Gateway Scan Report
The Crystal Eye appliance has an inbuilt Gateway Antivirus that examines and evaluates files as they transit in real time. Crystal Eye makes use of a combination of signature and heuristic analysis to classify files to detect and automatically block malicious files in order to prevent infection from occurring. The Gateway Scan Summary Report displays the scan summary specifying details regarding the files that were blocked. These details include Timestamp, IP Address (where the malicious files were detected), Site (domain name from where the malicious files originated), Blocked URL (URL of the blocked file), Reason (why the file was blocked), Content Type and Description.
Note: The Gateway Scan Summary can also be viewed in the Scan Summary section of the Security Dashboard and the AV Alerts Summary section under the IDS/IPS Alerts application. You can also download a PDF Scan Summary Report from the Gateway Scan Report application.
Crystal Eye administrators can also filter the scan report for a particular time bucket. All the flagged bad content in the Gateway Scan Summary are searchable through the search bar. The files that are blocked can also be allowed to get past Crystal Eye’s AV and can also be escalated to Red Piranha’s Security Operations Team (RP Secops) for further analysis. The escalation process can only be done if the Incident Response Services application is installed and configured.
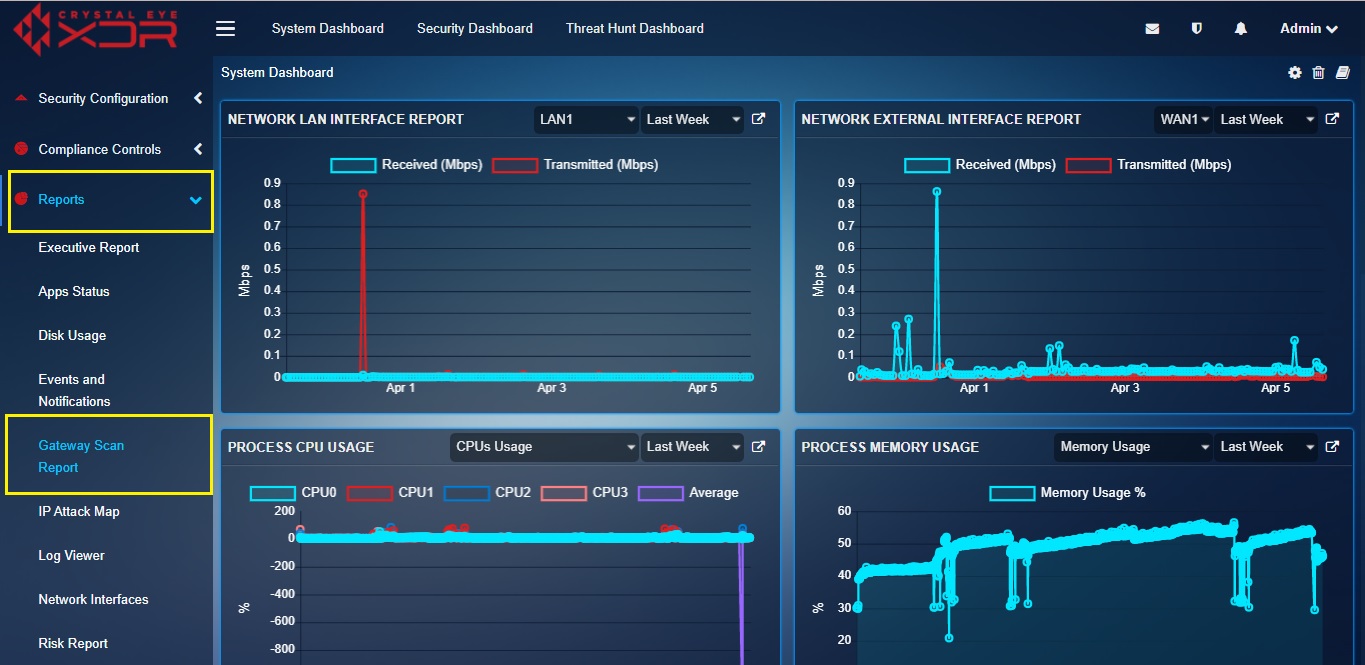
The Gateway Scan Report application is installed by default and can be accessed from the left-hand navigation panel.
Left-hand Navigation Panel > Reports > Gateway Scan Report Application
The entire Gateway Scan Summary can be filtered using the time range dropdown. This feature can be used to analyse all the flagged bad content according to a particular time bucket.
How to Filter Scan Report as per Time Range?
Step 1: In the Gateway Scan Report page, select the Time Range from the dropdown.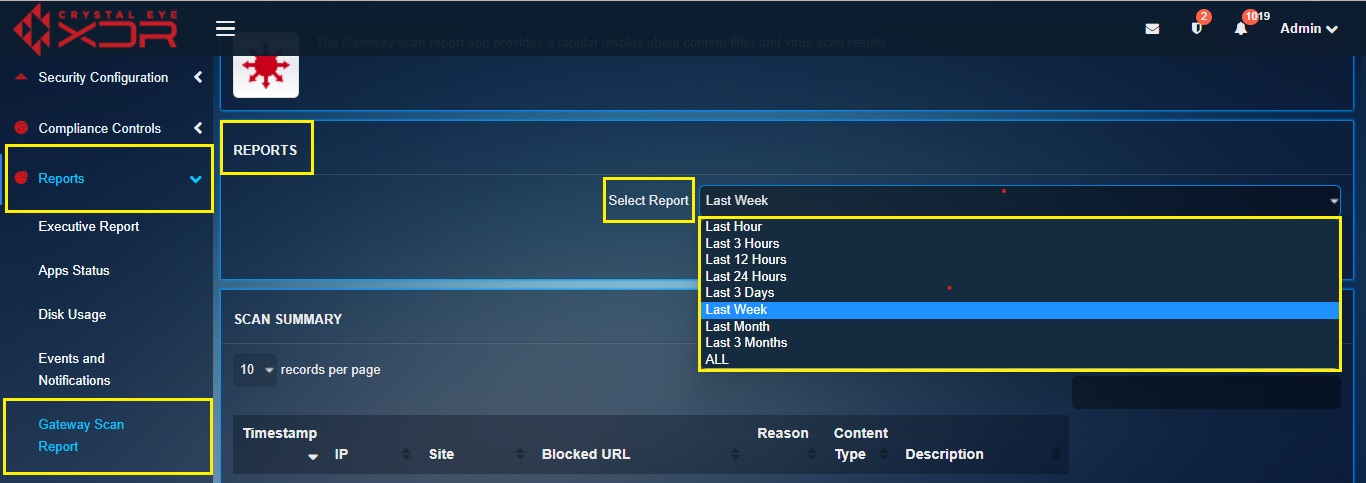
Step 2: You will now see the Scan summary for the selected time range.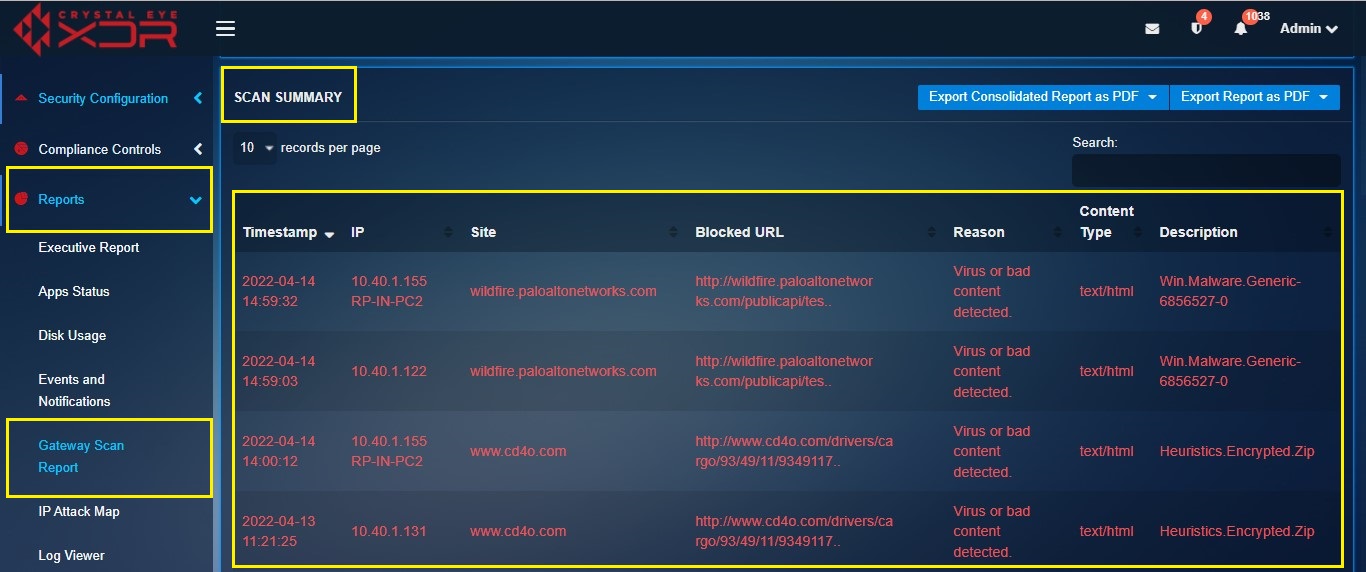
Note: Here we have selected the time range as ‘last week’ so that the scan summary shows all the files that were blocked in the past 1 week.
The Crystal Eye administrator can allow a flagged bad content blocked by CE’s antivirus. After the blocked files are allowed to get past Crystal Eye’s AV, the site domain name from where the files originated gets included to the Exception Sites section of Content Filter application. However, the inclusion of the website would remain limited to the exception sites section of the content filter policy assigned to the IP address where the bad content was detected at the first place.
How to Allow a Flagged Bad Content from the Gateway Scan Report application?
Step 1: In the Gateway Scan Report page, click the flagged bad content in the Gateway Scan Summary section.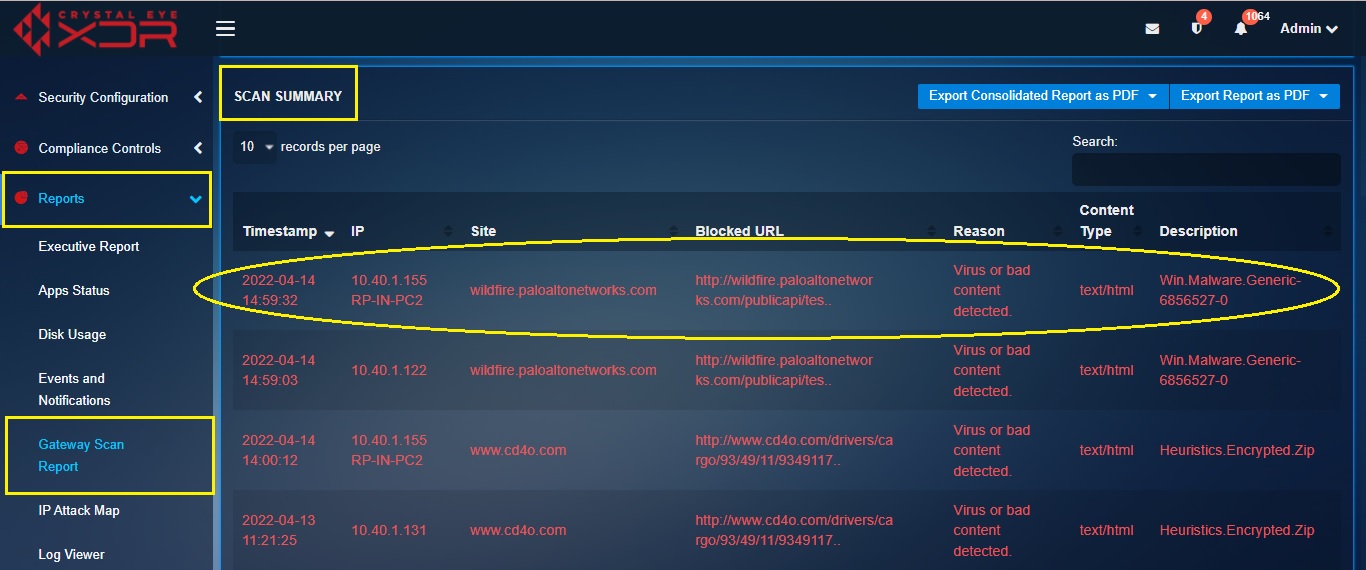
Step 2: You will now see the Scan Information page. Click the Allow button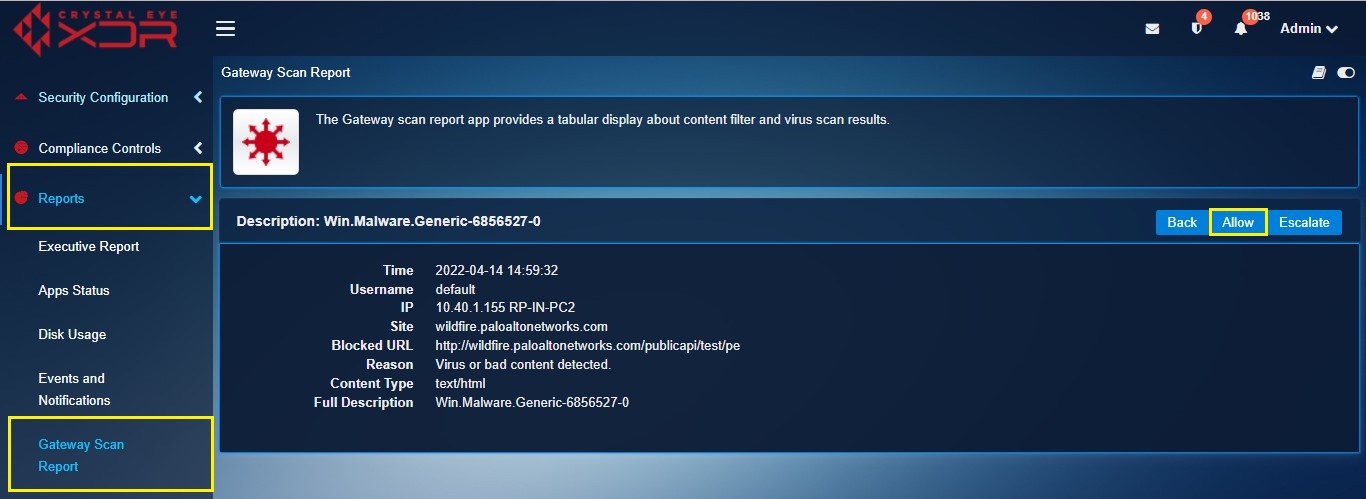
Step 3: You will now see the message, “Successfully Allowed Site’’. As mentioned in the screenshot below.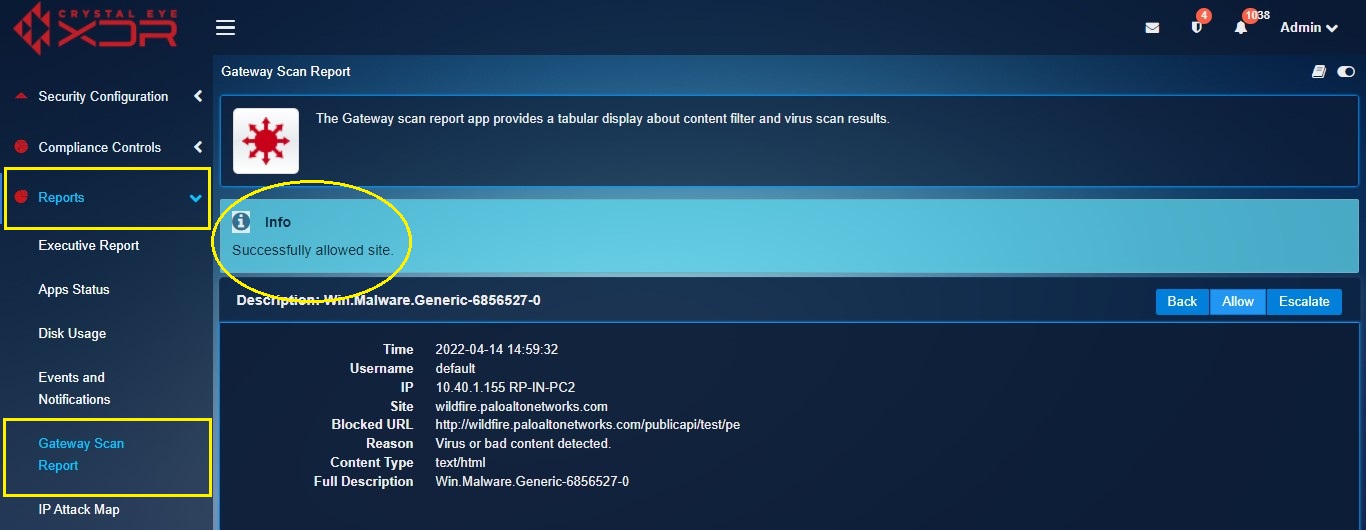
Note: Once the flagged bad content is allowed the website from where the file was downloaded gets included in the Exception Sites section of the Content Filter application. However, the inclusion of the website would remain limited to the exception sites section of the content filter policy assigned to the IP address where the bad content was detected at the first place.
Before escalating the ‘flagged bad content’ to RP’s Secops Team it must be ensured that the Incident Response Services application is installed from the marketplace and configured as well. Apart from the Gateway Scan Report application a ‘flagged bad content’ can also be escalated from the Gateway Scan Summary section of the Security Dashboard and the AV Alerts Summary section under the IDS/IPS Alerts application.
How to Escalate the ‘Flagged Bad Content’ Displayed in the Gateway Scan Summary to RP’s Secops Team?
Step 1: In the Gateway Scan Report page, click the flagged bad content displayed in the Gateway Scan Summary.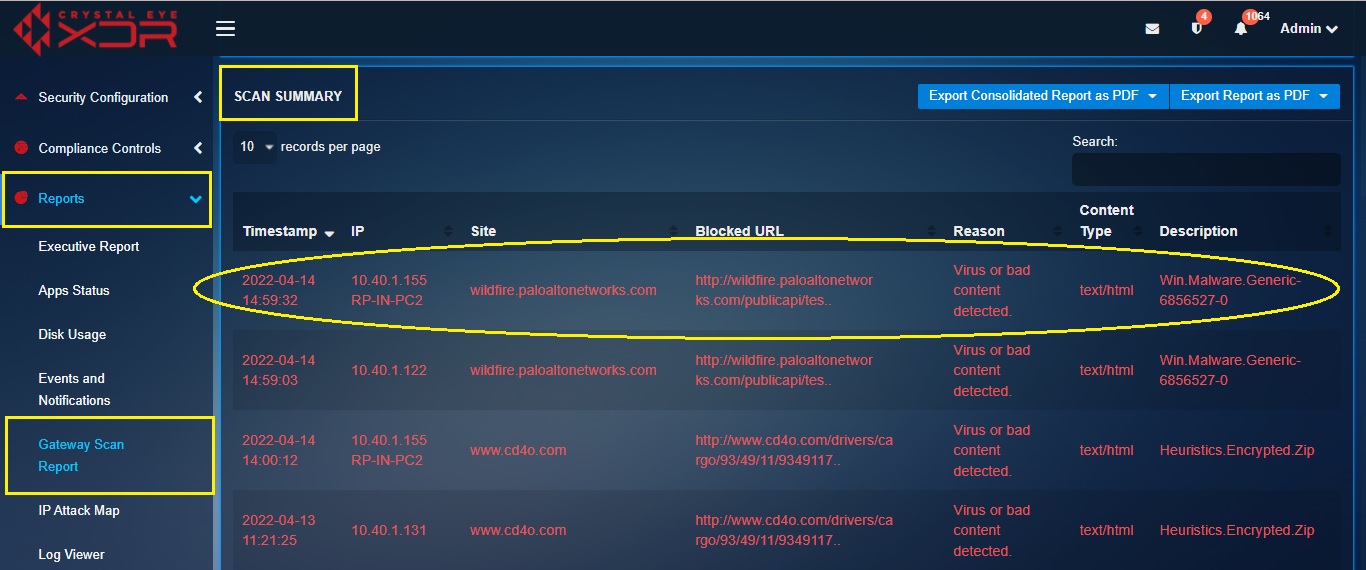
Step 2: You will now see the Scan Information pop-up. Click the Escalate button.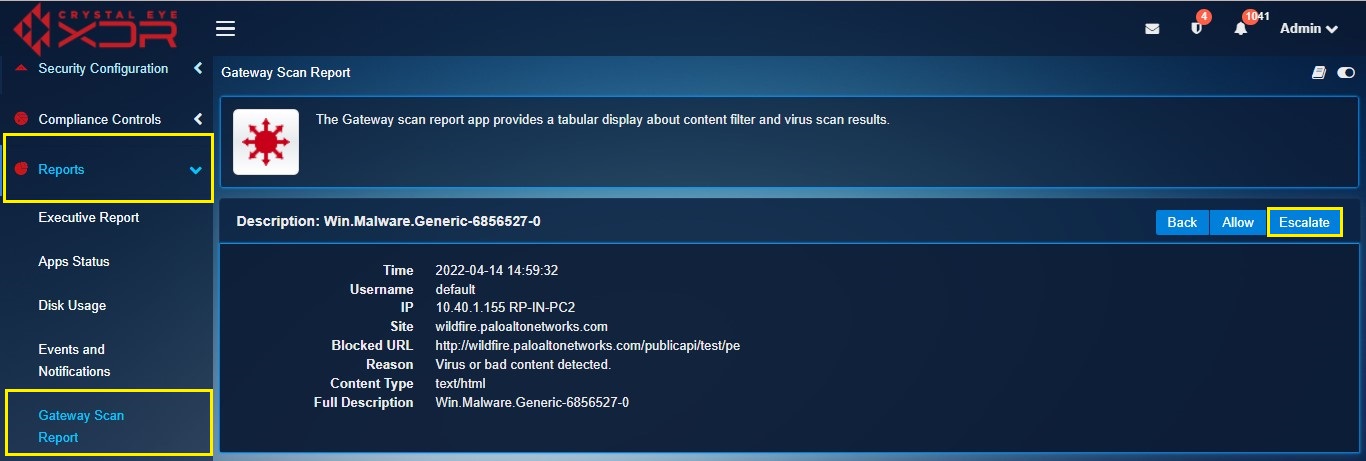
Step 3:Upon clicking the escalation button, a box appears. You can add your comments there and click on submit.
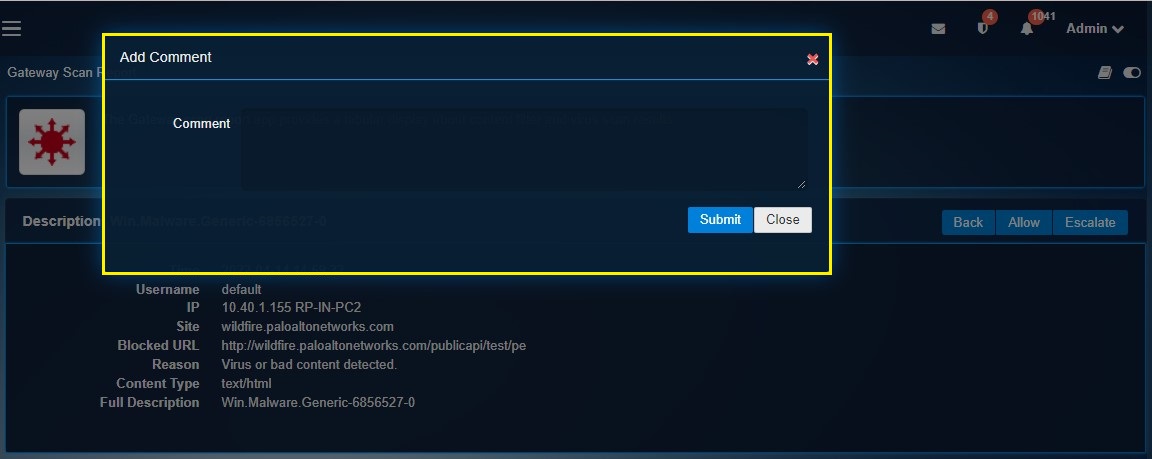
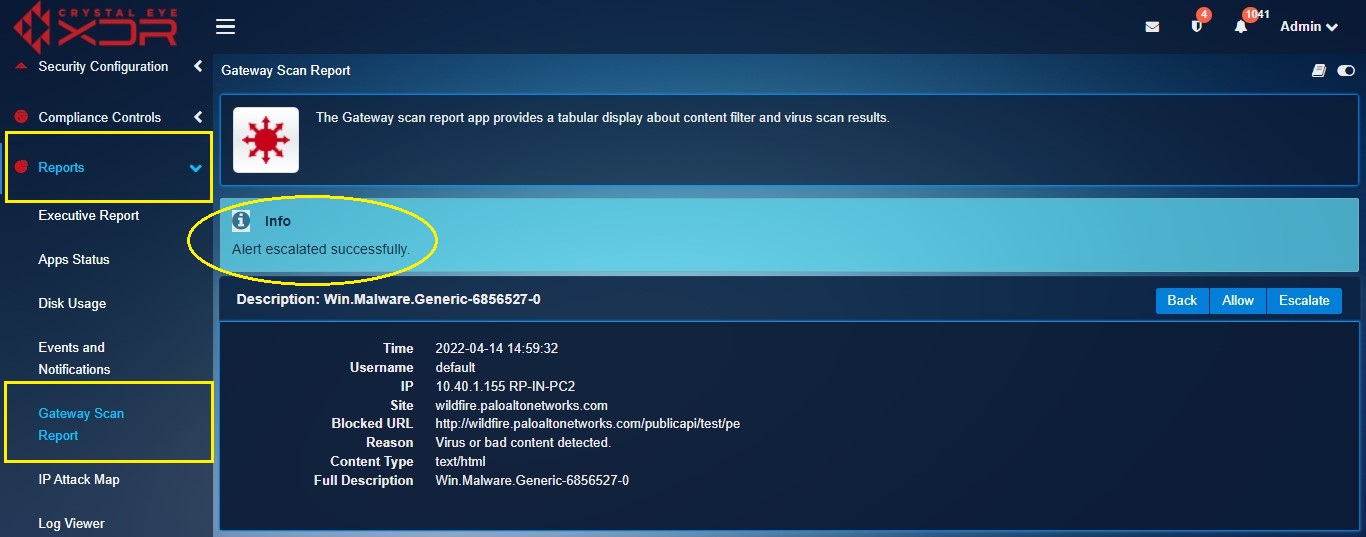
Note: You will now see the message, “Alert Escalated Successfully”. Refer to the screenshot below.
