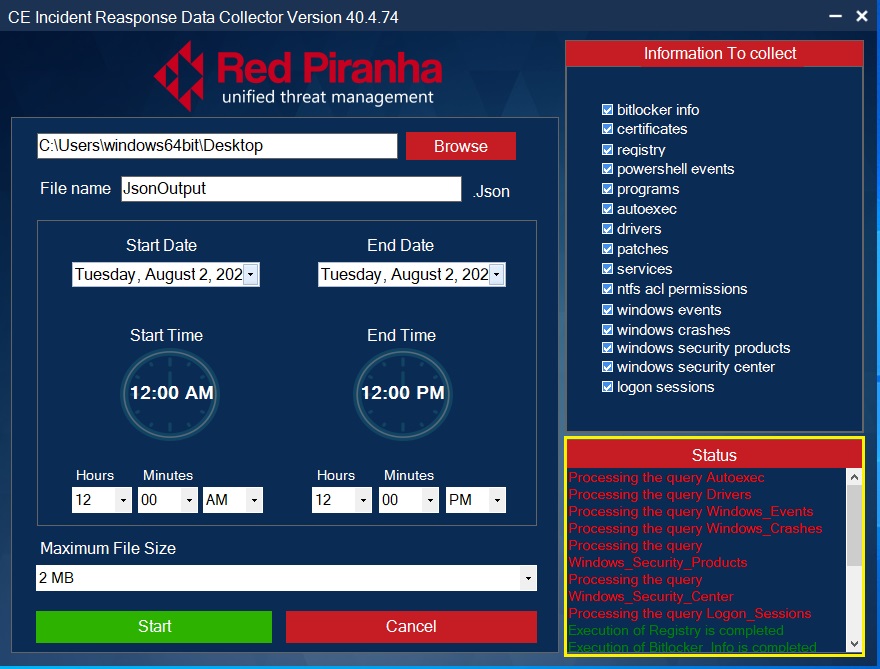
DFIR Application
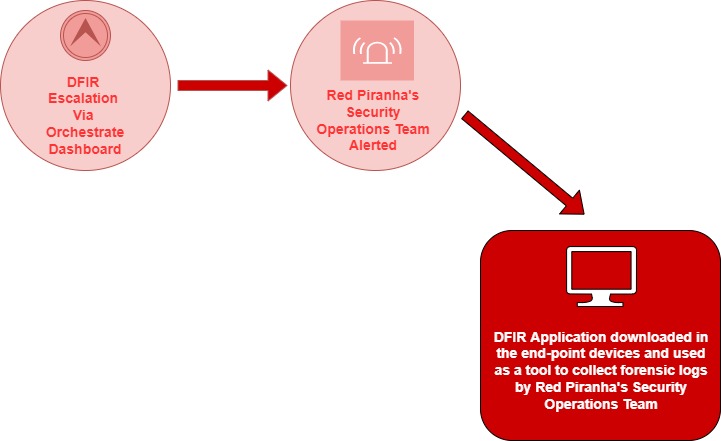
The DFIR application is made available by Red Piranha’s Security Operations Team in the event of a DFIR escalation. The orchestrate dashboard can be used to initiate a DFIR escalation at a click of a button.
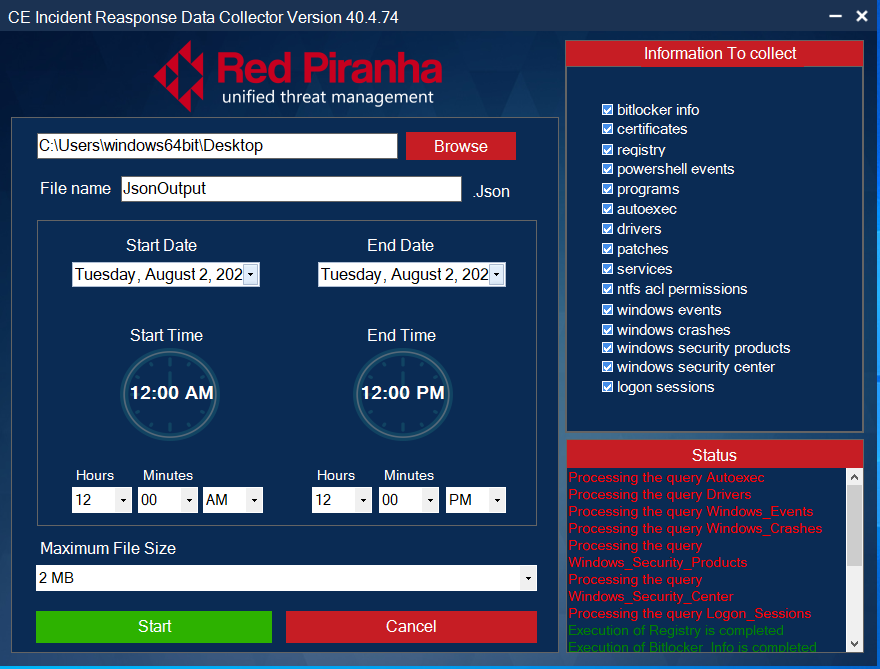
The DFIR application is used to take a device snapshot which can be used as forensic evidence. The following details are captured as a .jason file to use for further analysis:
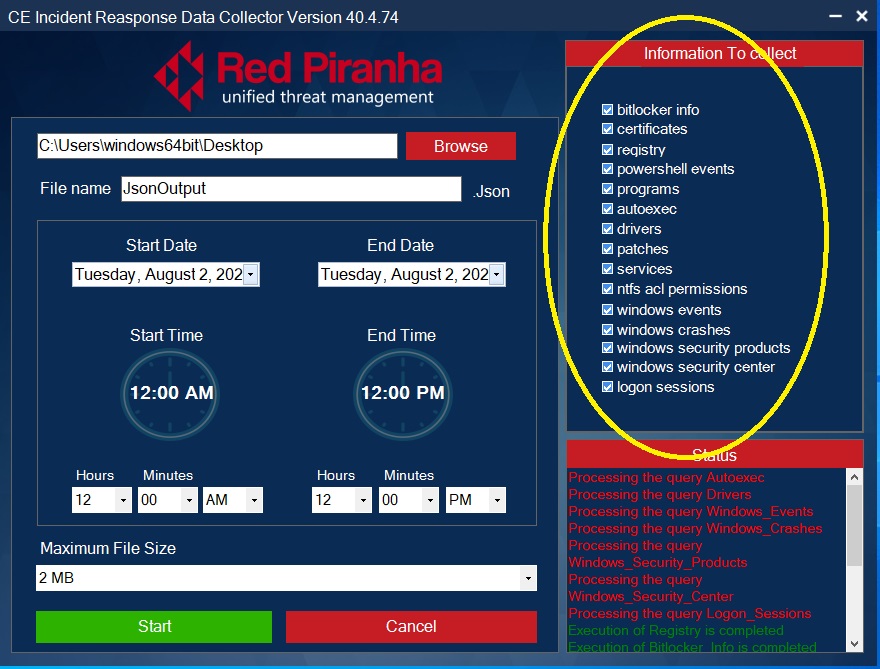
- Bitlocker info
- Certificates
- Registry
- PowerShell events
- Programs
- Autoexec
- Drivers
- Patches
- Services
- Ntfs and permissions
- Windows events
- Windows crashes
- Windows security product
- Windows security center
- Logon sessions
The DFIR app is made available by Red Piranha’s Security Operation’s Team in an event of a DFIR escalation.
The instructions mentioned below will help you to install the DFIR application in the affected end-point devices.
Step 1: Right-click Red Piranha DFIR Setup and click install.

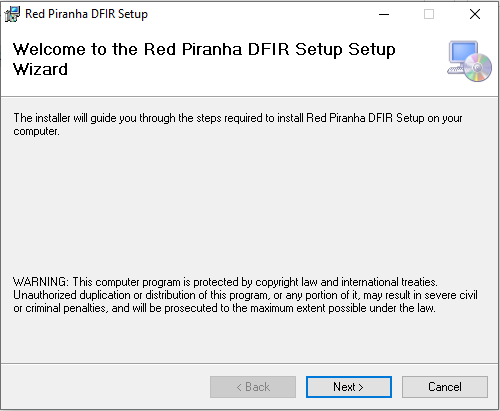
Step 2: You will see the Red Piranha DFIR Setup Wizard. Click the Next button.
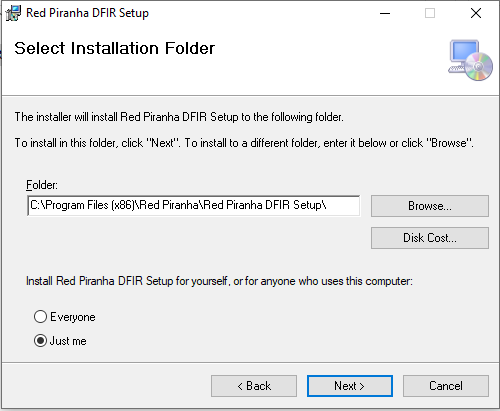
Step 3: Select the installation folder and click the Next button.
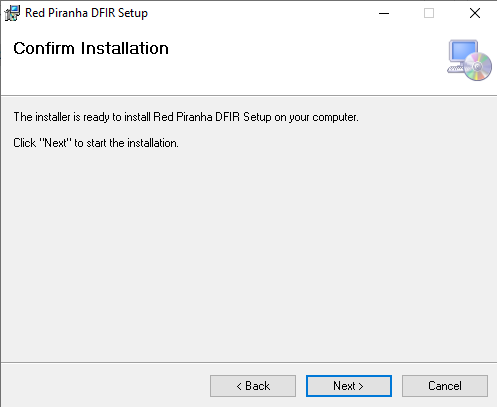
Step 4: Confirm installation by clicking Next button.
Note: You will now see the DFIR app interface.
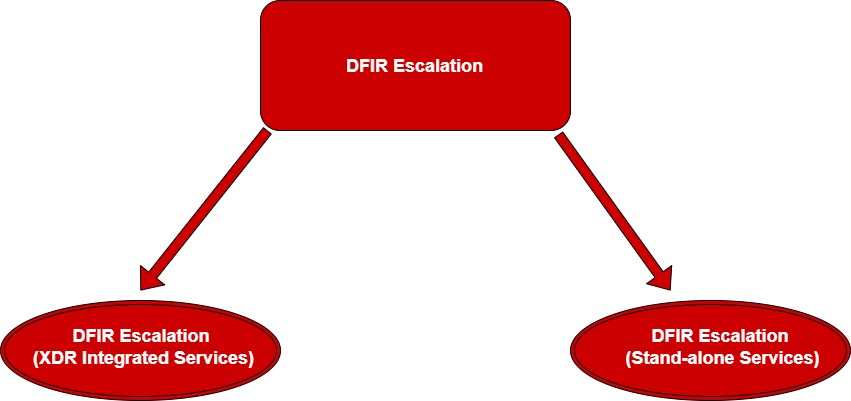
DFIR escalation is done through the Orchestrate Dashboard as soon as a security breach is detected. This escalation can be done as a part of XDR Integrated Services or Stand-alone Services available in the Order Services section of the Orchestrate Dashboard.
Note: DFIR escalation can be done using a managed service provider’s (MSPs) account or an End-client account.
XDR integrated services DFIR escalation is done when a CE XDR deployed in the affected network.
The XDR integrated services DFIR escalation involves linking the XDR digital forensics services to an existing Crystal Eye XDR deployment. The linkage can be done to a CE XDR appliance owned by the MSP or to an appliance owned by the client of the MSP. After the CE XDR linkage is done and the DFIR escalation is completed, the Secops Team of Red Piranha initiates the DFIR process.
Note: XDR integrated services DFIR escalation can also be done using the orchestrate dashboard account of a standalone client.
How to initiate XDR integrated Services DFIR escalation?
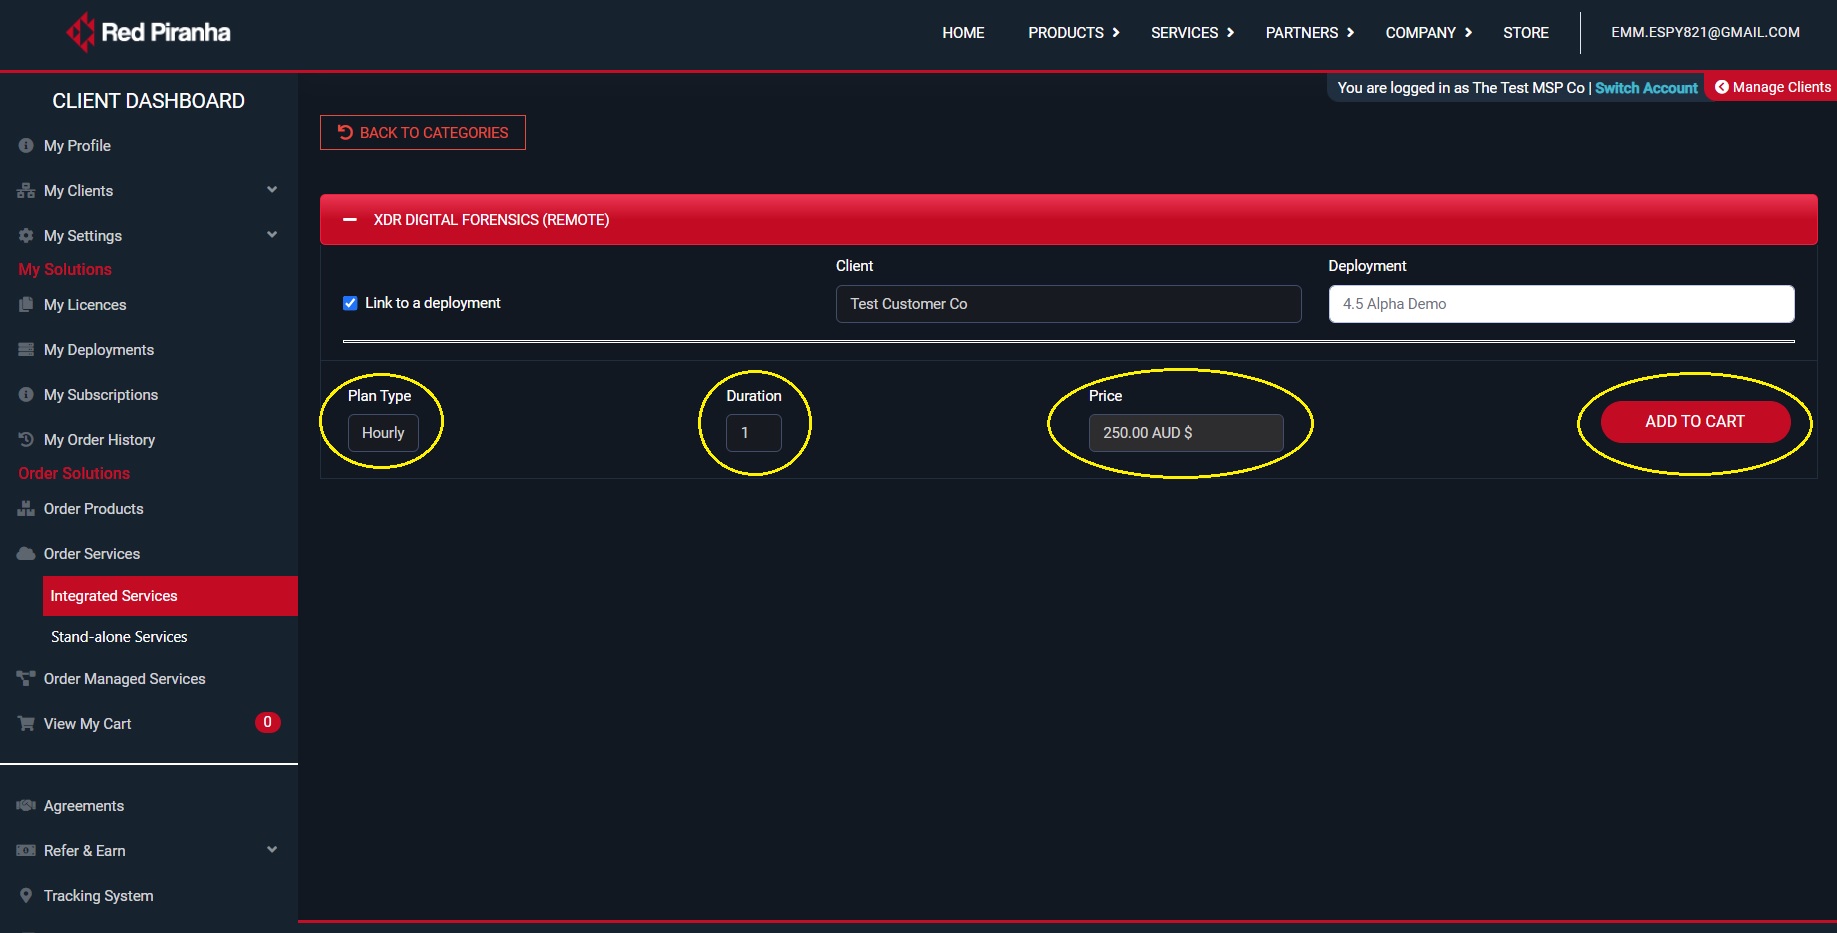
Step 1: Go to Order Services > Integrated Services in the orchestrate account.
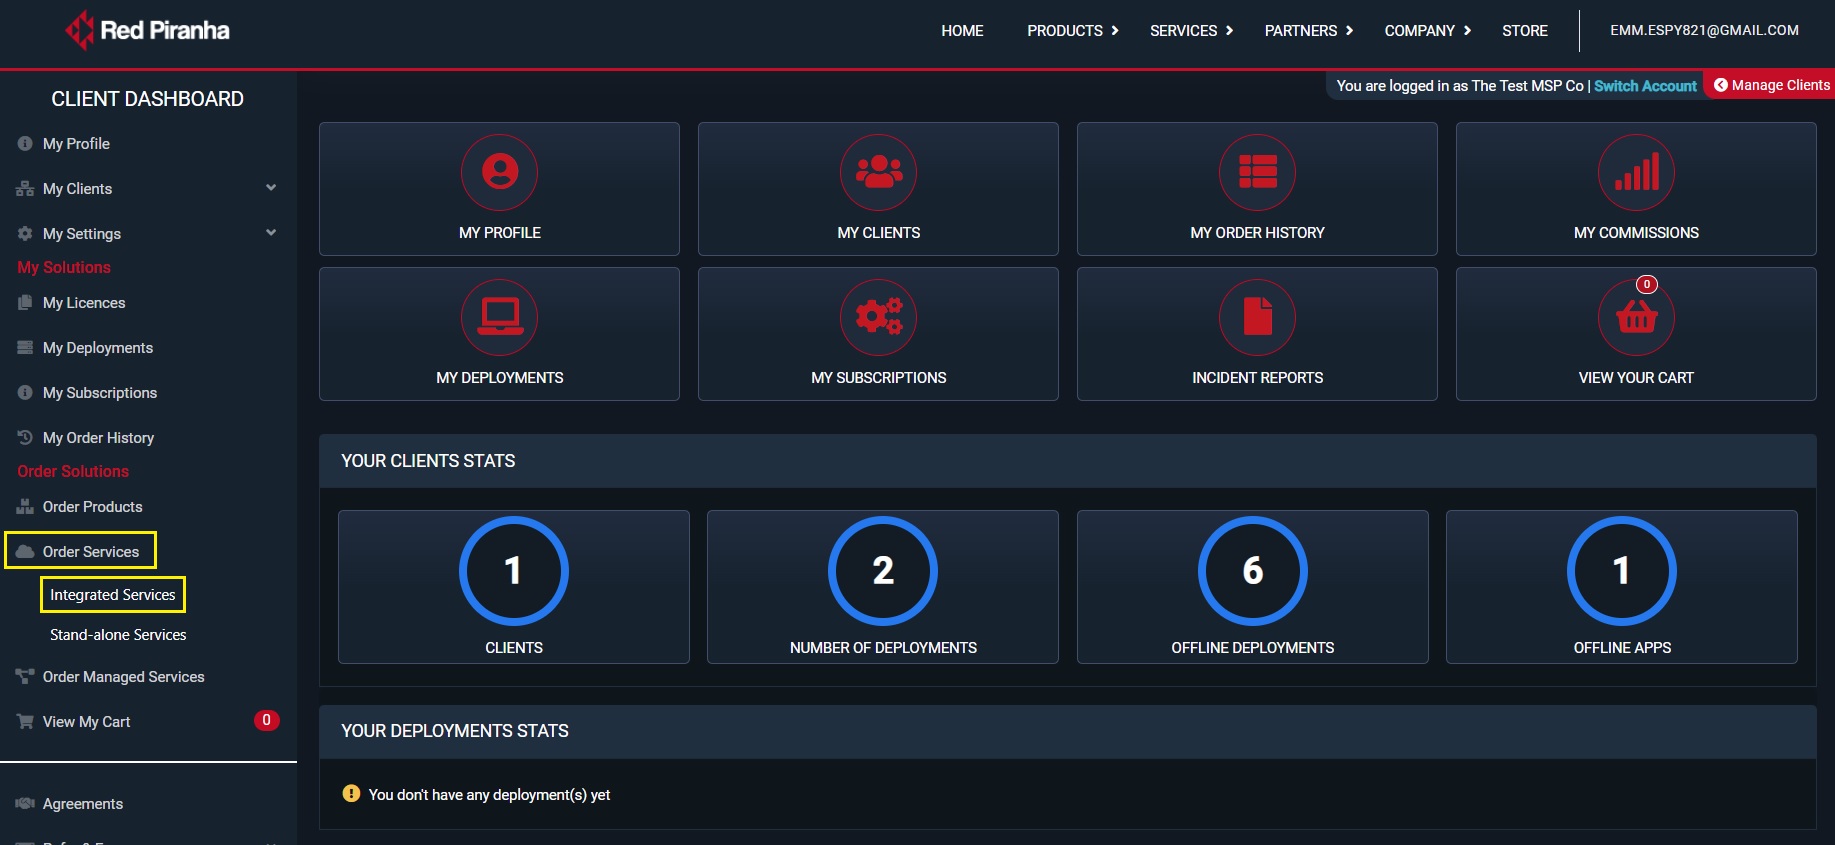
Step 2: You will see the XDR integrated services page. Click Digital Forensics tab.
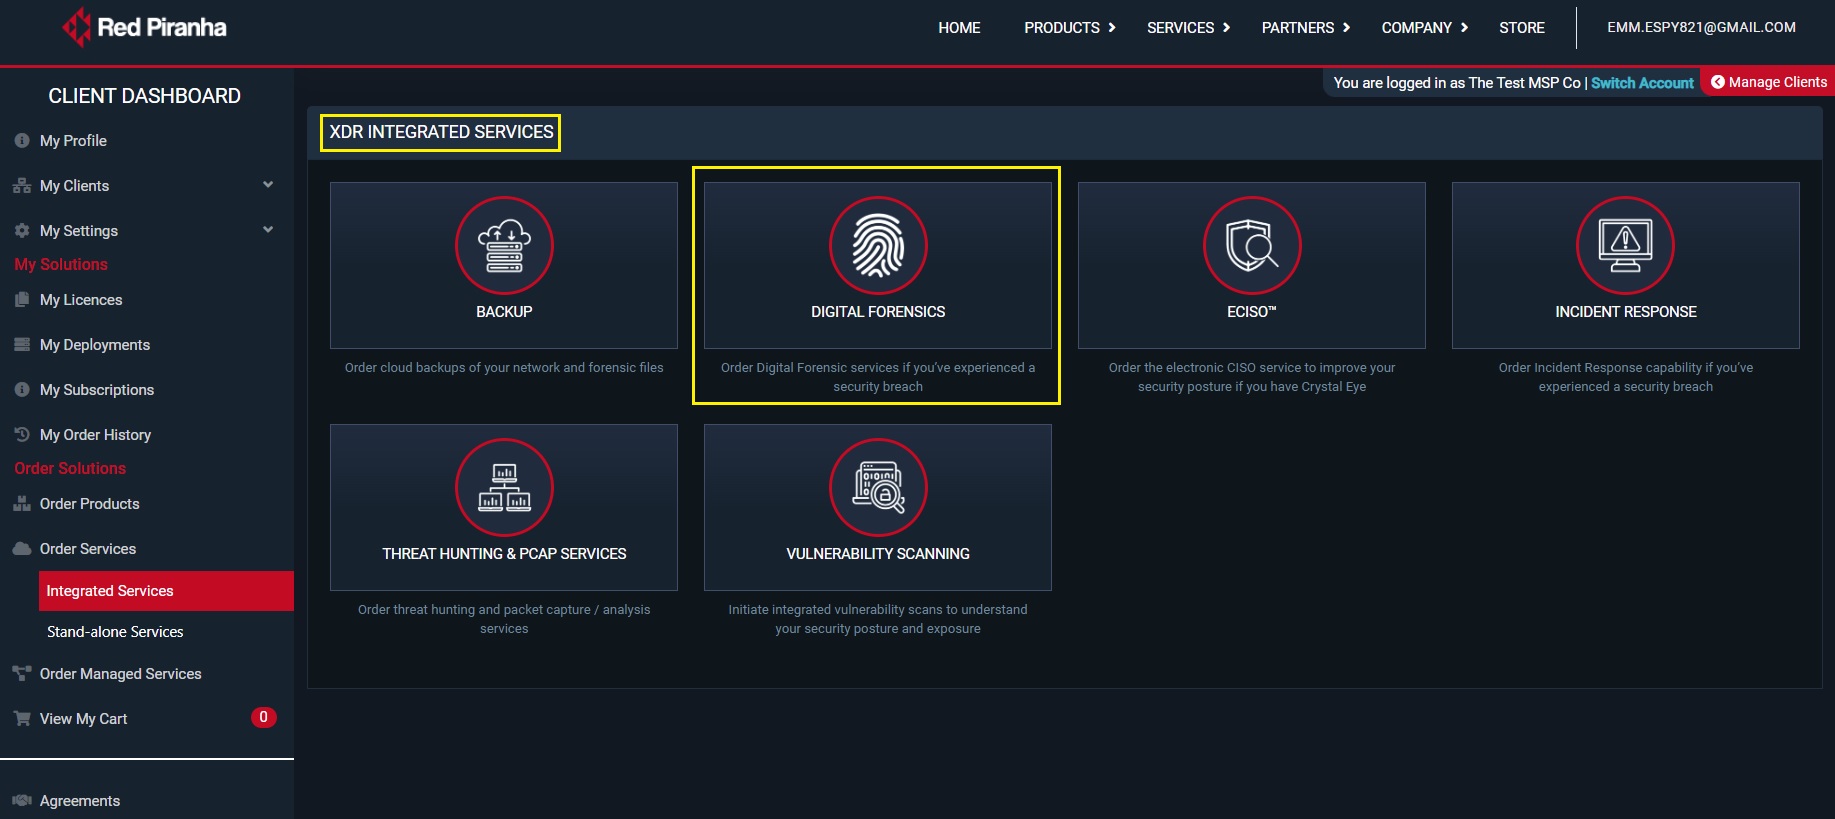
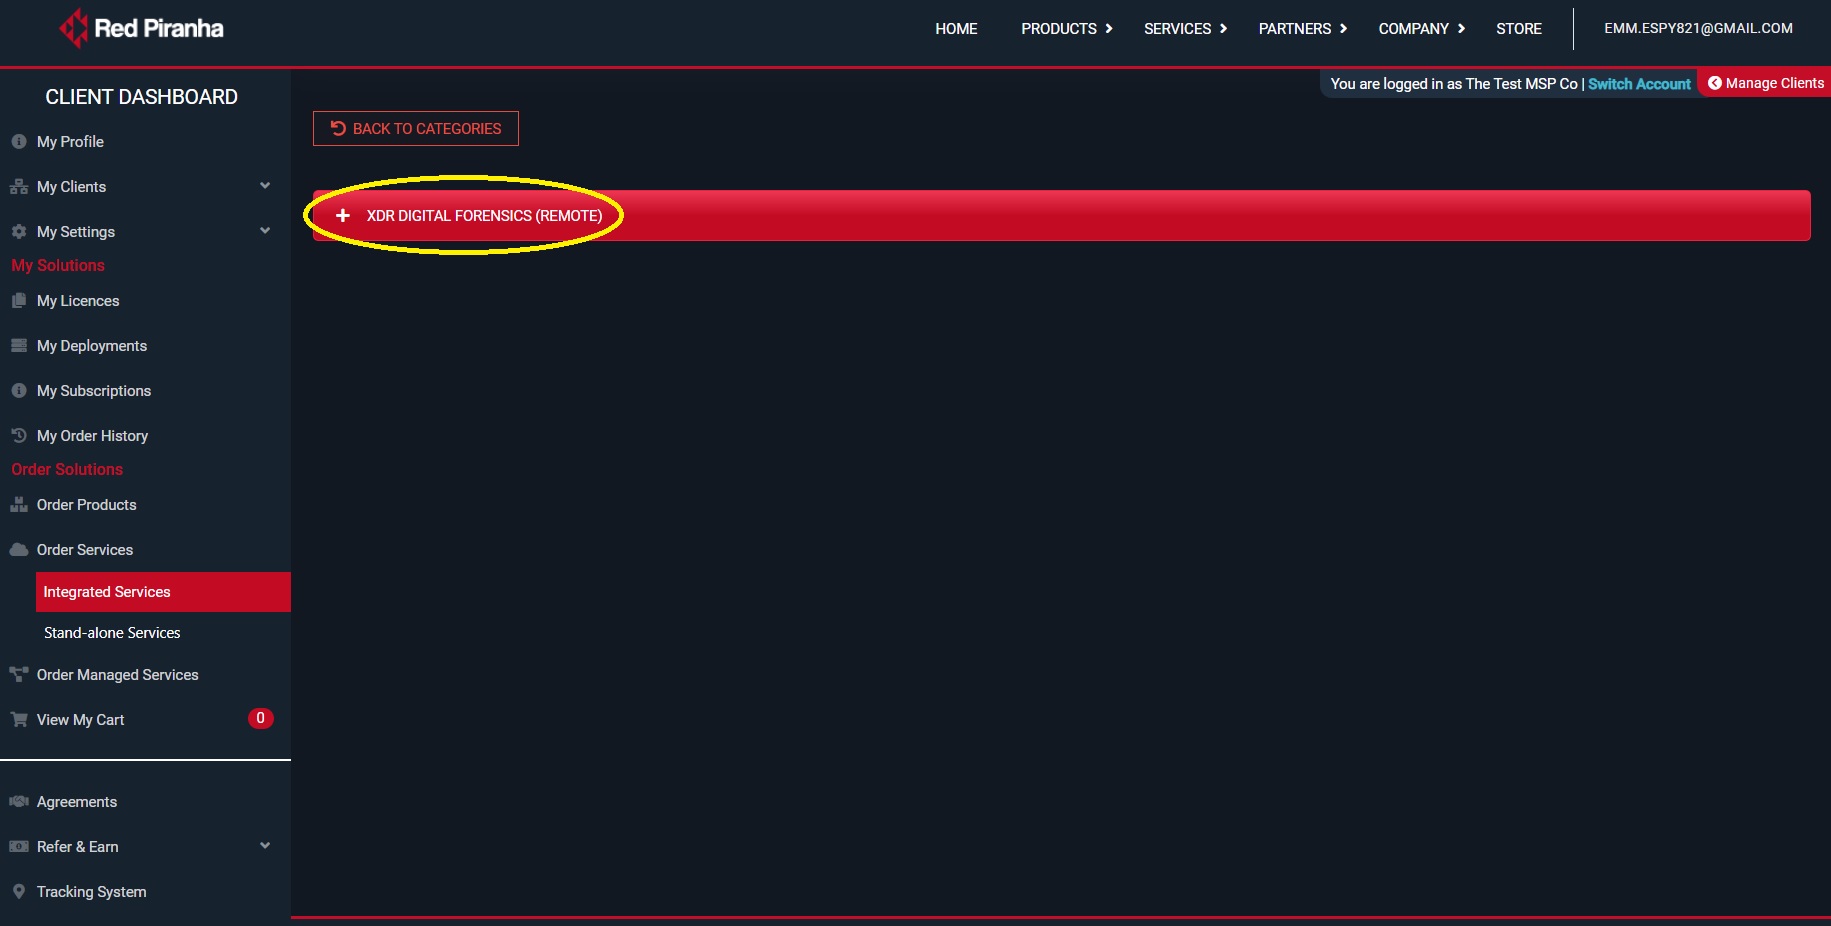
Step 3: Collapse the XDR Digital Forensics tab.
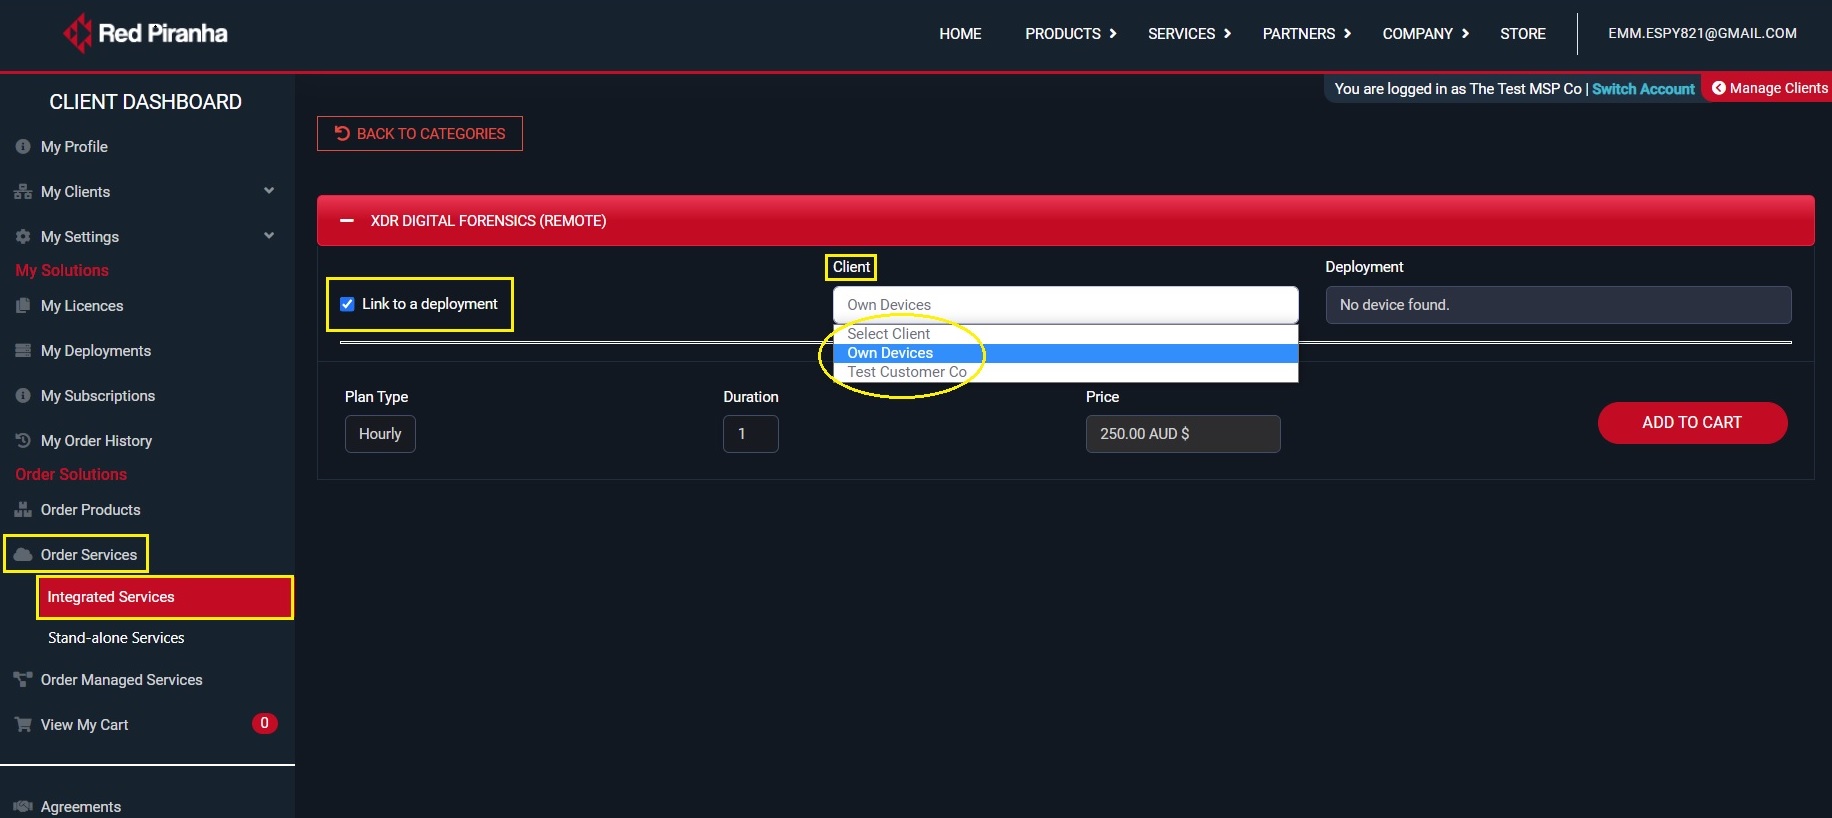
Step 4: Select the Link to a Deployment check box and specify in the Client dropdown whether its Own Device or a Clients Device.
Step 5: Once the client is selected, the deployment of the client will get auto-populated in the deployment dropdown. Select the relevant deployment from the dropdown.
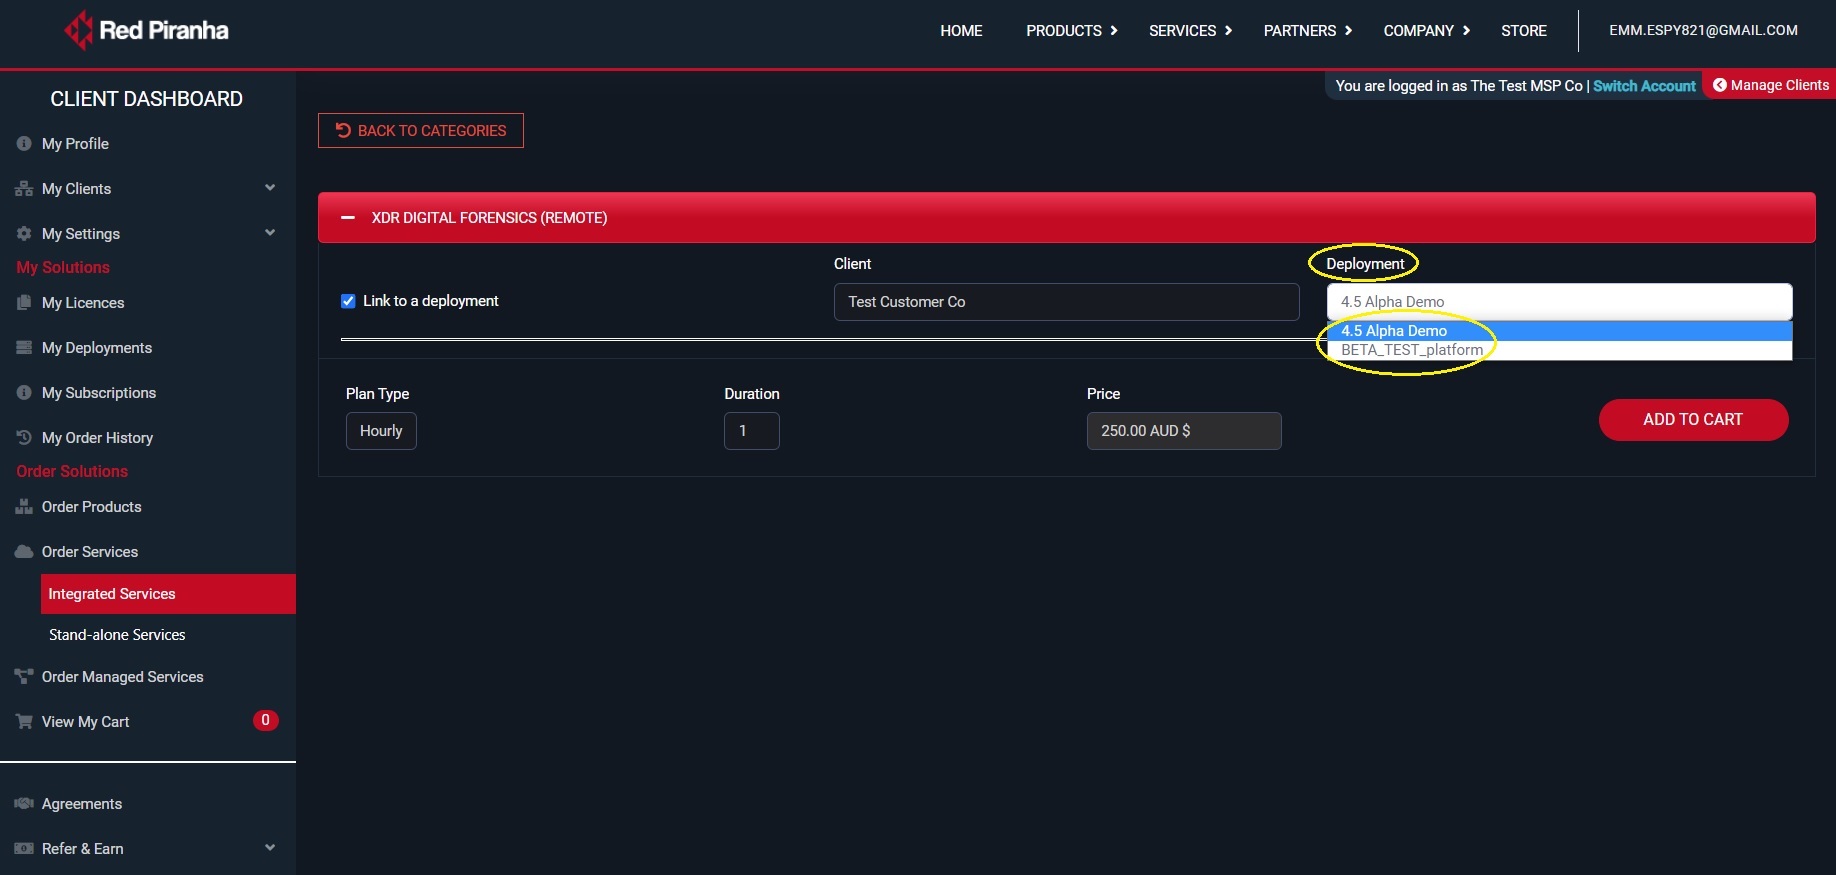
Step 6: Select the Plan Type (hourly only available), enter the Duration (hrs) and then click the Add to Cart button to process payment.
Stand-alone DFIR Escalation is done when a CE XDR is not deployed in the affected network.
The stand-alone DFIR escalation when triggered alerts the secops team which approaches the client for an onsite or a remote service.
How to initiate Stand-alone Services DFIR escalation?
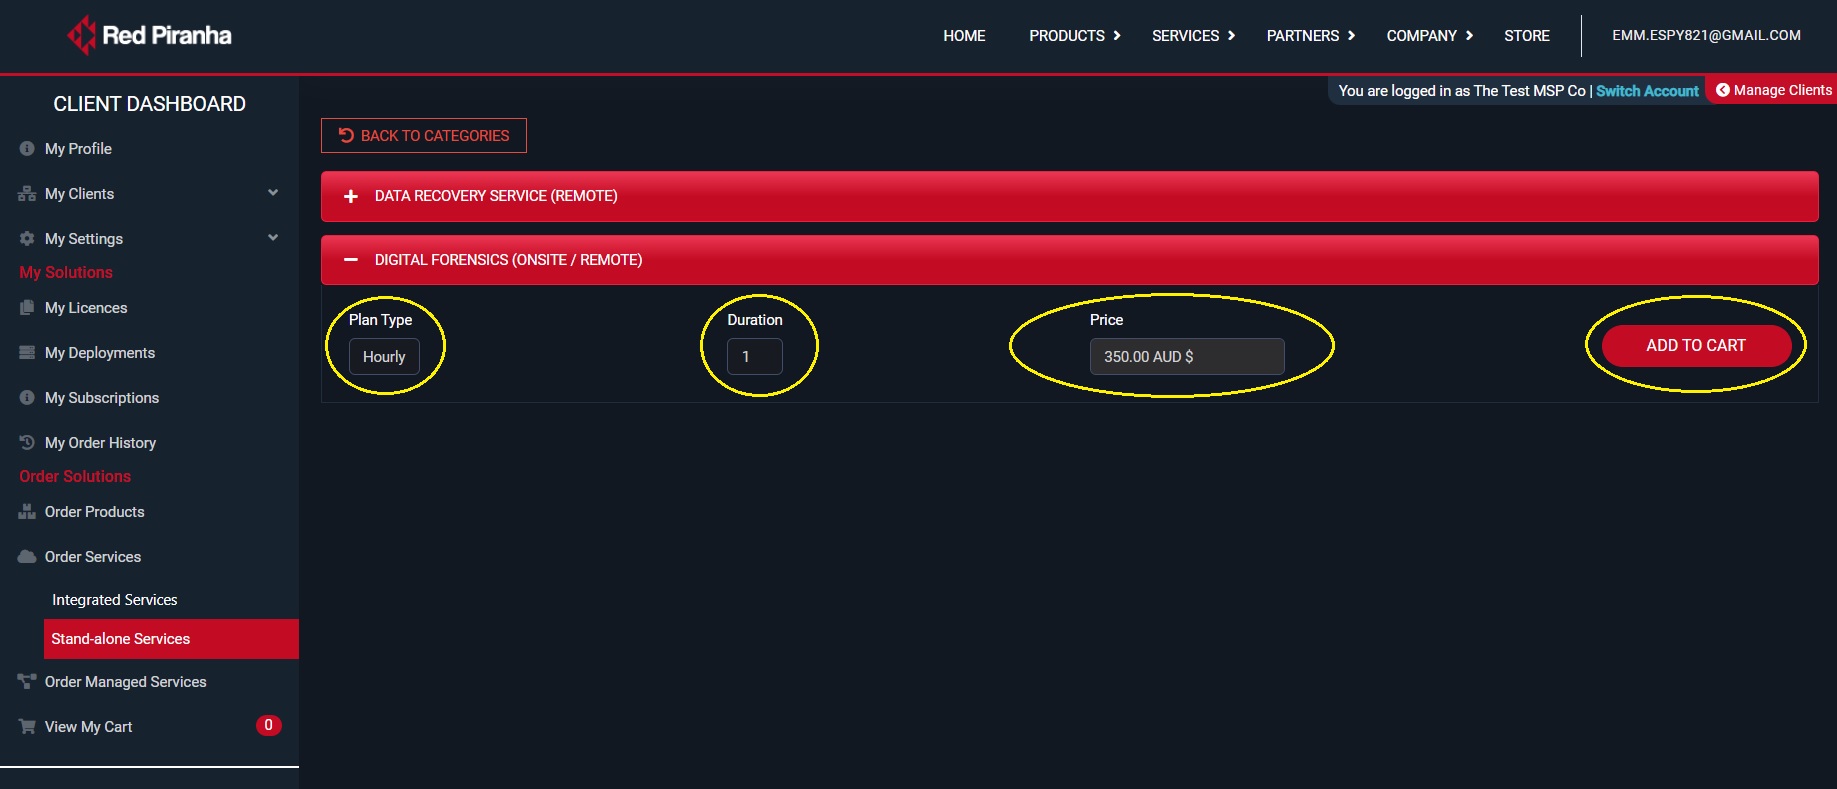
Step 1: Go to Order Services > Stand-alone Services in the orchestrate account and click the digital forensic (onsite/remote) tab.
Step 2: You will now see DFIR requirement selection details. Select the Plan Type, Duration and click Add to Chart button.
Step 1: Install DFIR App in the end-point device (Know how to install the DFIR app).
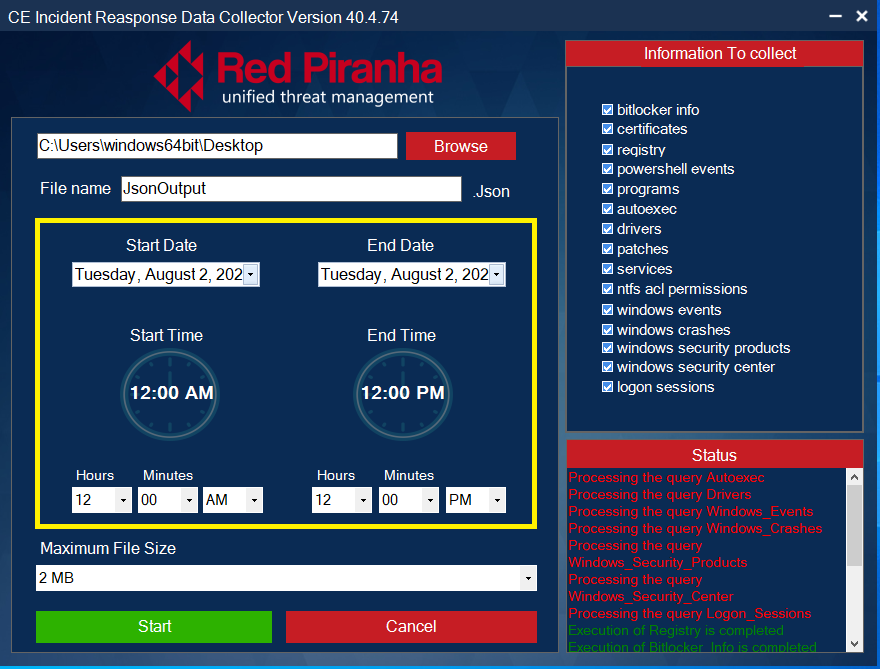
Step 2: Set Start and End Date for the Forensic Logs.
Step 3: Set Maximum Download File Size.
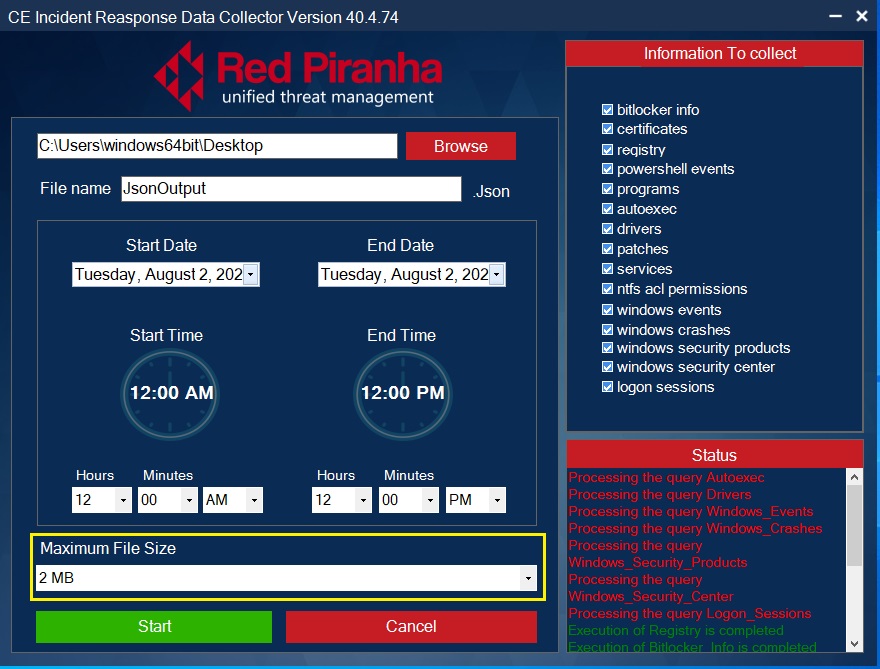
Note: As a default feature the Maximum File Size is 2 MB
Step 4: Select the Forensic Logs Type that needs to be extracted from the end-point device.
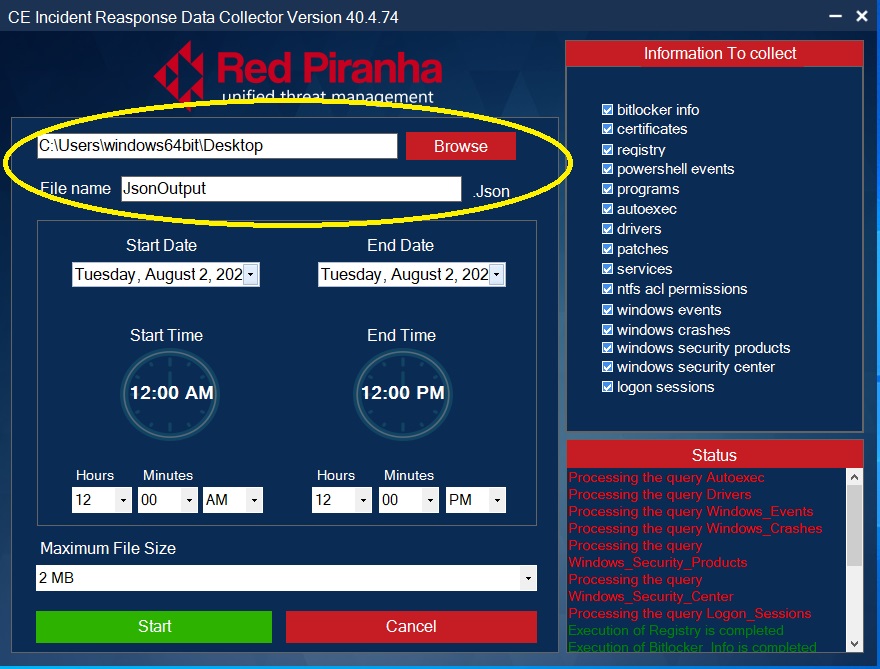
Step 5: Select the Output File Location and enter the desired file name.
Step 6: Initiate Forensic File Export.
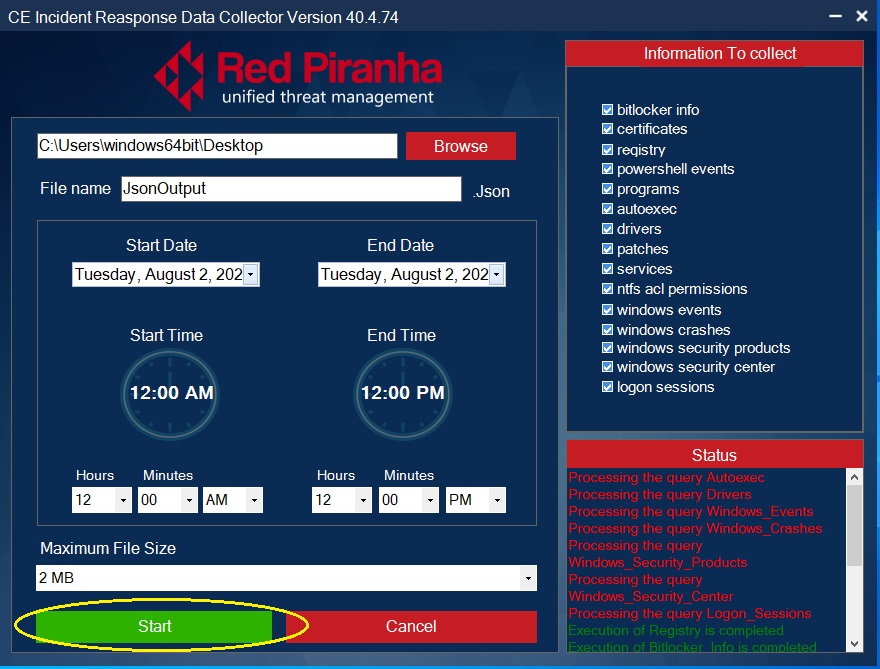
The DFIR app operation status shows the progress of the forensics logs extraction. The logs which are successfully extracted are depicted in green, whereas the logs that still being processed for extraction are shown in red.
