PCAP SNAP
The PCAP Snap app is used to capture network traffic and then transfer it to designated Red Piranha servers for automatic analysis and manual examination. The most convenient aspect of using this application is that it has a phenomenal packet capture scheduler that can be used to add multiple schedules as per requirements.
Important: Running PCAP analysis is done in conjunction with our Security Operations Team during either a breach investigation process or a compliance threat hunting process.
The PCAP SNAP application is not available by default. It can be installed from Marketplace in the left-hand navigation panel.
Left-hand Navigation Panel > Compliance Control > PCAP SNAP
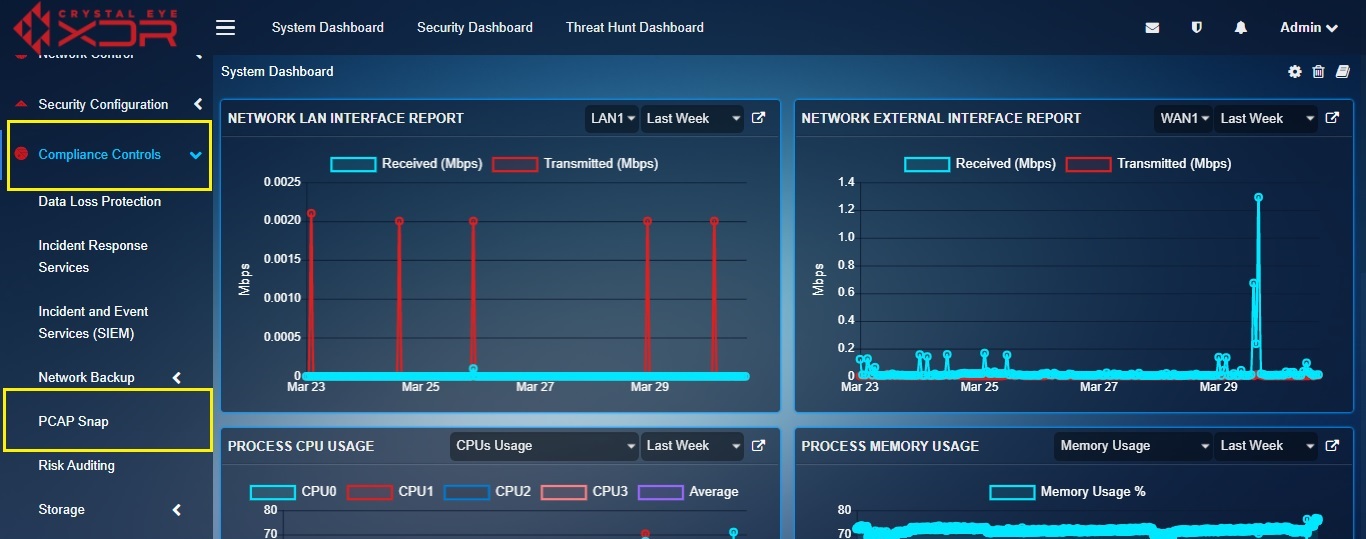
This feature of the PCAP snap application is programmed to set a pre-defined schedule for the packet capture. A particular time of the day can be selected to proceed with the packet capture process with the help of a user friendly interface. The objective of the packet capture process is to extract PCAP files from the Crystal Eye and send it to the Red Piranha servers for further analysis. These PCAP files are useful for troubleshooting a much focused event while app is programmed to smooth up complex troubleshooting process involving multiple devices in the Crystal Eye network.
While setting the packet capture schedule the administrator will be prompted to provide the following details:
-
Schedule Name: This field would define the name of the schedule.
-
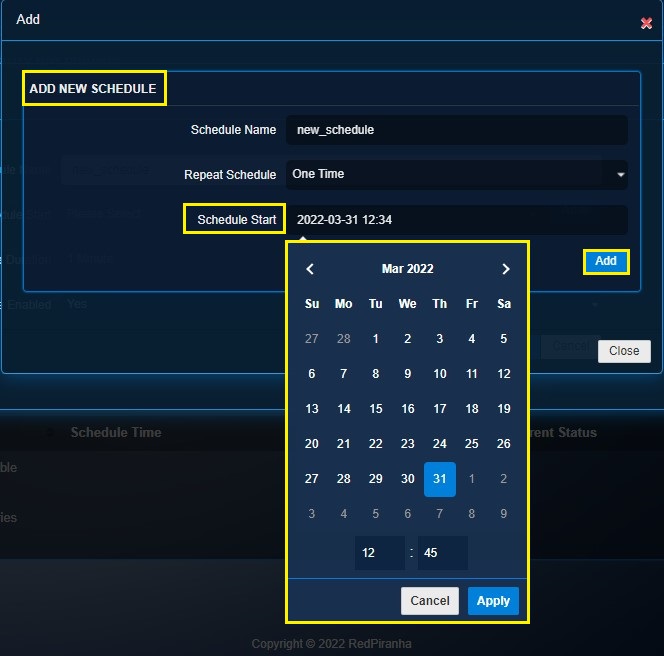
Schedule Start: This field defines the time at which the schedule is required to start. The start hour field accepts the time in hour’s format.
Note: If packet capture is to be scheduled at 12:05 hrs then the hour’s part of the time i.e. 12 must be entered in the Start Hour field and the minute’s part of the time i.e. 05 must be entered in the Start Minute field.
-
Schedule Duration: This field would define the time period for which the schedule shall run post the Schedule Start time.
-
Repeat Schedule: Here the administrator can choose the frequency of the scheduled packet capture. This could be a One Time, Daily, Weekly Scan or Monthly basis.
-
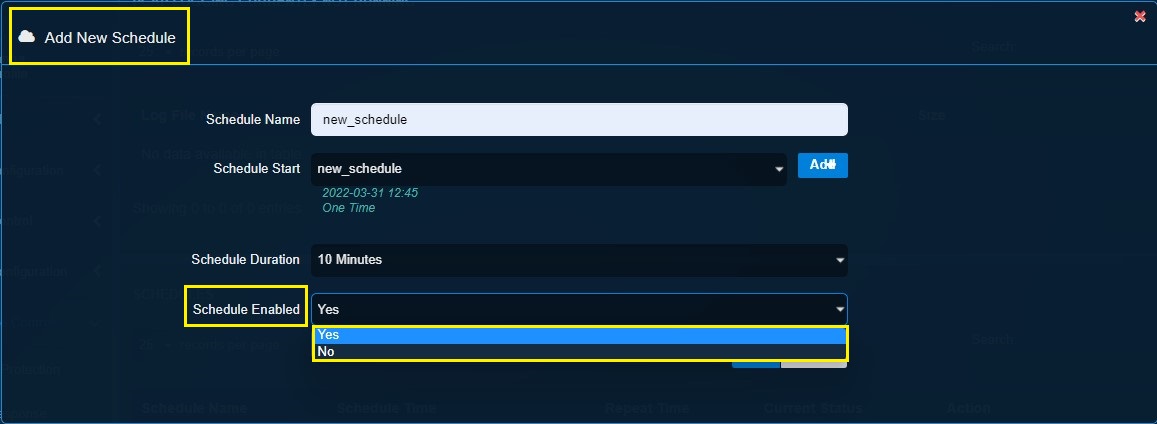
Schedule Enabled: A packet capture schedule can be created and then it could be set as Enabled/Disabled.
Step 1: In the PCAP Snap application page, click the Add button under the Schedules section
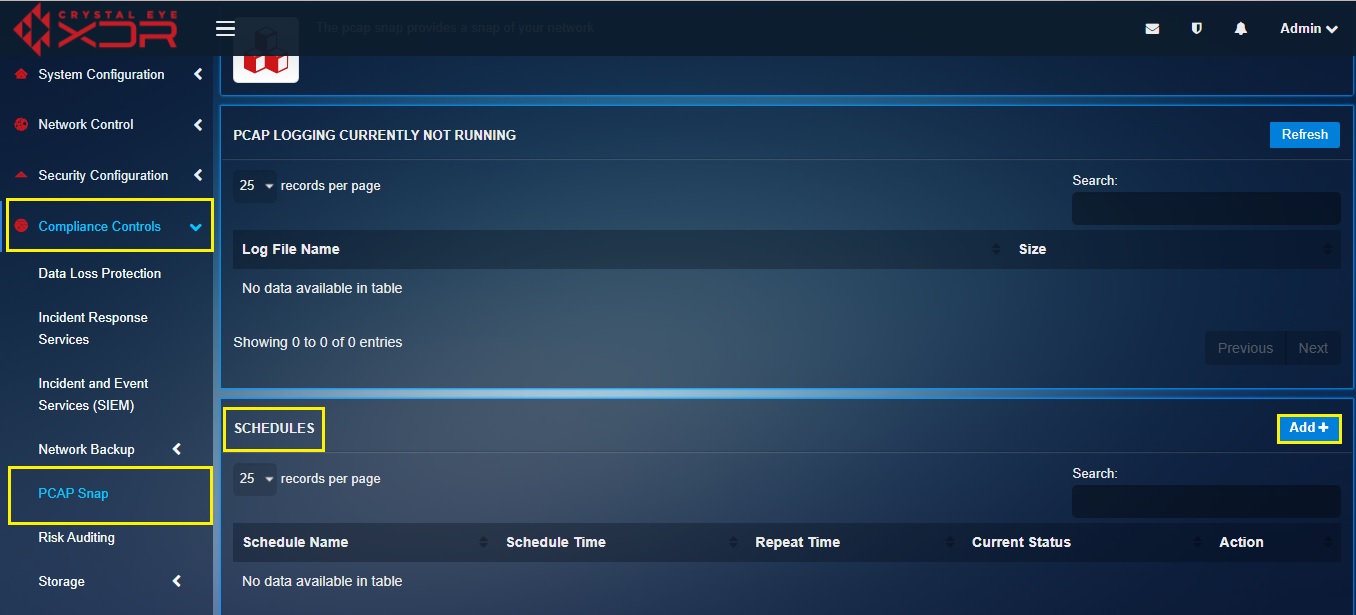
Step 2: You will now see Add New Schedule page. Enter the Schedule Name. The next field is Schedule Start. Click on Add button.

Step 3: You will see Add schedule page. Enter Schedule name.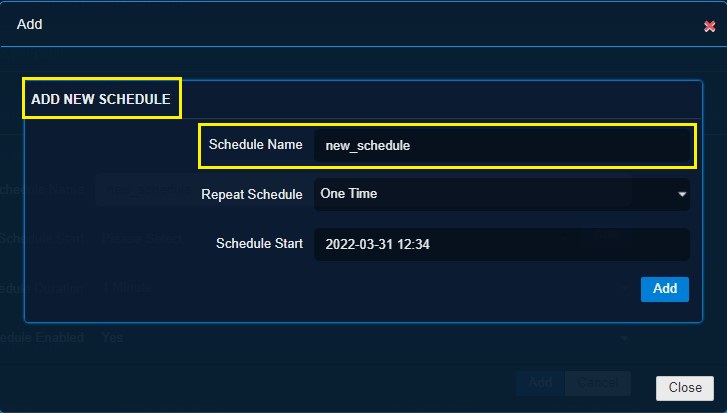
Step 4: Set the schedule frequency from the Repeat Schedule dropdown.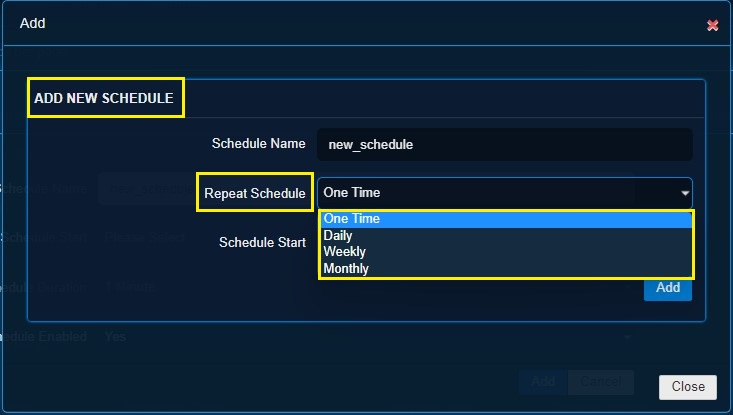
Note: The packet capture process can be scheduled as a One Time, Daily, Weekly or Monthly affair.
Step 5: Set Schedule Start from the dropdown and click on Apply. Lastly, click on Add button.
Step 6: Enter the Schedule Duration from dropdown. Now click the Add button.
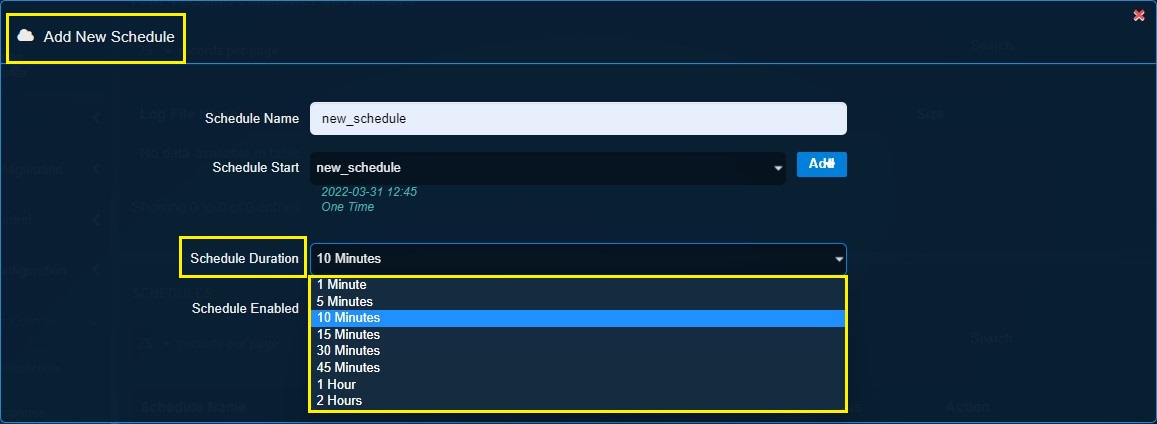
Note: The PCAP Snap app will automatically schedule the server upload process for a time slot equivalent to the fixed schedule duration post packet capture process.
Step 7: Enable or Disable the scheduled packet capture.
You will now see the scheduled details in the relevant table as highlighted in the screenshot:
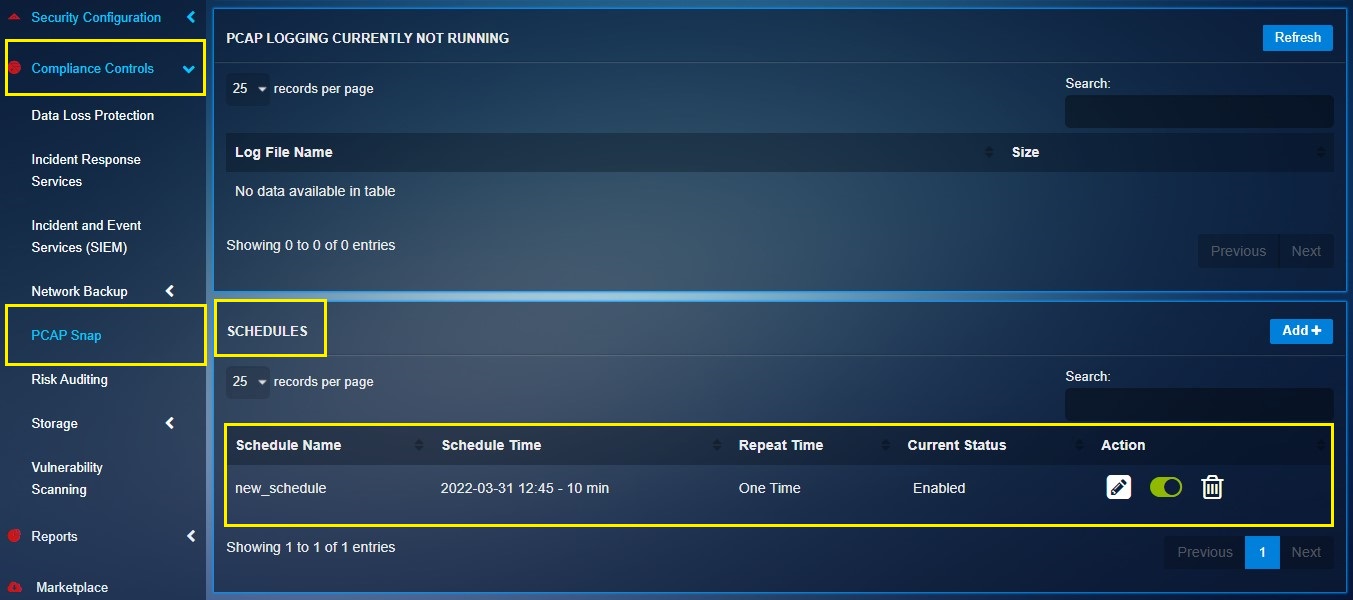
Note: Once the scheduled packet capture process starts the app status will change to running as highlighted in the screenshot below. After the packets capture process ends, the PCAP files will appear in the Log Table which will eventually be sent to the Red Piranha server.