Email Scanning Gateway
The Email Scanning Gateway app has capabilities to counter various email related cyber frauds attacks such as business email compromise, spear phishing, account takeover and impersonation. The scanning functionality of the application has been designed to eliminate any attached malicious files and then let the email pass through to reach the desired destination address.
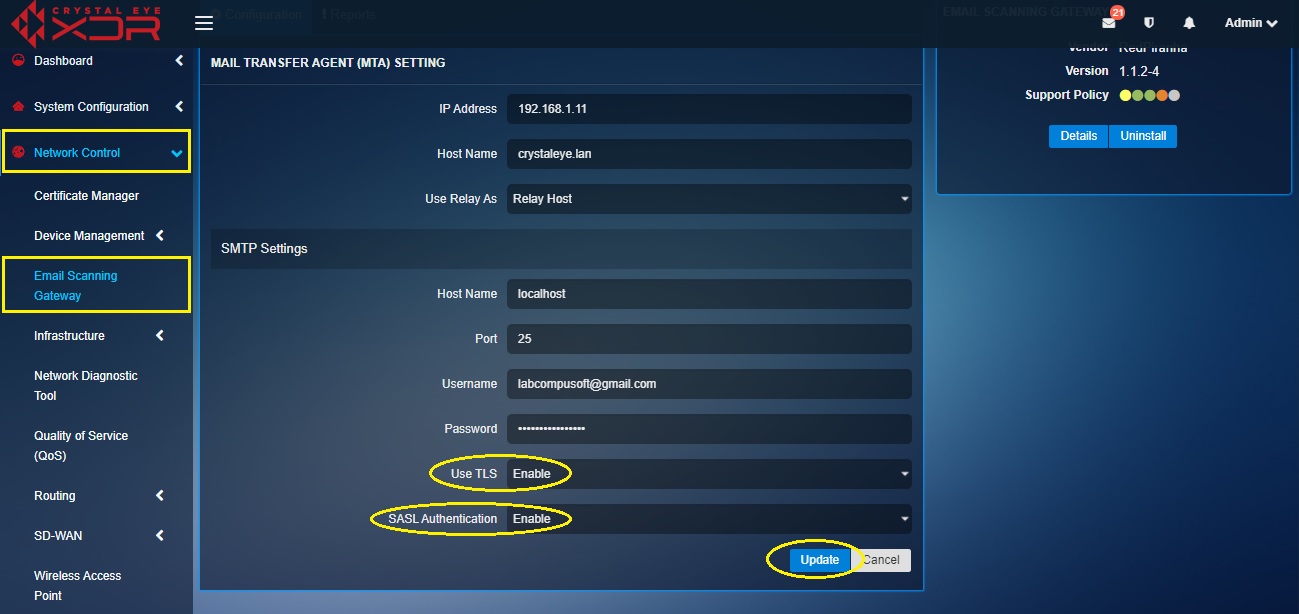
The app can be easily set up by entering the Public or Private IP address of the CE XDR, Hostname, and the Relay Domain Name.
Note: The Relay Domain Name will not be required if the relay is used as a Host. To ensure that this happens, Relay Host must be selected in the Use Relay As dropdown.
Additionally, SMTP Settings are required to complete the process of optimizing the app to counter various email related attacks and threats. The app has an excellent logging mechanism and threat monitoring system that allows the administrator to analyse various scan related statistics in the Traffic Stats section and Daily Stats section. Details regarding malicious content of a particular email quarantined by the email scanning app can be analysed and viewed in the Mail Report section.
The Email Scanning Gateway is not a default application. It can be installed and configured from Marketplace in the left-hand navigation panel.
Left-hand Navigation Panel > Network Control > Email Scanning Gateway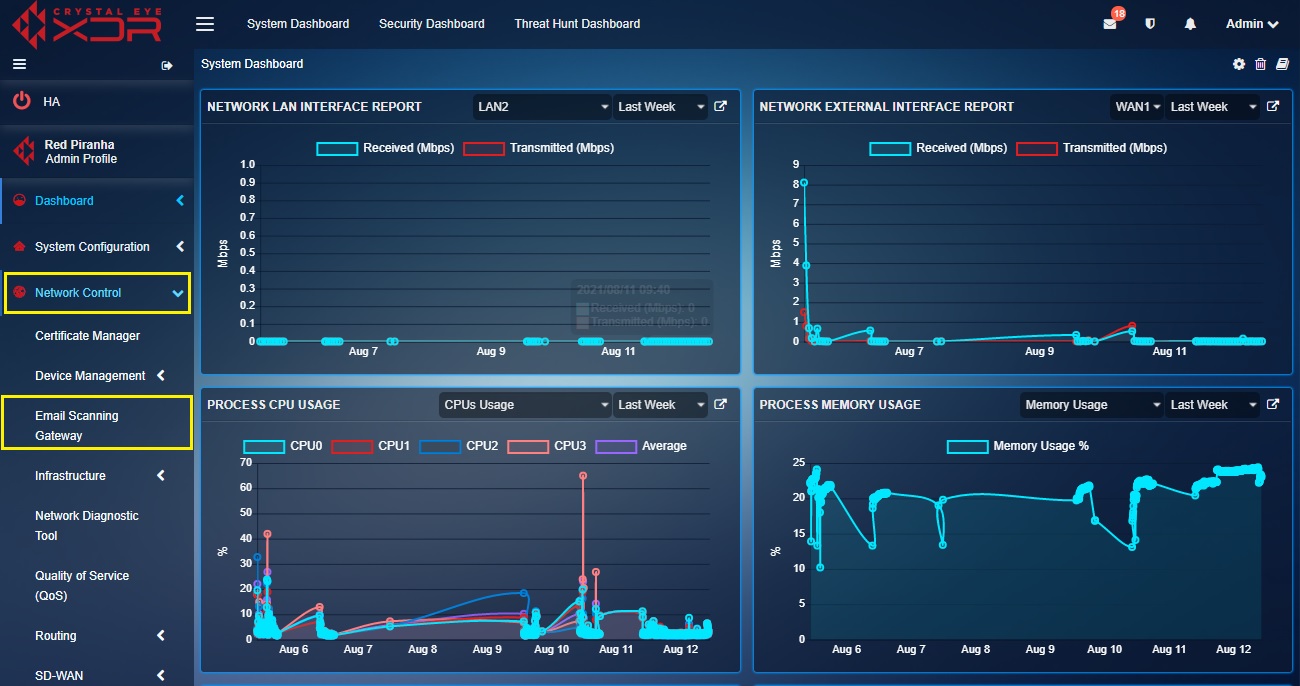 |
|---|
Configuring the Email Scanning Gateway App includes fine tuning the Mail Transfer Agent (MTA) Settings and the SMTP Settings. Based on the requirements, the administrator can configure Email Scanning Gateway app’s MTA Settings to scan only outgoing emails or both outgoing and incoming emails. If only out going emails need to be scanned, then the relay must be used as Relay Host and if both outgoing and incoming emails are to be scanned then relay must be used as Relay Domain.
SMTP Settings include assigning Host Name, SMTP Port, SMTP service Username and Password, enable/disable TLS and SASL authentication.
How to Configure Email Scanning Gateway app’s Mail Transfer Agent (MTA) Settings?
Step 1: In the Email Scanning Gateway page, click the Edit button.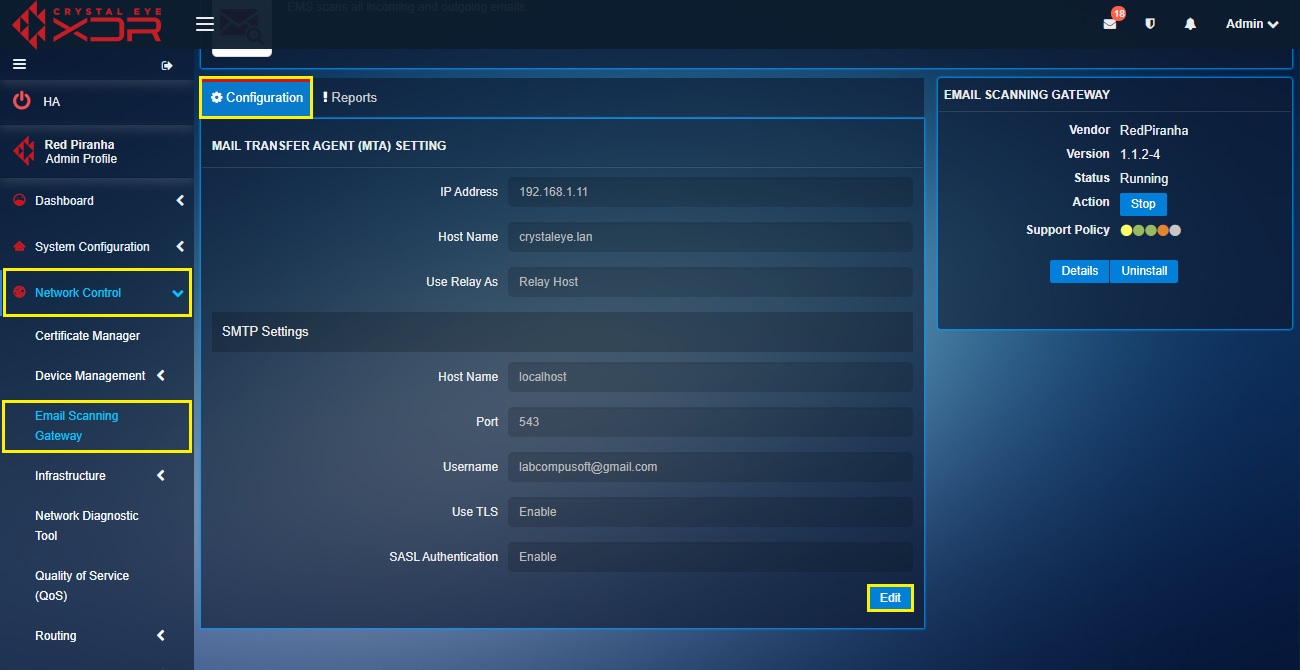
Step 2: Enter the IP Address and Hostname of the Mail Transfer Agent.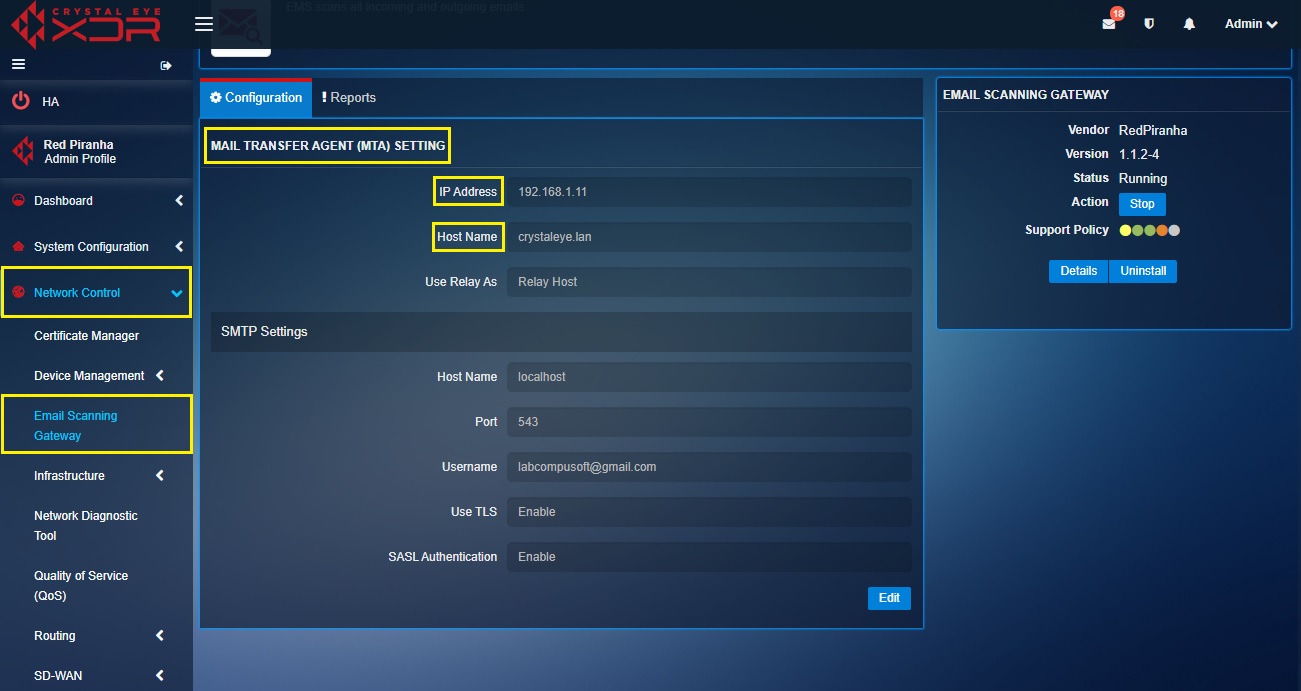
Note: The default setting of the Email Scanning App assigns the connected Crystal Eye XDR Appliance as Mail Transfer Agent. You will notice that the IP Address and the Hostname are of the Crystal Eye XDR Appliance.
Step 3: From the Use Relay As dropdown, select Relay Domain or Relay Host.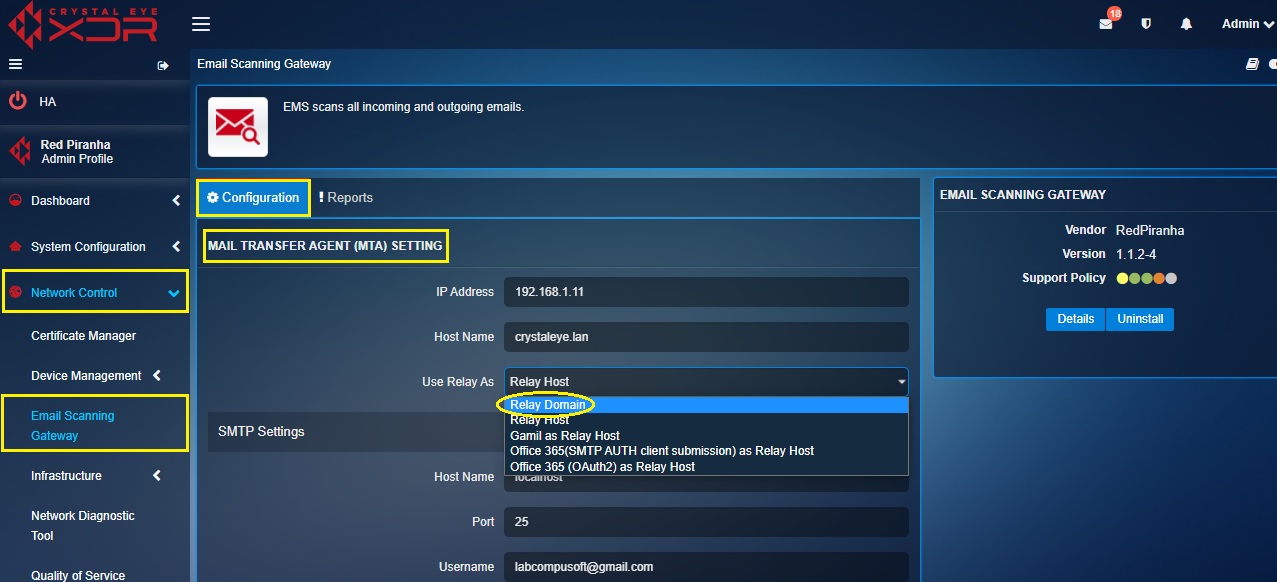
Note: If Relay Host is selected Email Scanning App will only scan outgoing emails. However, if Relay Domain is selected then the app will scan both incoming and outgoing emails for malicious files. The Relay Domain must be entered in the textbox if Relay Domain is selected in Use Relay As dropdown (refer to the screenshot below).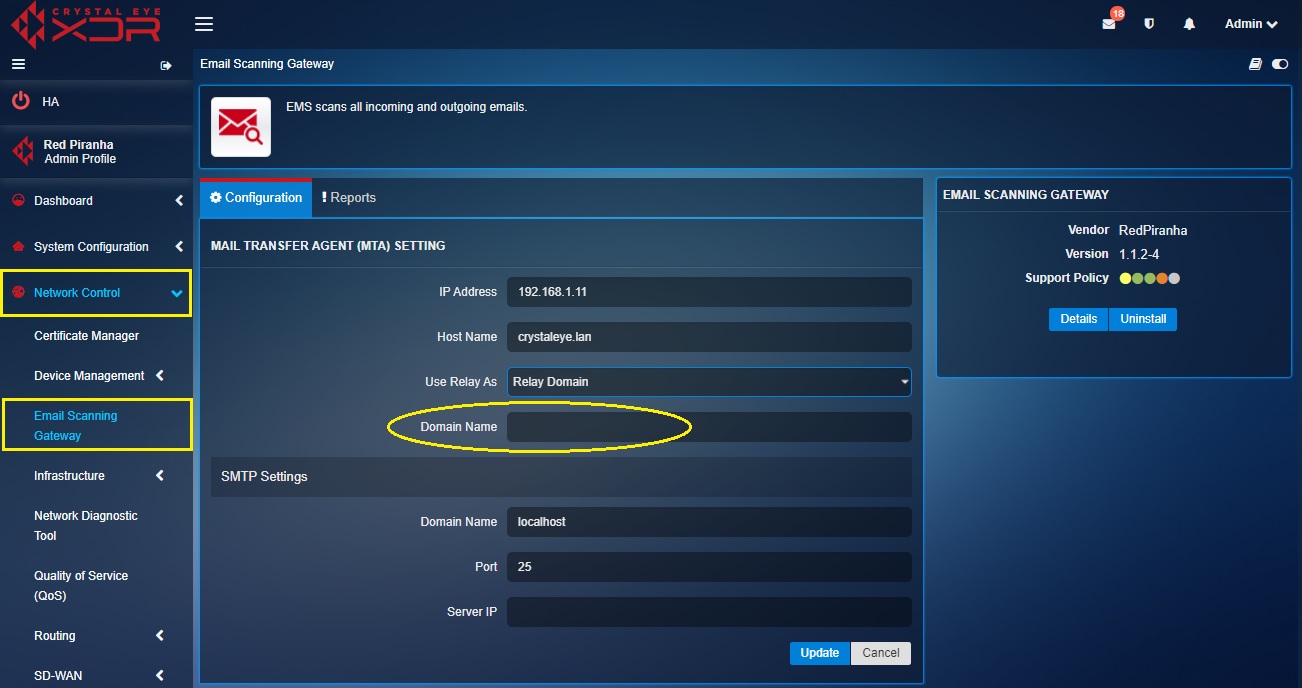
How to Configure Email Scanning Gateway app’s SMTP Settings?
Step 1: In the Email Scanning Gateway page, click the Edit button.
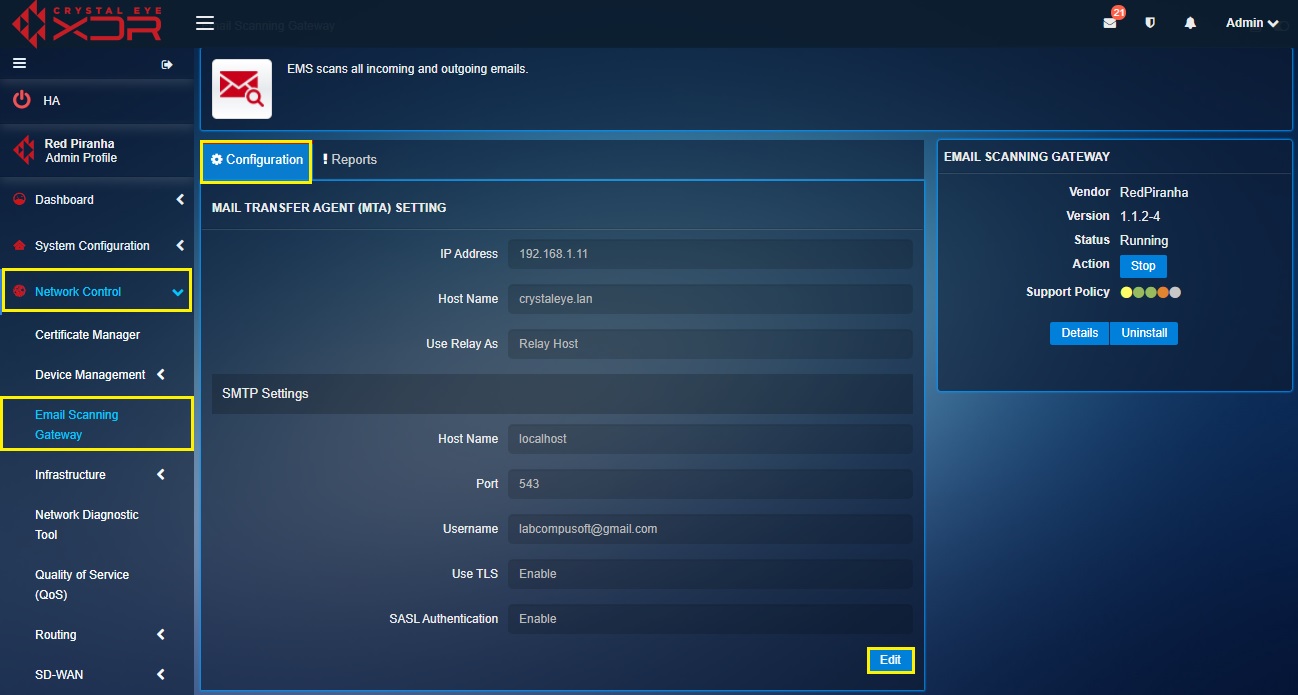
Step 2: Under the SMTP Settings section, enter the Host Name in the textbox.
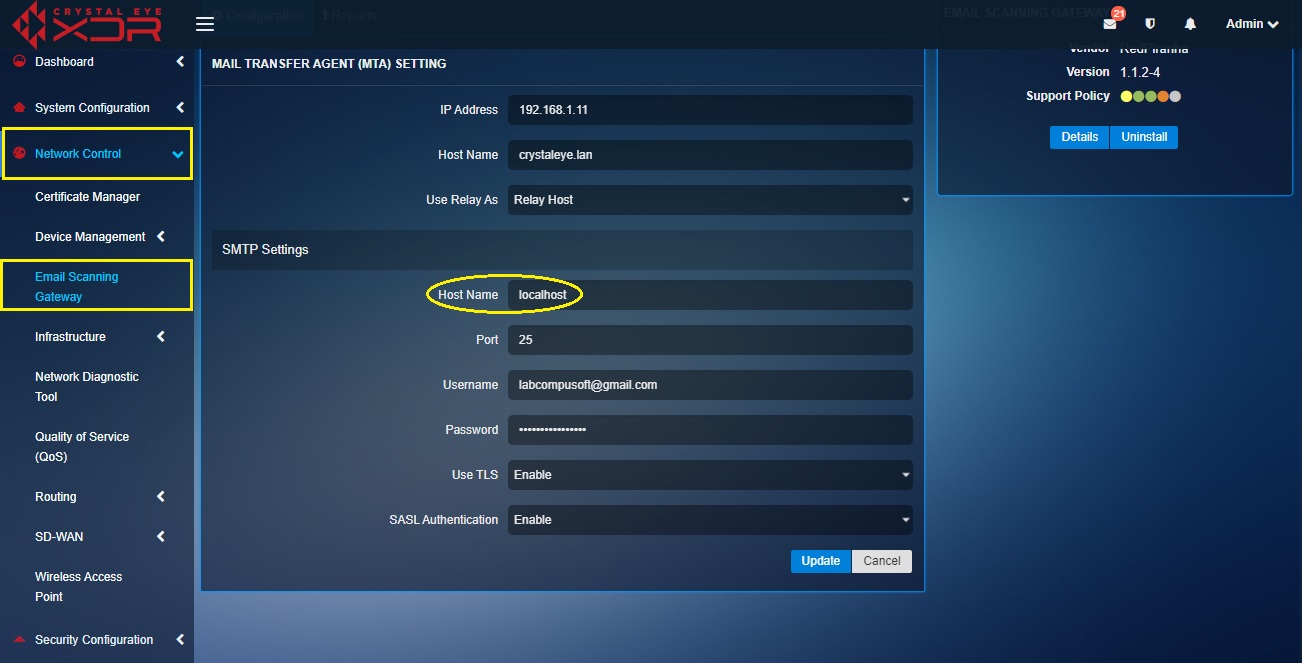
Step 3: Now enter the SMTP Port in the textbox and then enter the Username & Password.
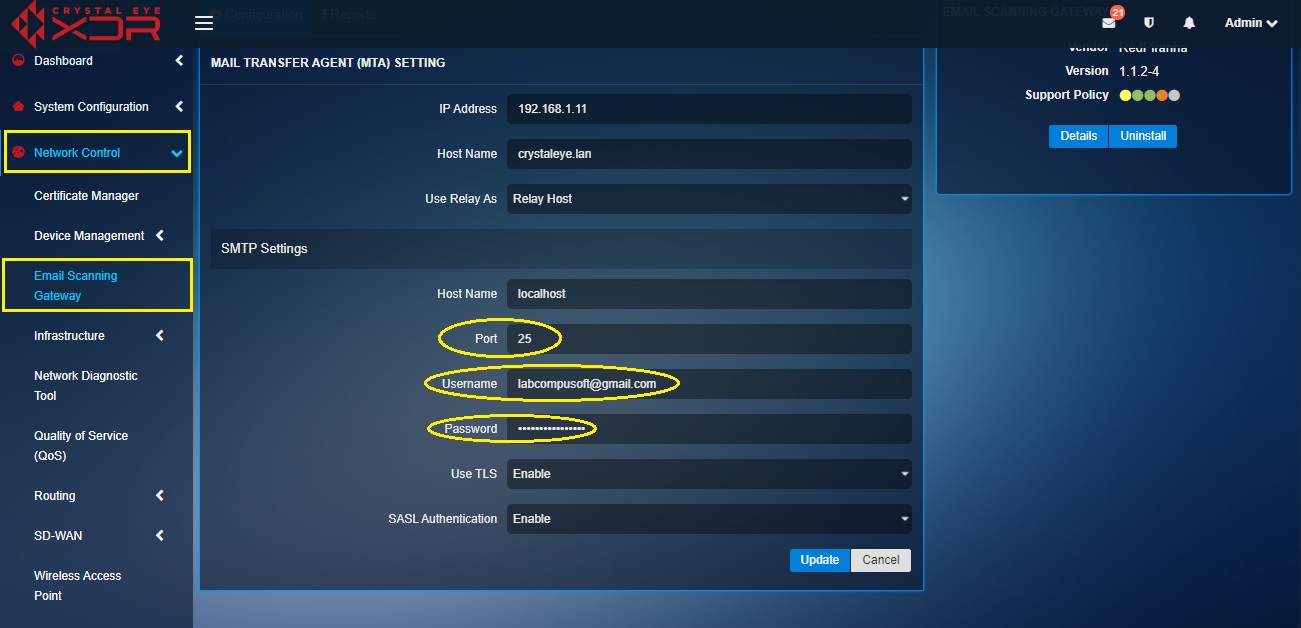
Step 4: Enable or Disable Use TLS and SASL Authentication based on requirement and click the Edit button.
There are three reports generated in the email scanning gateway app which helps in analysing data related to the malware that has been quarantined. The following are the reports that help in analysing and detecting cyber security threats originating from various types of malicious emails.
The mail traffic stats provide a detailed graphical view of the total number of emails scanned by the app every minute. If there are any Virus or spams detected it will reflect in the Mail Traffic Stats under Total Virus and Total Spam category.
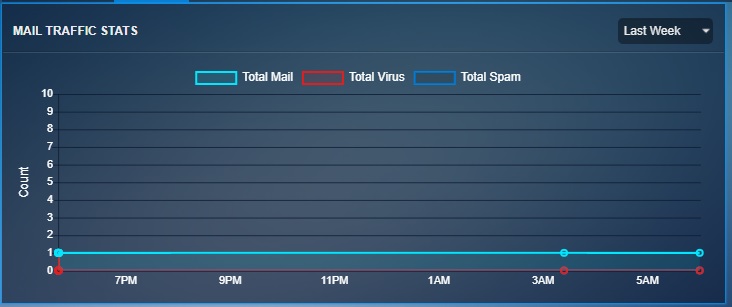
The data can also be segregated by clicking on Total Mail, Total Virus and Total Spam. The x-axis shows count of the scanned emails, virus, and spams. On the other hand, the y-axis shows the exact time these emails, virus and spams were scanned.
The Today’s Stats table provides an overview of the entire scanning related activities of the day. The information that appears on this table are as follows:
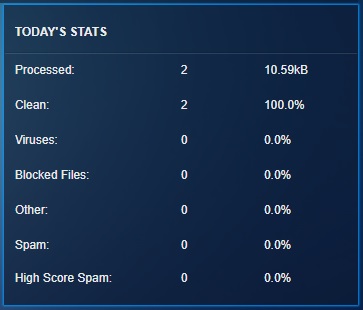
- Processed: The total file size of the scanned emails.
- Clean: The number of emails that have been scanned and cleaned-up.
- Viruses: The number of Viruses that have been detected.
- Blocked Files: The number of files that have been blocked post scanning.
- Spam: The number of spam emails scanned and blocked by Crystal Eye is mentioned here.
The Mail Reports provide details regarding the emails that have been deemed malicious because of any virus/malware detected in it. The details that are provided in this section about the blocked emails are as follows.
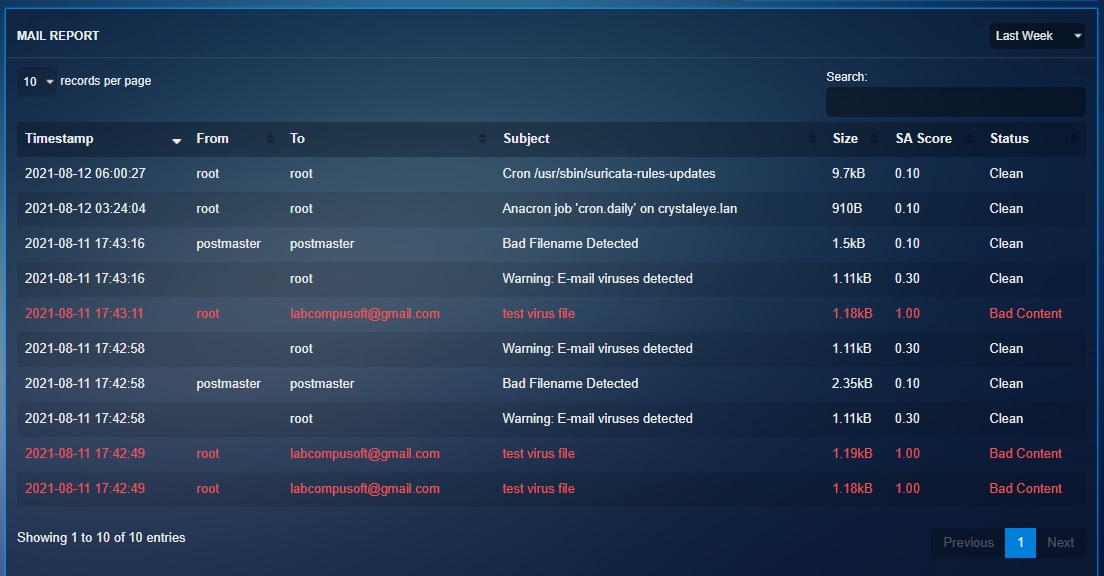
- Timestamp: The date and time at which the email was received and scanned.
- From: Where the scanned email originated.
- To: To whom the scanned email was sent to in the CE network.
- Subject: The subject of the blocked email.
- Size: The total size of the scanned email.
- SpamAssasin Score: The SA Score outlined in this section is determined after analysing several parameters to detect spam. These include DNS blocklists, text analysis etc. The email header and email body are also analysed, and then the auto scoring system provides the SpamAssasin Score outlining how the email performed against these checks.
- Status: The final result specifying whether the scanned email is clean or contains malware/bad content.