Advanced Firewall
The Advanced Firewall application can be used to create object-based firewall rules to manage the traffic flow between various zones in the Crystal Eye XDR network.
The advanced features of this application allow CE XDR administrators to create:
- Default and custom security zones,
- Traffic rules and assign them to security zones,
- Application rules to assign DNAT rules, and
- Gateway traffic rules.
Note: The advanced firewall application has numerous default traffic and application rules. In addition to this, the CE XDR also provides options to create customised traffic rules (with actions such as Allow, Reject, Block, IDPS, and Web Filtering) and customised application rules to optimize DNAT rules.
The advanced firewall application is installed by default and can be accessed from the left-hand navigation panel.
Left-hand navigation panel > Security Configuration > Advanced Firewall Application  |
|---|
A security zone can consist of multiple network segments that can be governed with the help of inbound and outbound rules. These security zones created in the Crystal Eye XDR network are bound with the interfaces which then processes traffic.
Note: A Security Zone of the CE XDR can be assigned to multiple interfaces whereas an interface can only be assigned to only one zone.
The security zones created in the Crystal Eye XDR are used to define the traffic with the help of object-based firewall policies. By default, there are four security zones in the Crystal Eye XDR namely, LAN, WAN, DMZ and HotLAN.
Note: Refer to the use case under the traffic rules section to know how security zones are used in inbound and outbound traffic rules.
Crystal Eye XDR has 4 default security zones namely, LAN Zone, HotLAN Zone, WAN Zone and DMZ Zone.
The Crystal Eye XDR network can be configured to accommodate multiple default access policies so that the flow of traffic can take place between different security zones such as LAN Zone, HotLAN Zone, WAN Zone and DMZ Zone.
| LAN Zone Related Access Policies & its Communication Details with Other Default Security Zones |
|---|
- All communications from LAN Zone to External Zone are permitted by default.
- All communications between network assets within the LAN Zone are permitted by default.
- All communications from the LAN Zone to HotLAN Zone are permitted by default.
- All communications from LAN Zone to DMZ Zone are blocked by default.
| Hot LAN Zone Related Access Policies & its Communication Details with other Default Security Zones |
|---|
- All communications from HotLAN Zone to External Zone are permitted by default.
- All communications from HotLAN Zone to LAN Zone are blocked by default.
- All communications between network assets within the HotLAN Zone are permitted by default.
- All communications from HotLAN Zone to DMZ Zone are blocked by default.
| External Zone Related Access Policies & its Communication Details with other Default Security Zones |
|---|
- All communications from WAN Zone to LAN Zone are blocked by default.
- All communications from WAN Zone to HotLAN Zone is blocked by default.
- All communications from WAN Zone to DMZ Zone are blocked by default.
| DMZ Zone Related Access Policies & its Communication Details with other Security Zones |
|---|
- All communications between the DMZ Zone to the External Zone are permitted by default.
- All communications between DMZ Zone to LAN Zone are blocked by default.
- All communications between DMZ Zone to HotLAN Zone are blocked by default
- All communications between network assets within the DMZ Zones are permitted by default.
The Crystal Eye XDR offers feature to create custom zones and inter-zone policies. Such zones can be used to customize traffic movement and access across different zones and network depending upon use case.
The default zone policies of the CE XDR can be edited to suit the security policies and traffic policies of the organisation using Traffic Rules, Application Rules and Gateway Traffic Rules.
How to Create Custom Security Zones?
Firewall Parameters that can be Configured while Creating Custom Zones| Parameters | Description |
|---|---|
| Allowed Zones | These are the zones that are explicitly allowed to communicate with the interface/zone to which this zone will be assigned to (even if the Interzone Traffic Policy Setting is set to Block) |
| Blocked Zones | This parameter is useful when you have configured the Interzone Traffic Policy to Allow traffic between zones, but you want to exclude (explicitly block) a zone from that. Then you would select that zone as a blocked zone |
| Incoming Traffic Policy | Select to allow incoming traffic. |
| Outgoing Traffic Policy | Select to allow outgoing traffic. |
| Interzone Traffic Policy | Select Allow to permit traffic between zones and Block to prevent communication between zones. |
| NAT | Select when this Zone should perform NAT |
Step 1: In the Advanced Firewall app page, click the Add button under the Security Zones tab.

Step 2: You will now see the Add New Zone section. Enter a name and description for the Zone. Select the Allowed Zones and Blocked Zones if applicable, Select the Incoming/Outgoing/Interzone Traffic Policies and check the NAT tick box if this zone will be doing Network Address Translation (NAT).

Step 3: Click the Add button.

Crystal Eye XDR’s Advanced Firewall application has enhanced capabilities to govern, and control inter zone traffic. The traffic rules feature is designed to determine access rights and allow or reject traffic between network object /hosts.
These rules can play a vital role to assign access rights allowing enhanced level of protection to the network objects (such as a subnet) or a network host. It is through these rules that traffic can be controlled by its Source, Destination, Zone, and Service.
In addition, the CE XDR administrator can assign various firewall policy actions to the traffic such as:
- Allow
- Reject
- Block
- IDPS
- Web Filter (Authentication based & IP/MAC based)
The advanced firewall application in CE v4.0 comes pre-configured with default traffic rules. These rules are discussed in detail below.
Allow ICMP: ICMP protocol is enabled on CE XDR so that incoming ping requests from any source are allowed to ensure smooth functioning of the vulnerability scanning feature.
Allow SSH Access: This rule allows all SSH protocol related incoming traffic from any source.
Allow Webconfig Access: This rule allows CE XDR administrators to access it via webconfig.
Allow BGP Access:
Allow Transparent Web Filter: This is default firewall policy rule related to content filtering across CE XDR network. However, this is the only rule among the other default rules that can be edited and customised as per network requirements. The user can bypass web filtering for the entire network and can also switch to four modes of content filtering i.e Transparent, Transparent with SSL decryption, Explicit & Eplicit with SSL decryption.
Let’s learn how the Traffic Rules feature of the Advanced Firewall Application can be used to create firewall rule with an ‘Allow’ rule action. In the use case below, we will create a firewall rule specially designed for an Operational Technology (OT) environment (refer to the diagram below).

In the diagram above, we have created an OT environment with the following zones:
- SCADA Zone consisting of SCADA workstations and SCADA servers.
- DMZ Zone consisting of DMZ hosts
- Industrial Control System (ICS) Zone consisting of engineering workstations, Historian Servers and HMI.
- PLC Zone consisting of PLC workstations.
- Manufacturing Operating System consisting of Lab Workstation, File Server, and MES/MOM.
- Infrastructure Management Zone consisting of Infra Management hosts.
- HOT LAN Zone which can be considered as an untrusted zone.
- The Business Enterprise Zone is connected with the OT environment with IPsec VPN and the remote workers are connected to the OT environment using SSL VPN.
Based on the diagram above the following security policies/firewall rules (refer to the table below) can be created and implemented using the Advanced Firewall Application in this scenario. However, we will discuss how the first rule below can be created with the help of screenshots. In this rule we will allow RDP traffic to flow from an Untrusted Zone’s corporate subnet to DMZ Zone’s DMZ-Host1.
.jpg "Security%20Policy%20%28rules,%20firewall%20rules,%20etc%29")
How to Create an Object-based Traffic Rule in the Advanced Firewall application?
Based on the scenario discussed below, we will be creating a traffic rule as mentioned in the first rule in the table above.
Just to recall the contents of the firewall rule, the RDP traffic (TCP, 3389) originates from the corporate subnet of the untrusted zone and the destination of this traffic is DMZ Zone’s DMZ Host 1 (refer to the table below for more clarity).

We will also create network-based object such as corporate subnet, a host-based object DMZ-Host 1 and service-based object protocol RDP (tcp/3389). All these objects will be created using the Host & Groups application and will finally be used to created object-based firewall policy/rule.
Step 1: Go to Host and Groups application under the System Configuration menu.

Note: You will now see the user interface of the Host and Groups application. We will now create the objects before the traffic rule is created. The three objects we will create is RDP protocol (tcp/3389), Corporate Subnet (10.10.1.0/24) and DMZ - Host1 (10.10.2.1/24). The diagram and the tabular format of the firewall rule below can be reviewed to understand more about the objects that would be created and where these objects are positioned in the OT Environment diagram.
Step 2: We will now create an object for RDP protocol (tcp/3389). To do so, click the Services tab on the Hosts and Groups application page.

Step 3: You will now see the Add Services page. Enter RDP in the Names textbox.

Step 4: Enter the Port Number as 3389, select the Group as Default_ Service_Group, enter the Description and click the Add button.

Step 5: You will now be directed to the Services page. The service-based object created for RDP protocol will be listed on this page.

Step 6: Now click the IP Host tab and you will now see The IP Host page. Click the Add button on the top-right corner of the IP Host page. We will now create an object for the Corporate Subnet.

Note: The IP address of the corporate subnet is 10.10.1.0/24.
Step 7: You will now see the Add IP Host page. Enter Corporate_Subnet in the Name textbox, Select the Family as IPV4 and the Type as Network, enter the corporate subnet network IP address (10.10.1.0/24) in the value field, select the Group and the description. After updating these values click the Update button.

Step 8: You will be directed to the listing page of IP Host where you will be able to see the object (corporate_subnet) created in the IP Host list.

Step 9: We will now create the third and the last object for the DMZ Host 1 (Refer to the image in the Note section below to understand the positioning of DMZ Host 1 in the diagram and in the firewall rule). Click the IP host tab and then click the Add button on the top right corner of the IP Host section.

Note: In the following diagram you will be able to understand the positioning of DMZ-Host1 and also know the firewall rule in context of the traffic flow between two objects i.e Corporate subnet and DMZ-Host1.
Step 10: You will now see the Add IP Host page. Enter DMZ-Host1 in the Name textbox, Select the Family as IPV4, Select the Type as IP from the dropdown, enter DMZ-Host1 IP address 10.10.2.1/24 in the Value field, leave the Group as default (DEFAULT_IPHOST_GROUP) unless there is a requirement to change this, enter the description and click the Add button.

Step 11: You will now see DMZ_Host1 listed in the IP Host section.

We have now successfully created three objects that will be used to create an object-based firewall policy/rule. In the steps below, we will use the 3 objects created above and then create the traffic rule to allow RDP communication if the traffic originates from the corporate subnet of untrusted zone and has its destination as the DMZ_Host1 server in the DMZ Zone.
Step 12: Go to Security Configuration > Advanced Firewall

Step 13: You will now see the Advanced Firewall application page. Click the Traffic Rules tab.

Step 14: You will now see the Rules page. Click the Add button on the top right corner of the Rules section.

Step 15: You will now be directed to the Add New Traffic Rule pop-up page.

Note: The screenshot above shows where we will create the firewall policy/rule to allow all RDP communications originating from the corporate subnet in the untrusted zone with the destination to the DMZ_Host1 in the DMZ Zone.
Step 16: Enter the Description, select the Protocol as TCP, select the Source Zone as HOTLAN, select the Network as corporate_subnet, select the destination zone as DMZ, select destination IP Address as dmz_host1, select the service/port as RDP, select the Actions as Allow and then click the Add button.

Note: The firewall rule created in the screenshot above can be elaborated in a tabular format below.
**Outcome- You will see the firewall rule listed in the Rules page**Content to be uploaded soon!
The ‘block action’ of the advanced firewall can be used to enforce firewall policies where there’s a requirement to block traffic originating within the internal security zones or from the WAN side of the CE XDR.
In the use case scenario discussed below, we will use the ‘block action’ of the advanced firewall to enforce MAC based filtering in the wireless interface of the CE XDR.
MAC filtering relates to a security access control methodology where only known devices are permitted to access the network interface. MAC filtering is widely used to prevent unwanted devices to gain network access in a wireless environment (WLAN).
To achieve MAC filtering in the wireless interface of the CE XDR, we will block all the MAC addresses that are not permitted to access the internet via Wi-Fi.
Note: MAC address filtering as a security access control methodology is more reliable than IP based filtering since MAC addresses remain the same in an environment with DHCP. The dynamic IP addresses of the host change in a DHCP network environment and that’s why MAC based filtering is preferred as it makes it more feasible to identify and filter the source and destination of the traffic.
MAC filtering provides the much-required additional layer of security where any attempt by an attacker to access the network by masquerading the IP address is blocked. This is made possible since the MAC address is taken as the sole criterion to while providing access to the network.
How to use block firewall policy action using the traffic rules to enforce MAC based filtering?
The wireless interface of the CE XDR gets created automatically after the wireless access point app is installed from the marketplace. The Wi-fi interface gets assigned to the LAN zone by default (refer to the network settings application screenshot below).

Note: All the communications between Wi-Fi1 interface and WAN zone are allowed by default.
Step 1: Go to System Configuration > Hosts and Groups > MACHosts and create MAC Hosts Group of all the MAC addresses that are not permitted to have explicit access to the internet via Wi-Fi.

Note: In our use case scenario, we will name the group as WiFi_Restricted_Group.
Step 2: Now go to Security Configuration > Advanced Firewall > Traffic Rules and click the Add button on the top-right corner of the Rules section.

Step 3: You will now see the General Settings section and Advanced Settings section in the Add New Traffic Rule pop-up. Select the Zones in the Source section and the Destination section as LAN and WAN respectively.

Step 4: In the Actions section, select Block from the Target dropdown.

Step 5: Click the Advanced Settings tab and select Wi-Fi1 from the Network dropdown under the Source section. Also select the MAC address group (Wifi_Restricted_Group) from the MAC Address dropdown and click Add.

Note: Whenever you come across a MAC address which needs to be blocked go to the Host and Groups application and add the MAC address to the Mac group created there (in our case the group name is WiFi_Restrict_Group)
You have now restricted internet access via Wi-Fi for a bunch of devices in the CE XDR network through MAC address filtering.
Learn how to use the 'IDPS Target feature' of the traffic rules by referring to the IDPS Inline mode section
The advanced firewall application of the Crystal Eye XDR has capabilities to assign content filter policies to traffic originating from various default and custom zones created in the network.
Note: The CE XDR administrator can also assign authentication-based content filter policies to any traffic in the network.
The CE XDR administrator can select different content filtering modes such as:
- Transparent mode
- Transparent mode with SSL decryption
- Explicit mode
- Explicit mode with SSL decryption
Based on the selected mode, only http or both http and https traffic can be scanned for web filtering.
Note: Select Transparent mode with SSL decryption to ensure that both http and https traffic is scanned for web filtering. By default, the content filter mode is set to transparent mode which scans only http content.
As a CE XDR administrator, you might come across instances where content filter policies might not be conducive due to its restrictive nature for some users in the network. In such cases, the content filter policies can be by-passed, and this bypass action can be assigned to any traffic originating from any security zones in the CE XDR network.
Let’s learn how to assign a transparent with decryption content filter mode to ensure that both http and https traffic is scanned for a particular network traffic. In our use-case scenario, we have a flat network topology where it has become imperative to block websites belonging to the social media category for the customer care operations department of the organisation. However, there is a requirement to bypass web filtering on the devices used by 3 senior managers of the organisation via MAC filtering.
Note: As of now we can only assign default content filter policy which is editable. However, soon the traffic rules web filtering action will also have the capability to assign custom made content filter policies.
How to assign a content filter policy that blocks access to social media websites for a particular department in the company and then how to bypass these web filtering policies for senior managers through MAC address filtering?
Note: In our use case scenario, we will create a custom zone created for the customer care operations (CCO) department of the organisation and a restrictive content filter policy will be assigned to the traffic originating from this zone. We will then create a MAC address traffic rule to bypass the web filtering rule.
Step 1: Create a custom zone and name it CCO_dept.
Note: You may refer to the following link to know how to create a custom security zone. https://manual.redpiranha.net/40/security-configuration/advanced-firewall#customsecurityzones
Step 2: Go to Security Configuration > Web Filter > Content filter > Policy Management tab and click the Configure Policy button under the App Policies section.

Step 3: You will now see the default policy page. Click the Edit button next to Blacklists.

Step 4: You will now be directed to the Blacklists page. Select the tick box next to Facebook and Social Media.

Step 5: Go to Security Configuration > Advanced Firewall > Traffic Rules and click the Add button on the top-right corner of the Rules section.

Step 6: You will now see the Add New Traffic Rule pop-up box. Select CCO_Dept as a Zone in the Source section.

Step 7: Now select WAN as a Zone in the Destination section.

Step 8: Select Web Filter from the Target dropdown in the Actions section.

Step 9: You will now see the Web Filter Mode dropdown. Select Transparent_SSL from the dropdown and click the Add button.

Note: We selected Transparent_SSL (Transparent with SSL decryption) mode since we would have to scan https content (facebook and other social media websites are https).
Step 10: Now go to Security Configuration > Web Filter > Web Proxy Server and click the Download Certificate button in the Rules section.

Step 11: Install the CE XDR SSL Decryption Certificate to the browser if you are using a Laptop. Read below to know how to install certificates in Google Chrome and Mozilla Firefox browsers.
Follow the steps below to install CE certificate in Google Chrome:
Go to Settings > Privacy and security > Security > Manage Certificates > Intermediate Certification Authorities > Click Import button and import the CE certificate

Note: Ensure that your chrome browser is set-up to automatically detect proxy settings.

Follow the steps below to install CE certificate in Mozilla Firefox:
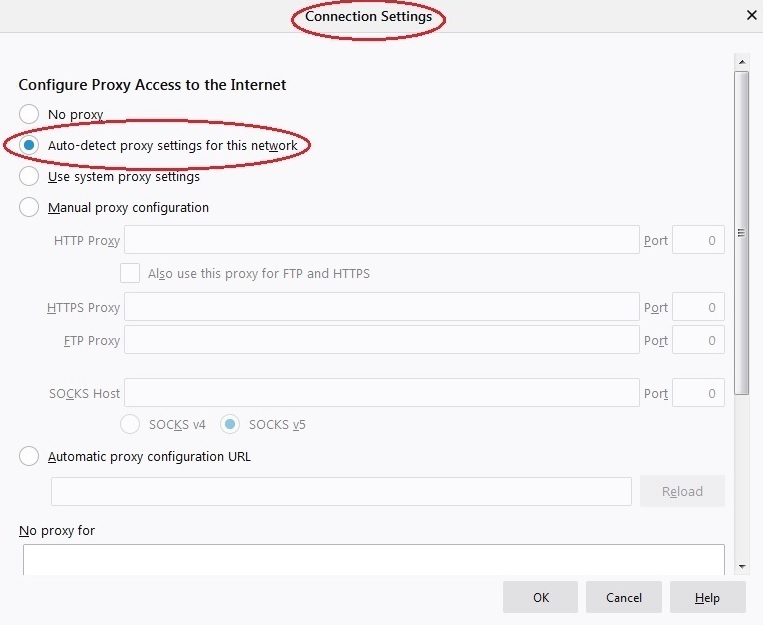
Type ‘about:preferences’ in the browser > Privacy and Security > Certificates > Certificates Manager > Authorities > Click Import button and import the CE certificate
Note: Ensure that the browser is set to automatically detect proxy settings (Go to Network Settings > Select Auto-detect proxy settings for this network) crystal-eye-xdr-custom-traffic-rules-action-web-filter13
You have now successfully blocked social media websites for the Customer Care Operations Department. However, as per our scenario there is an explicit requirement to bypass the MAC addresses of 3 senior managers so that social media websites are accessible only through their devices. The MAC addresses of the 3 managers are 3E:38:00:B3:F8:29, 44:A1:76:20:CD:C2 and 8F:6D:2C:37:CE:29. Pursue the following steps to bypass the content filter policies.
Step 12: Go to System Configuration > Hosts and Groups > MAC Host tab and click the Add button in the Mac Hosts section.

Step 13: You will now see the Add Mac Hosts page. Enter the Name as web_filter_bypass_SM. Then enter the Mac addresses and enter a suitable description as shown in the screenshot below.

Note: You will now be directed to the Mac Hosts dashboard where this group would be listed.
Step 14: Now go to Security Configuration > Advanced Firewall > Traffic Rules and click the Add button.

Step 13: You will now see the edit traffic rule page. Go to General Settings tab and enter the following details.
- enter the description as “bypass SM content filter”
- select CCO_Dept from the Zones dropdown under the Source section
- select WAN from the Zones dropdown under the Destination section
- select WEB_FILTER from the Target dropdown under the Actions section
- select Bypass from the Mode dropdown

Step 14: Click the Advanced Settings tab and select the MAC address object that we created in step 12 and step 13 containing the MAC addresses of senior managers devices that needs to bypass content filter.

Note: You will now see the content filter bypass traffic firewall rule in the Traffic Rules dashboard.
We have now bypassed content filter policies for the MAC addresses of the senior managers in the network.
The Application rules feature of the Advanced firewall application is a perfect platform to apply DNAT rules. The DNAT Rules translates the IP address of an internal server positioned behind the Crystal Eye XDR to a Public IP address which can then be accessed by an end point client located in a remote location. We will discuss more about DNAT rules and how to create it with a use case below.
Let’s review the use case scenario discussed below and understand more about using the Application Rules feature used for creating DNAT rules in the Crystal Eye XDR.
In the use case diagram discussed below, we have a server in a segmented network named as Host-1 with an IP address (172.16.0.10). Host-1 server has web services running on its port 8080. We will create a DNAT rule so that the remote client (with the IP address 198.41.100.6 and 198.41.100.7) gets access to the services running on the webserver.

How to Create Destination NAT Routes Using the Application Rules Feature of the Advanced Firewall Application?
In the steps below, we will create an object for the two clients (Client 1 & Client 2) which needs to be given explicit access to Host1 (172.16.0.10:8080). We will also create an object of Host1 and then use these objects to create a DNAT rule.
We will create the following objects in the Hosts and Groups application:
- A single object for Client 1 and Client 2
- Object for Host 1
- Object for https service port (443)
Step 1: Go to System Configuration > Hosts and Groups and click the IP Host tab.

Step 2: You will now be directed to the Add IP Host page. Enter the following in the designated text boxes.
- Client1andClient2 in the Name textbox,
- Enter the IP address of Client 1 and Client 2 in the Value textbox,
- Enter a suitable description

Note: You will now see the object in the IP Host dashboard.
Step 3: Similarly, create another object for Host-1 with the IP address 172.16.0.10.

Step 4: Click the Services tab in the Hosts and Groups application.

Step 5: You will now see Add Services page.
- Enter the Name as HTTPS Port
- Enter port number as 443
- Add a description

Step 6: Go to Security Configuration > Advanced Firewall, click the Application tab and then click the Add button.

Step 7: You will now see the New Application Rule pop-up.
- Enter the description
- Select TCP from the Protocol dropdown
- Select the WAN IP in the From IP Address dropdown
- Select Host 1 object in the To IP Address dropdown (as created in step 3)
- Select HTTPS_Port object in the From Service/Port (as created in step 5 and step 6)

Step 8: Click the Advanced Settings tab, select WAN in the Zones dropdown under the Source section and click the Add button.

Note: You will now see the DNAT rule in the Application Rules dashboard.