DHCP Server
The Dynamic Host Configuration Protocol (DHCP) Server is an essential component of the network and plays an important role in assigning the IP addresses, default gateways and other key network parameters.
The CE XDR can be configured as a DHCP Server or a DHCP Relay agent. The DHCP server feature of the CE XDR ensures that the devices connected to the network obtains their IP configuration from the CE XDR appliance. The DHCP relay feature of the CE XDR allows to broadcast DHCP packets between the DHCP client and the proposed DHCP server.
Managing DHCP servers becomes even more easier by just monitoring the Configured Servers section and the Available Servers sections under the Servers tab. The DHCP configuration of each server created can be edited and various DHCP related parameters such as Start IP, Last IP, Lease Time, Gateway, Netmask, DNS Server Address and WPAD URL can be controlled.
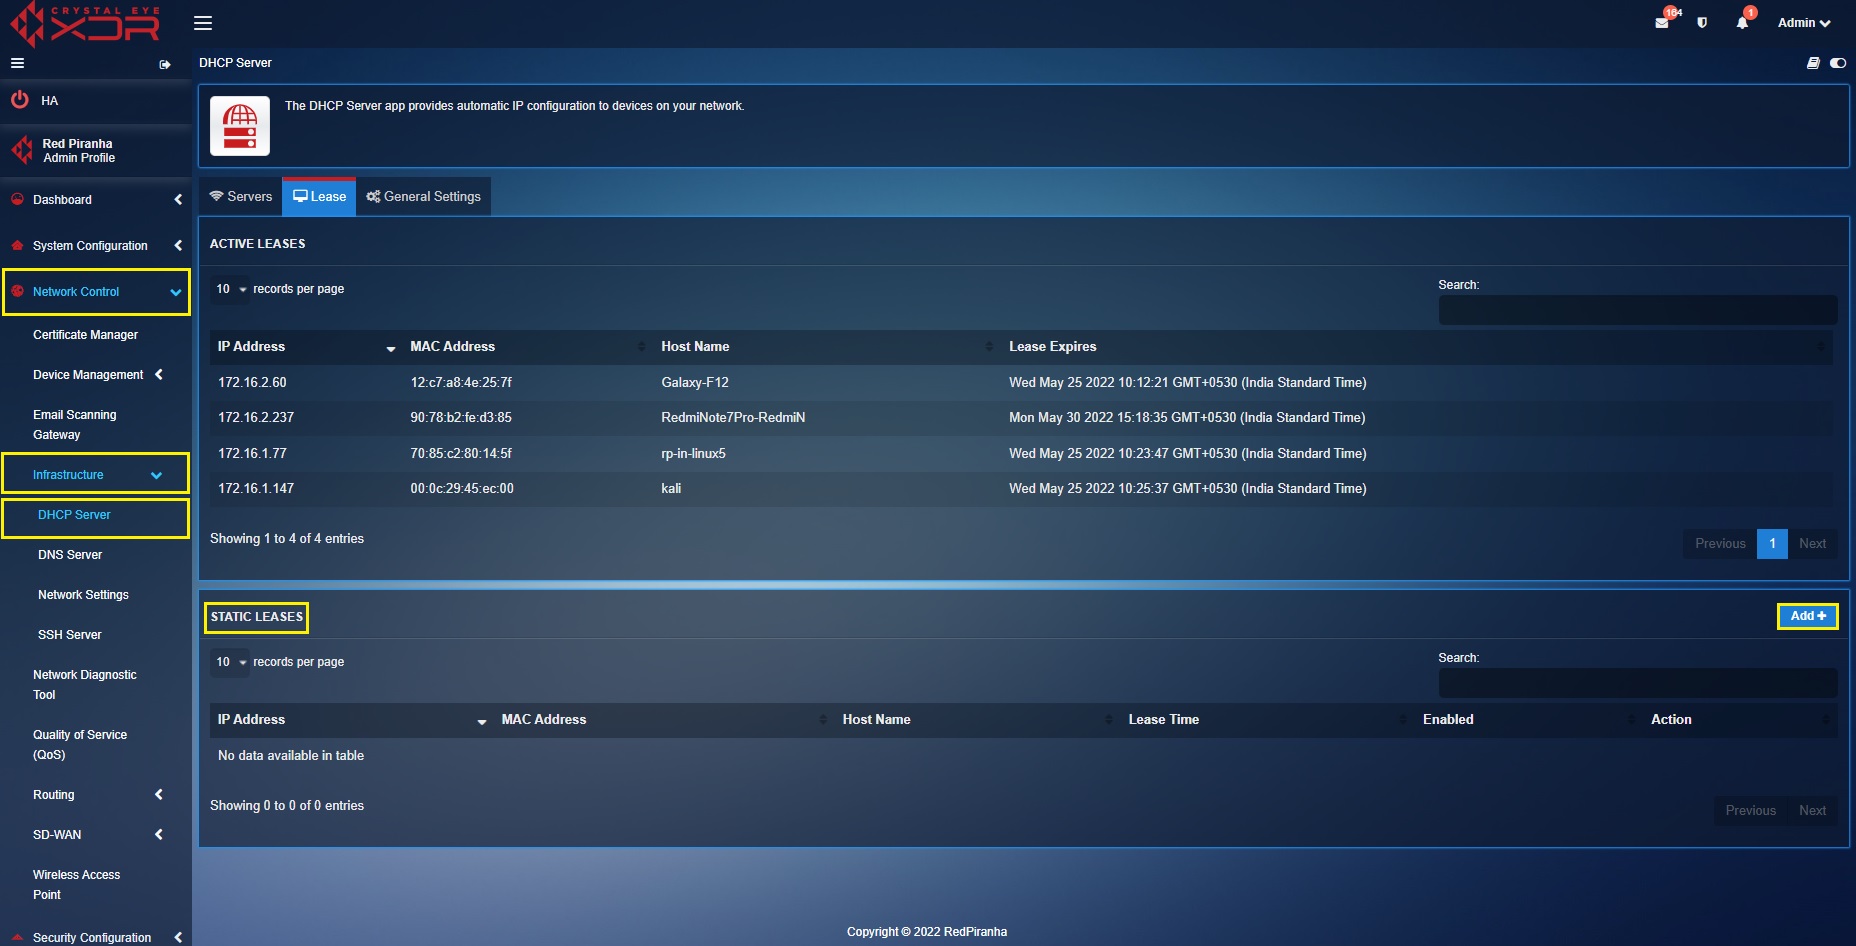
The Lease Tab lists active IP leases which includes IP Address, MAC Address, Host Name and Lease Expiry. Static leases can be assigned to devices which allows CE administrators to either opt for infinite lease time or a more specific lease time (Minutes, Hours, Days, Months, and Years).
Note: Assigning your devices a static lease ensures they will always have that same IP address.
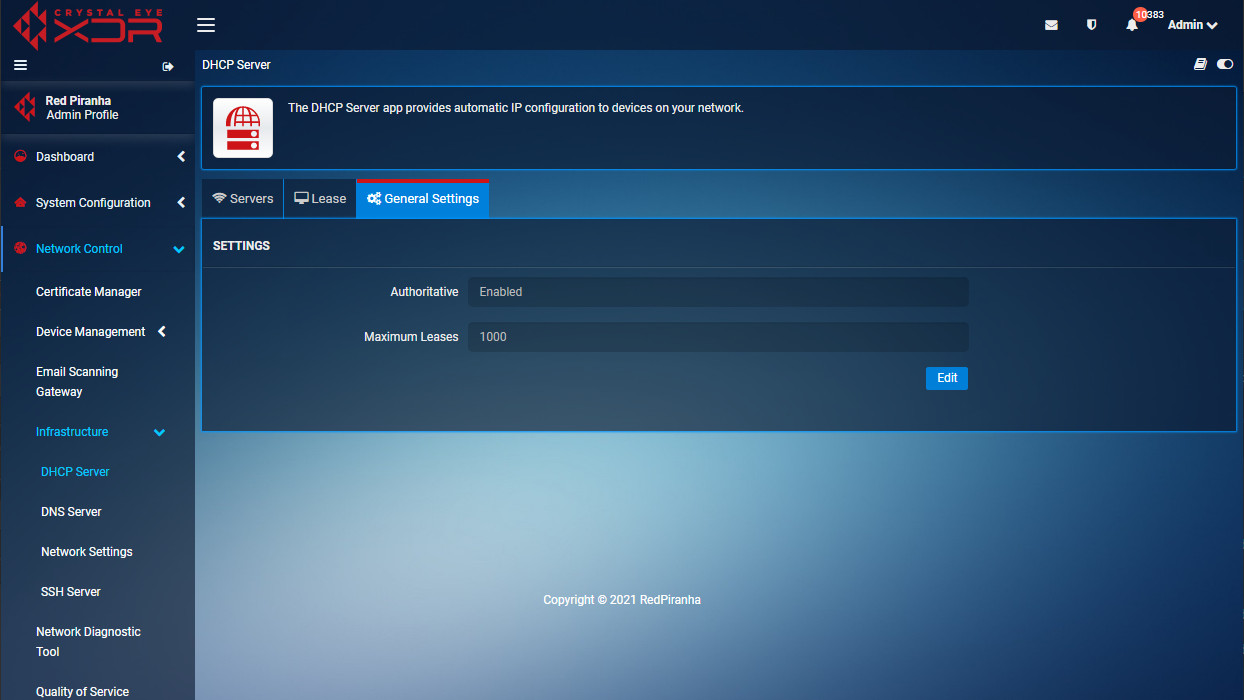
The General Settings Tab gives access to Authoritative Mode and Maximum Leases settings.
The DHCP Server application is installed by default and can be accessed from the left-hand navigation panel.
Left-hand Navigation Panel > Network Control > Infrastructure > DHCP Server 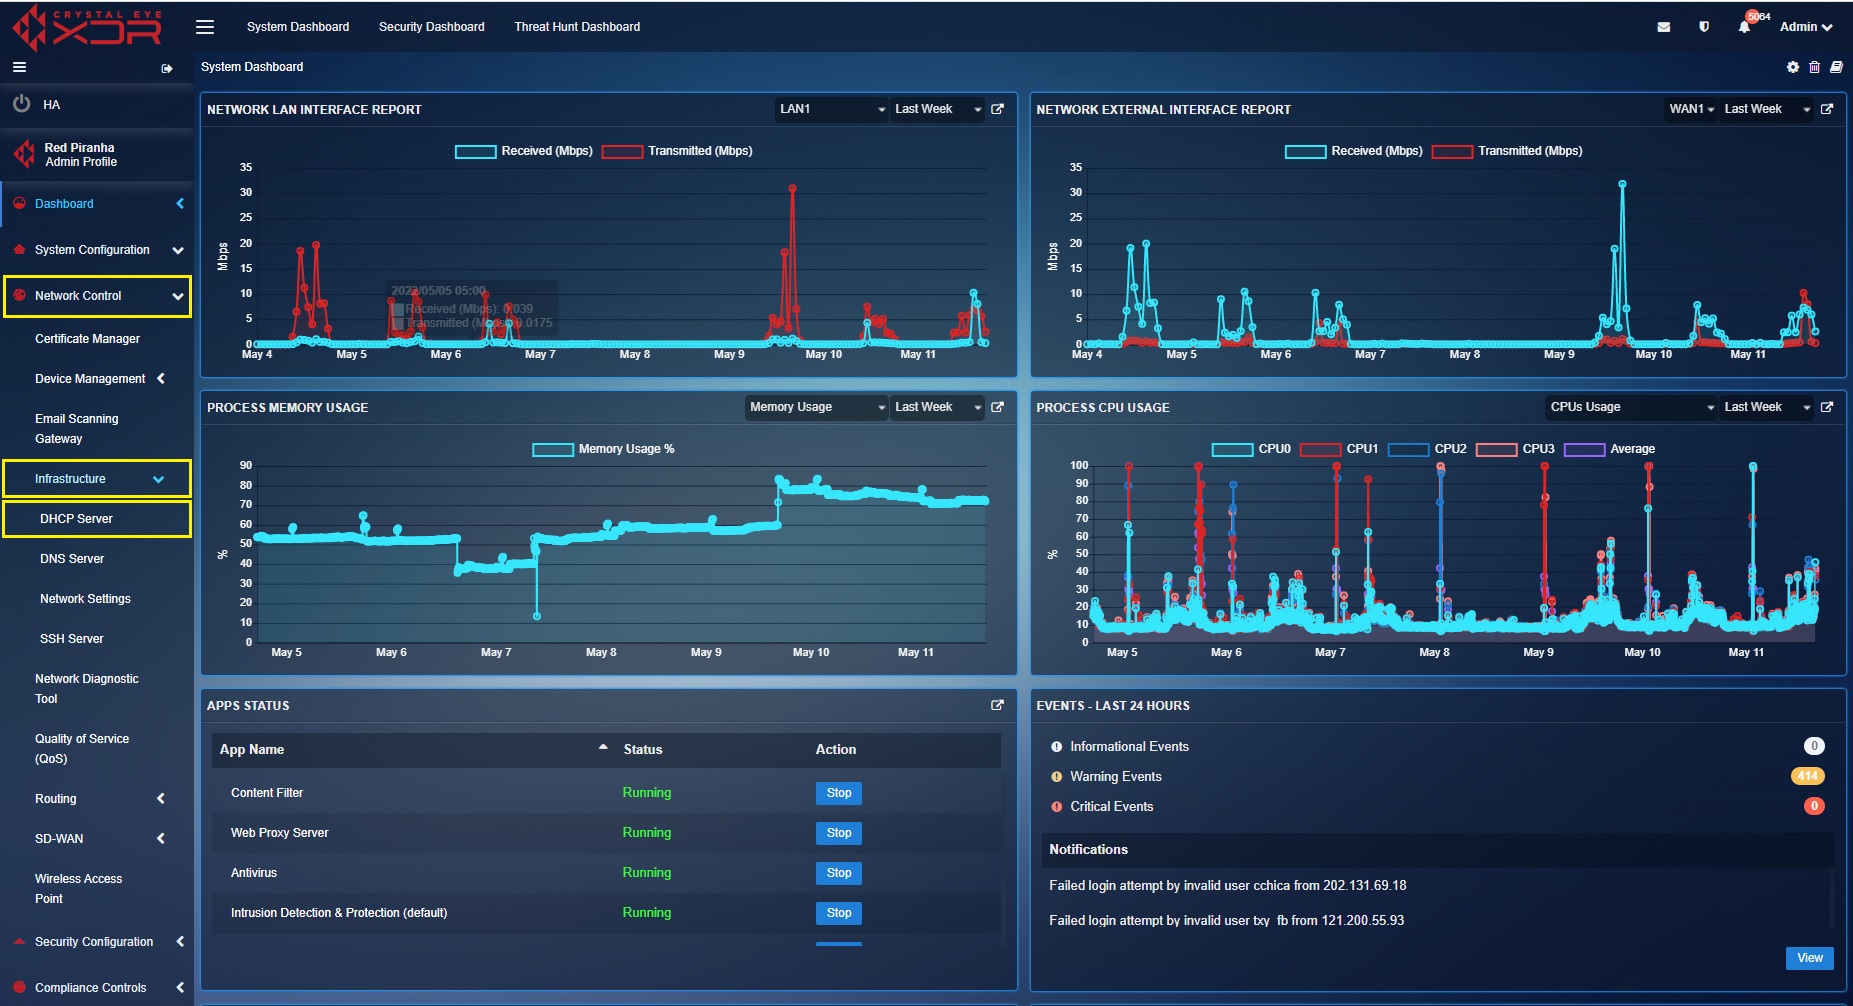 Once you have navigated to the app, you will see a list of servers that have been configured and a list of available servers yet to be configured under the Servers Tab. Once you have navigated to the app, you will see a list of servers that have been configured and a list of available servers yet to be configured under the Servers Tab.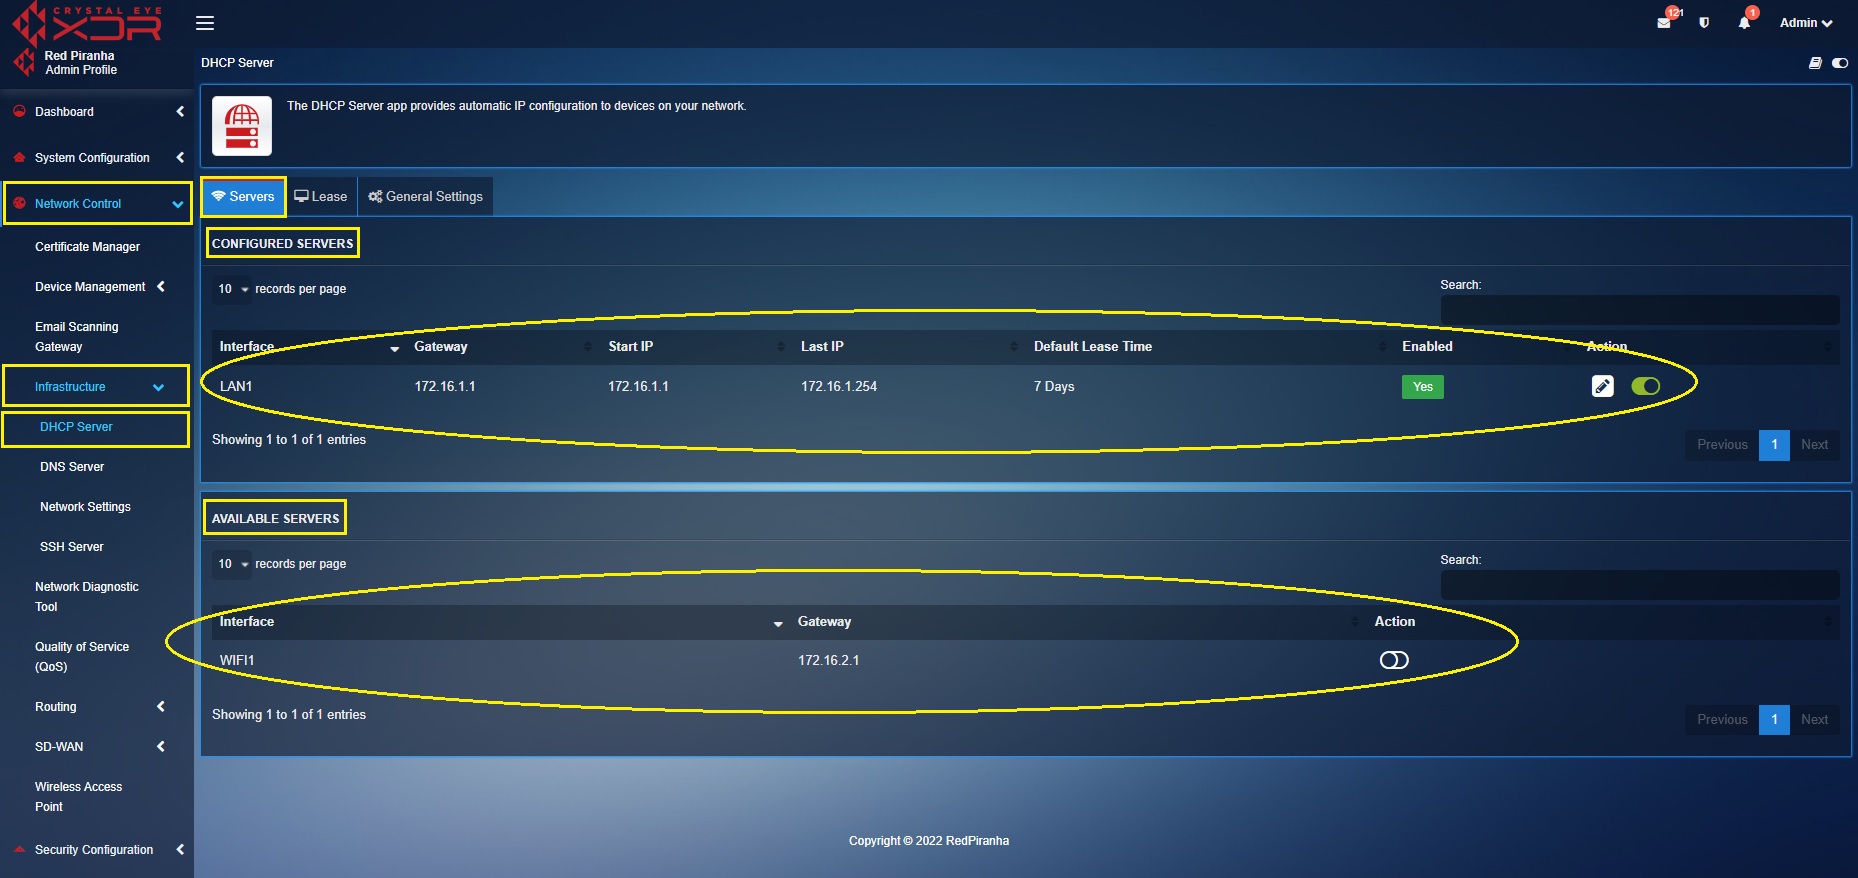 |
|---|
The CE XDR can be configured as a DHCP server for all the devices connected to its network. Specific IP pools can be assigned to the DHCP clients having the CE XDR as the DHCP server. Each DHCP server can be explicitly configured to add parameters such as DNS IP address and default gateway.
How to Configure the CE XDR as the DHCP Server for the devices connected to a LAN interface?
Step 1: While configuring the LAN interface in the Network Settings app it must be ensured that the Enable DHCP Server box is checked. Once the required fields are filled click the Update button.
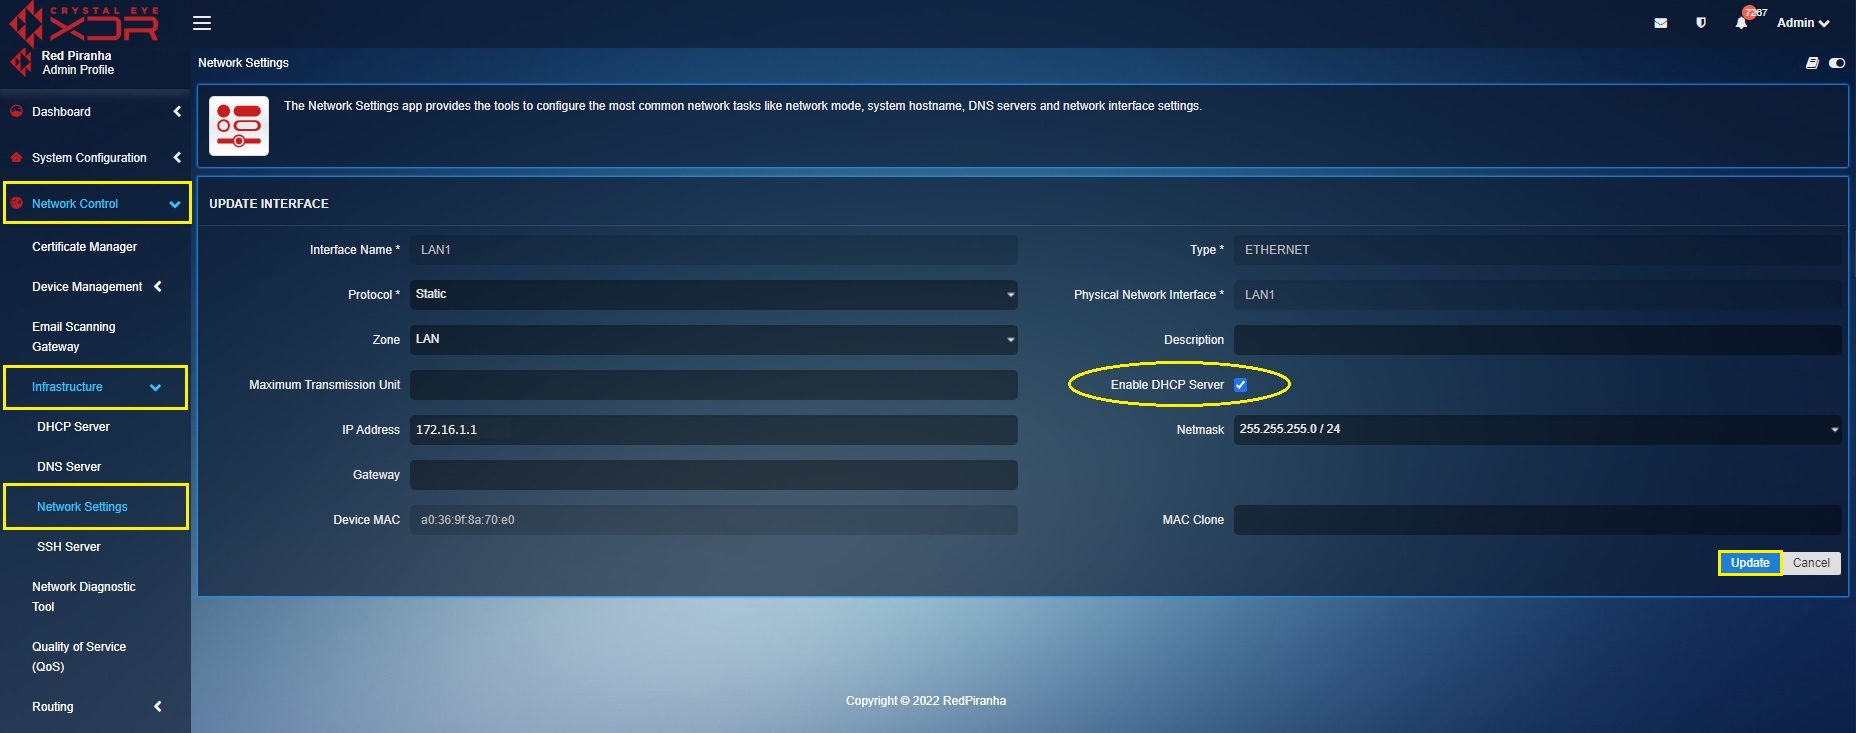
Note: You will now be directed to the Interface section of the Network Settings application. Here you will be able to see the configured interface as highlighted below.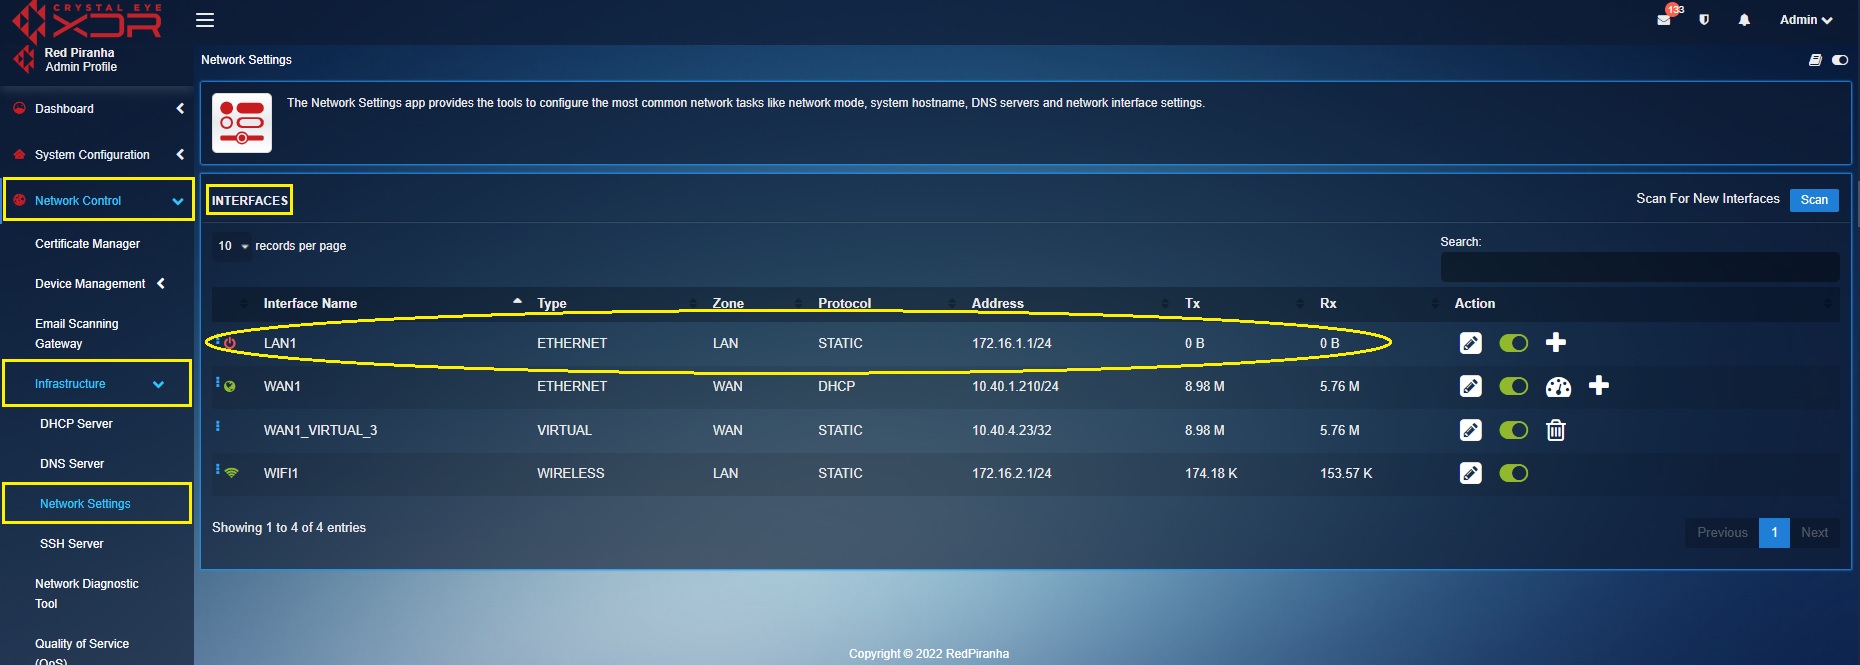
Step 2: Go to Network Control > Infrastructure > DHCP Server
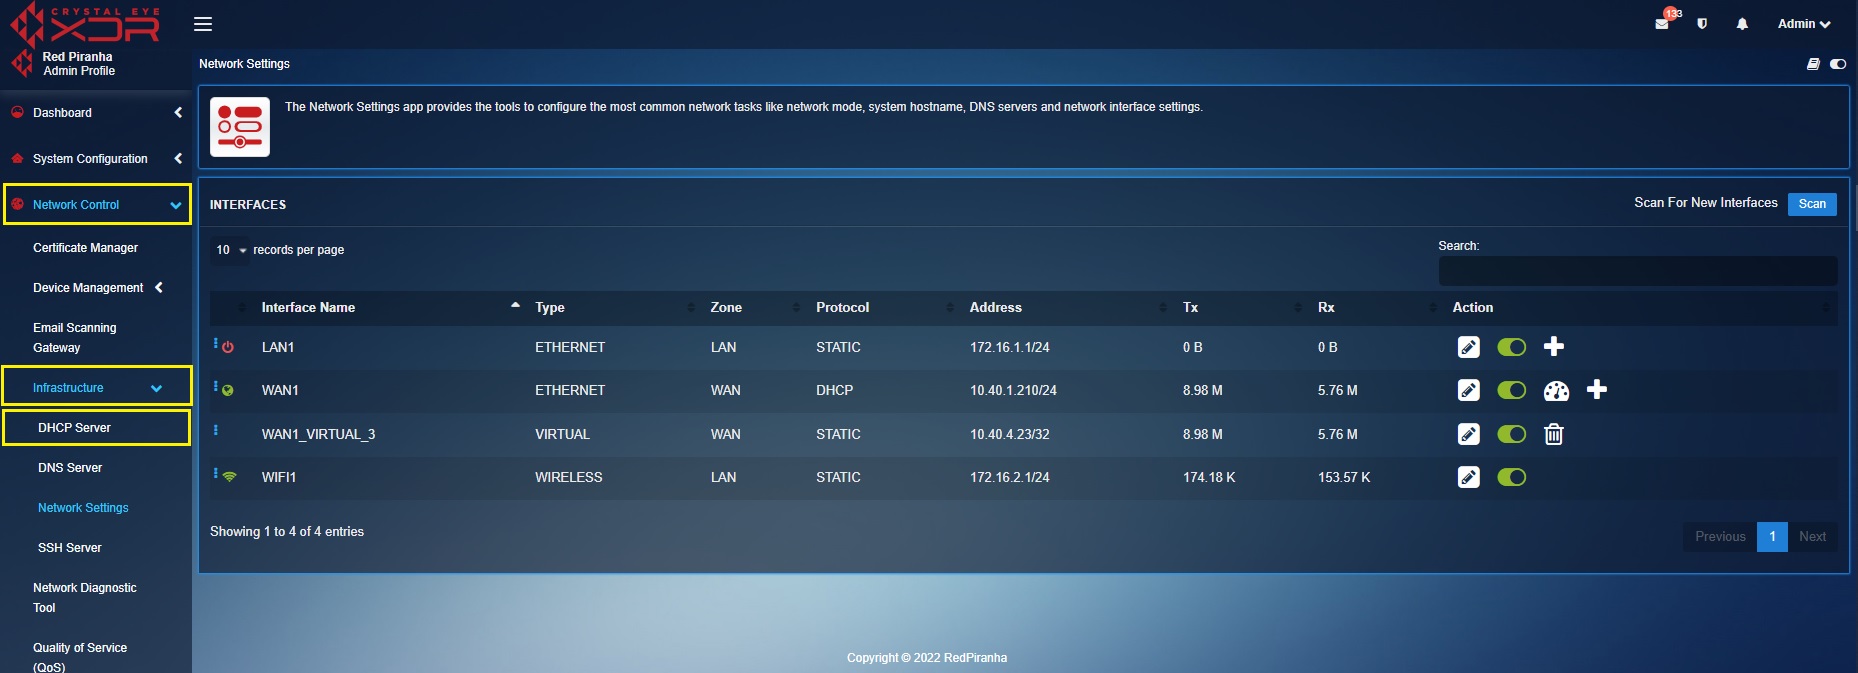
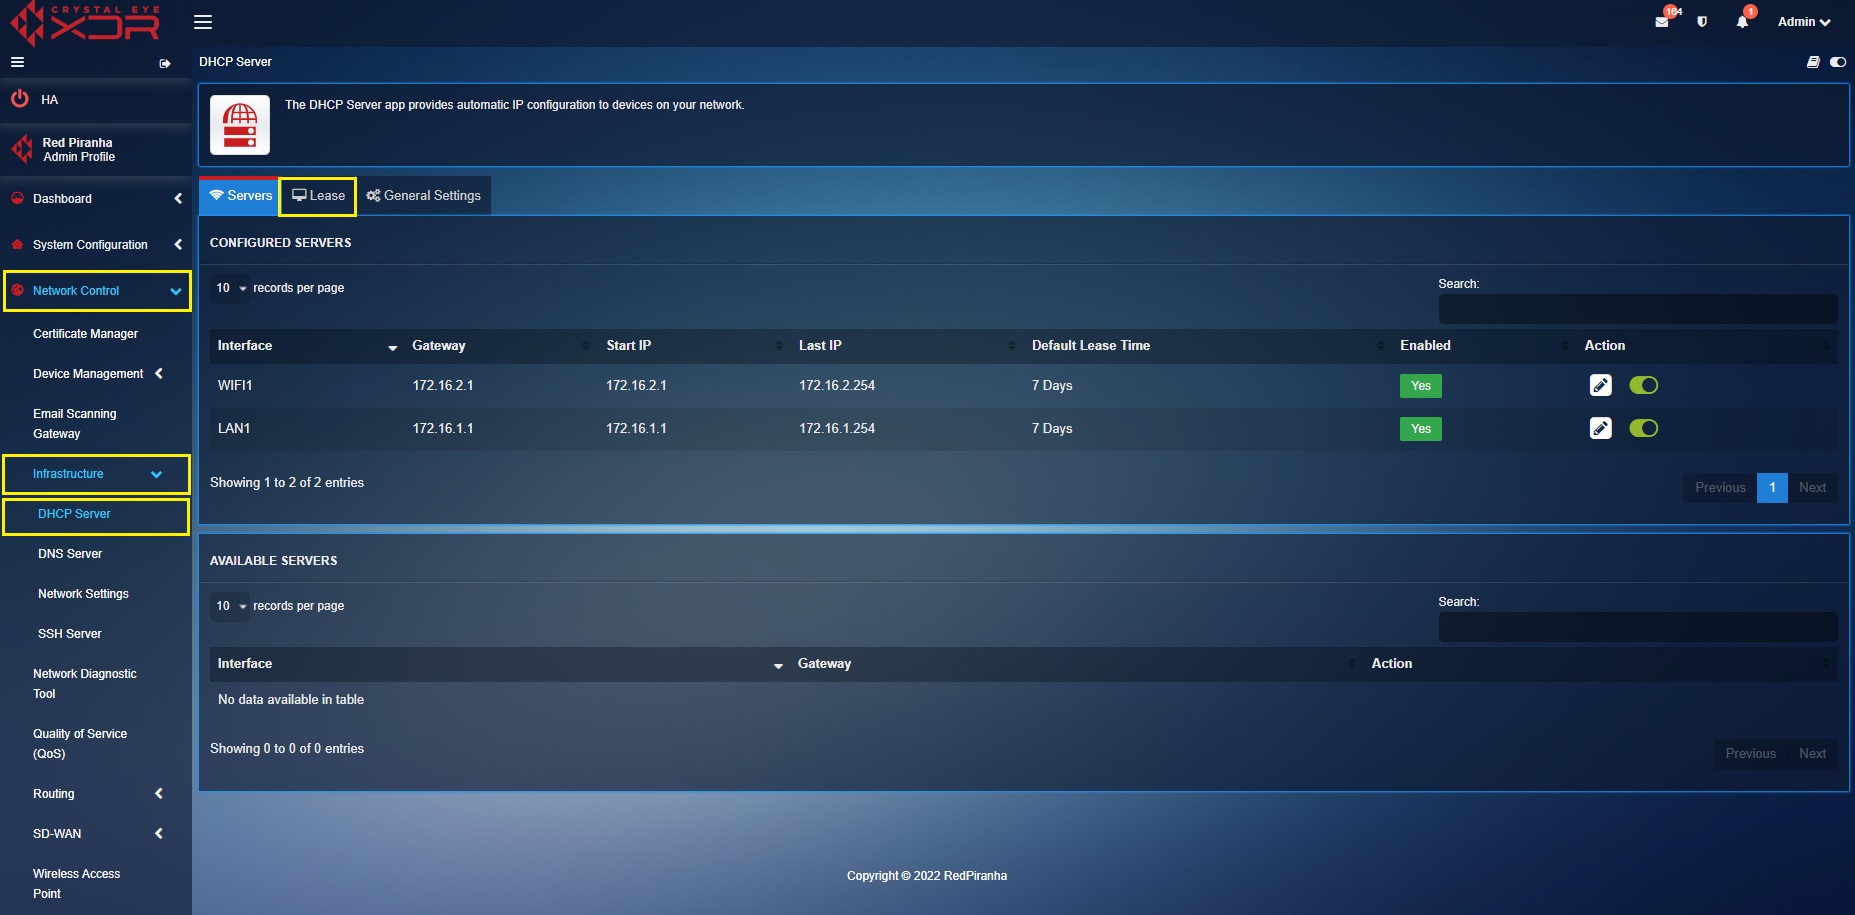
Step 3: You will now see two sections namely, Configured Servers and Available Servers.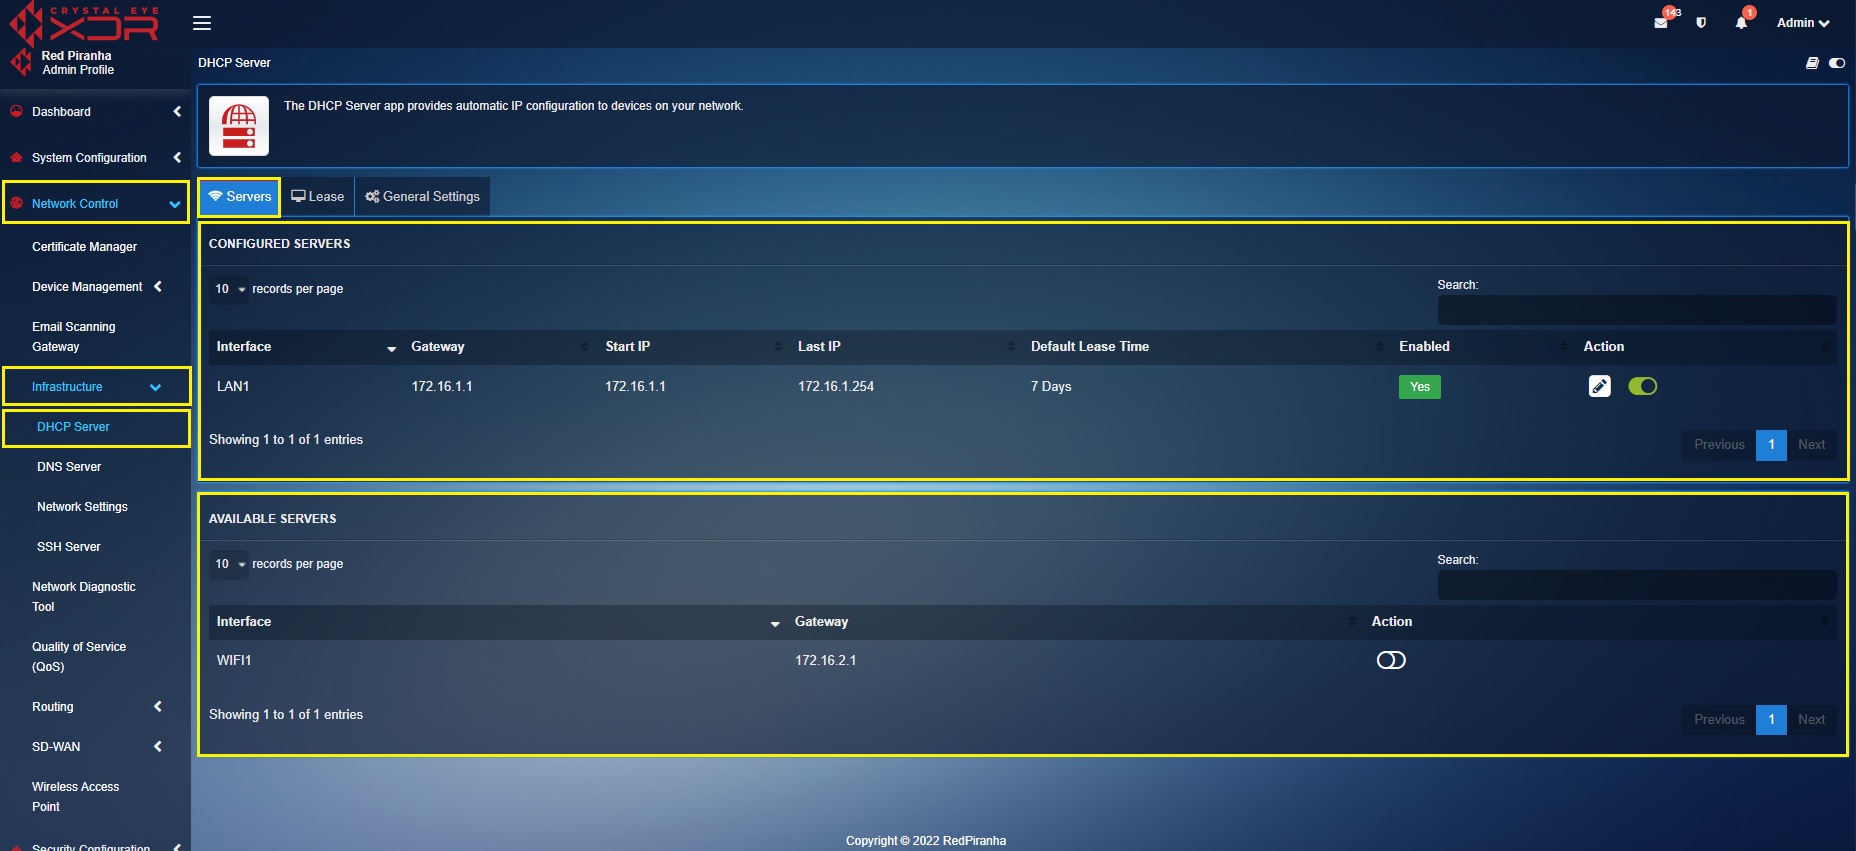
Note: The interfaces showing up in the Configured Servers section shows the interfaces for which DHCP is enabled in the Network Settings application. The interfaces that show up in the Available Server section are the one’s that don’t have DHCP enabled in the Network settings application.
Step 4: To edit a DHCP Server, click the edit action on the corresponding line for that server and you should see the following interface.
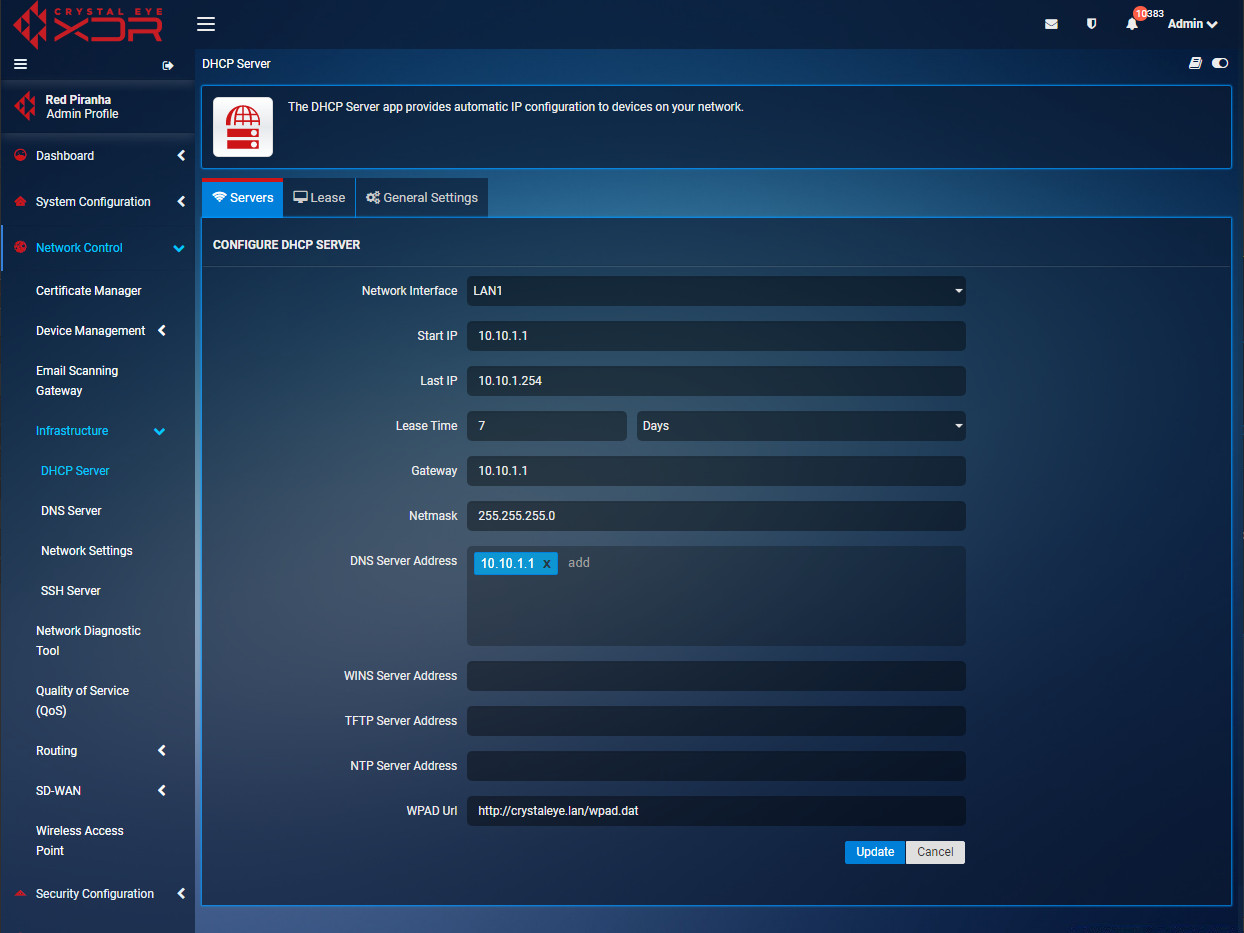
From this Configure DHCP Server interface you can modify the following settings:
- Network Interface: This will be the network interface that this server will be associated with. The network interface can be a physical, virtual or VLAN interface that is present on the Crystal Eye Appliance.
- Start IP: This is the start of the IPv4 address pool assigned to this DHCP server.
- Last IP: This is the last IP of the IPv4 address pool assigned to this DHCP server.
- Lease Time: This is the duration of the lease that will be assigned to hosts that obtain an address from this server and can be expressed in minutes, hours, days, months and years. Default value is 7 days.
- Gateway: This is the IPv4 address of the gateway assigned to the hosts that obtain an address from this server. Default value is the IPv4 address of the interface assigned to this DHCP server.
- Netmask: This is the IPv4 network mask assigned to hosts that obtain an address from this server.
Note: Default value is the netmask assigned to the interface under Network Control > Infrastructure > Network Settings > Netmask.
- DNS Server Addresses: This is a list of DNS server IPv4 addresses that will be assigned to hosts that obtain an address from this server. Default value is the IPv4 address of the interface assigned to this DHCP server.
Note: It is recommended to allow the Crystal Eye interface to be set as the DNS server to be able to perform DNS based traffic filtering in other applications.
- WINS Server Address: This is an optional field to specify the IPv4 address of a WINS server to allow legacy support of Windows Internet Name Service. By default, this field is blank.
- TFTP Server Address: This optional field is to specify the IPv4 address of a TFTP Server. TFTP Servers are typically set in environments where remote boot support is required. By default, this field is blank.
- NTP Server Address: This optional field is used to specify the IPv4 address of Network Time Protocol Server. By default, this field is blank.
- WPAD URL: This is the location of the Web Proxy Auto Discovery configuration file which allows the central configuration of Web Proxy settings on host devices connected to the network. By default, this is set to http://crystaleye.lan/wpad.dat.
The interfaces of the CE XDR in which DHCP servers are disabled shows up in the available DHCP Servers section. Here you’ll be able to view the Interface and the Gateway (of the interface). This section would essentially display the interfaces which don’t have the CE XDR configured as its DHCP server.
The Crystal Eye XDR can be used to assign static IP addresses for a device specified with its MAC address. This feature eliminates the need to set static IP manually on each device in the network.
Note: It is recommended to map the device before assigning a static IP address for it. Click here to know how to Map Devices on the Crystal Eye XDR network.
How to assign a static IP address for device connected to the CE XDR?
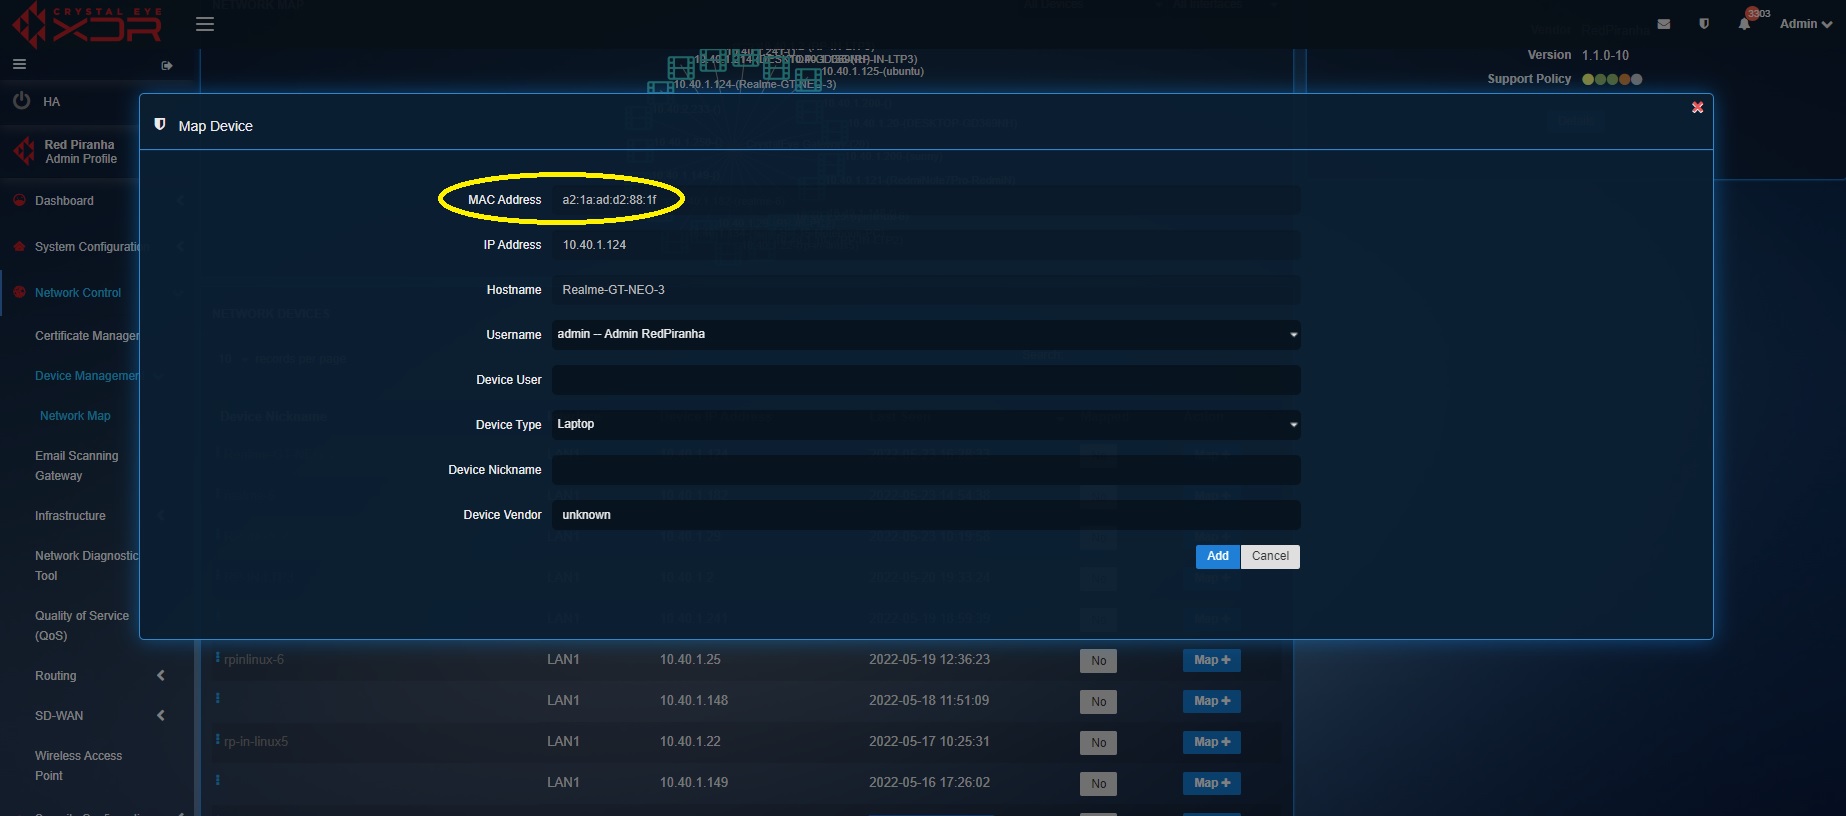
Step 1: The process of assigning a static IP address involves mapping the MAC address of the device with the assigned static IP address. The Network Map app can be used to identify the MAC address of a device connected to the CE XDR network. Go to Network Control > Device Management > Network Map. Click the Map button next to the device hostname. You will now see the Mac address of the device.
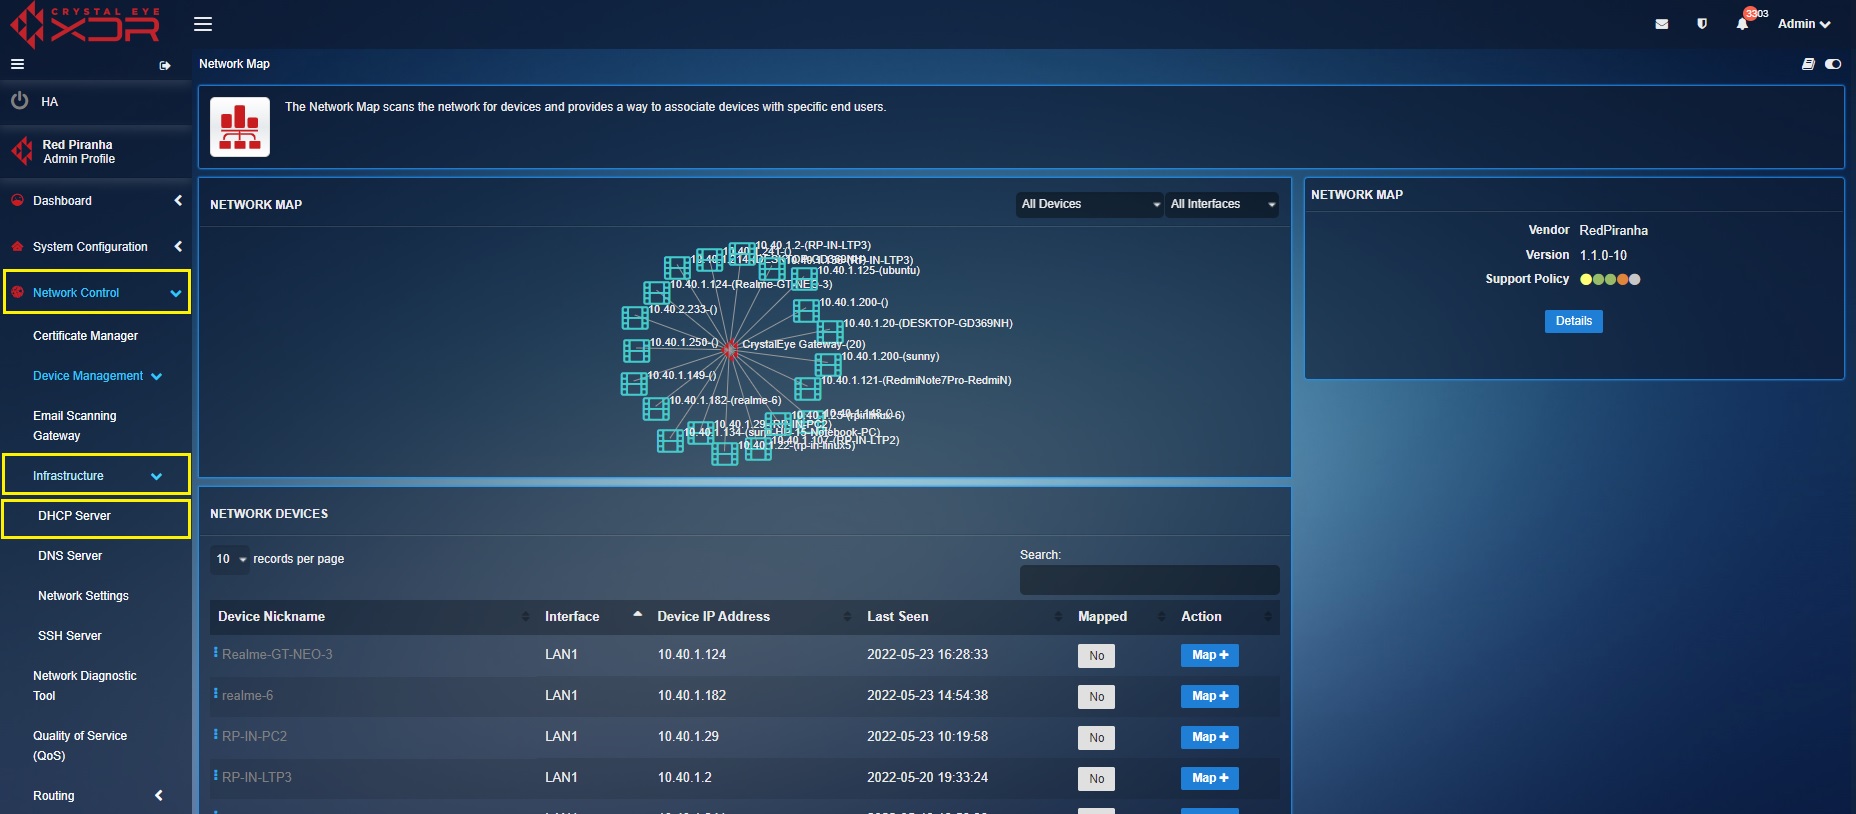
Step 2: Go to Network Control > Infrastructure > DHCP Server
Step 3: You will now be directed to the DHCP app page. Click the Lease tab.
Step 4: Click the Add button in the Static Leases section.
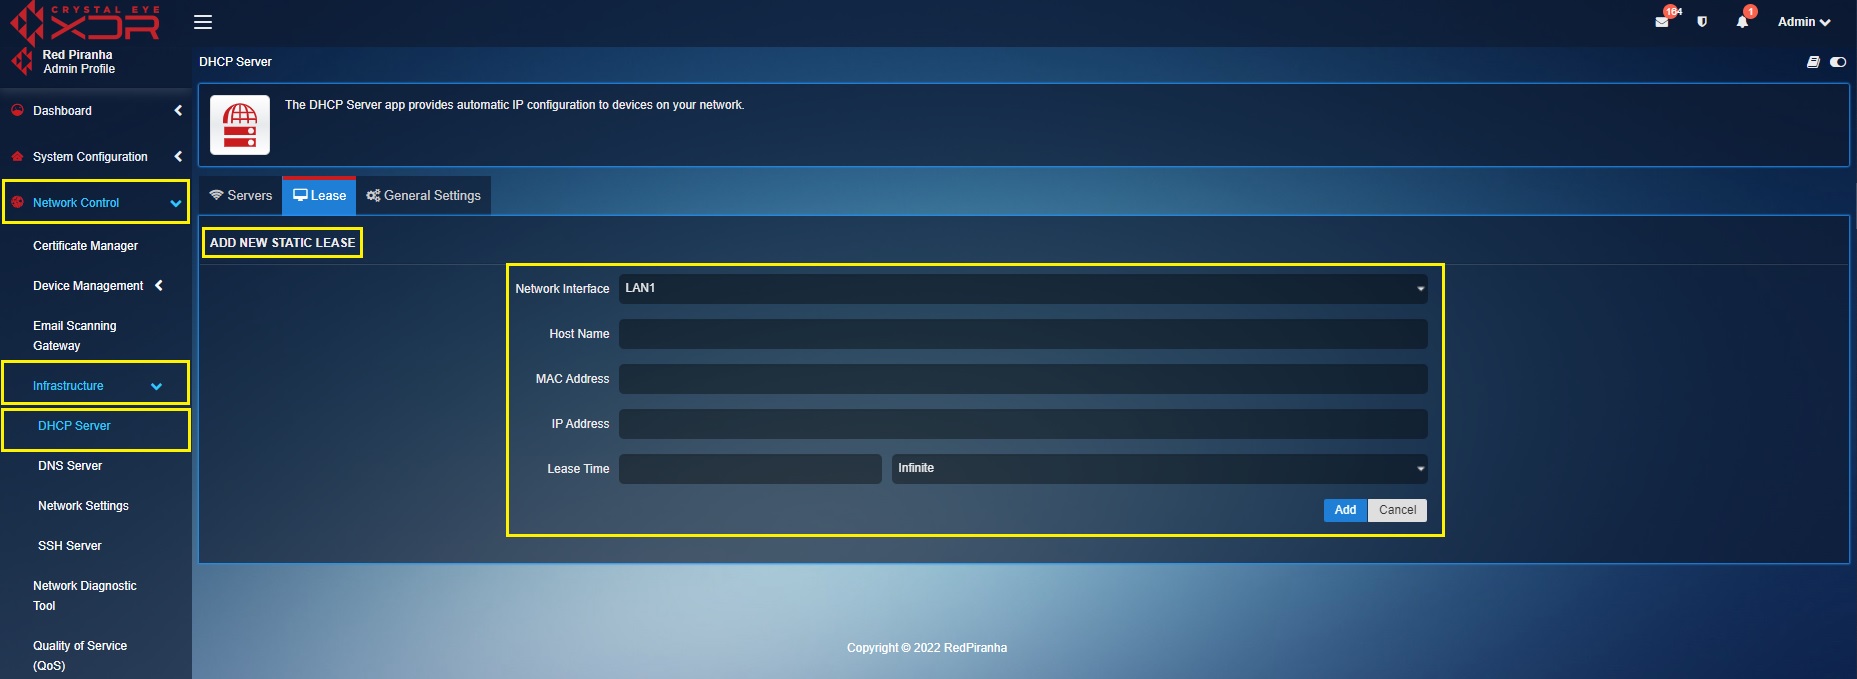
Step 5: You will now see the Add New Static Lease page. Manually select the Network Interface, enter the desired hostname, MAC Address, IP Address and Lease Time. Select the Lease Time as infinite to have a static IP address and click the Add button.
The Active Leases section under allows CE administrators to view the Lease details which shows the lease expiry details of a particular device. This sections also shows the IP address of the device, its MAC address & its Hostname.
Note: The address bar on the top right corner of the Active Leases section can be used to search the required lease records. 
The General Settings tab contains controls for enabling or disabling authoritative mode as well as setting the maximum number of sessions. In most cases, leaving this as the default is recommended except to cater for unique deployments.
