Remote-access VPN Quick Start Guide
Crystal Eye’s Remote-access VPN is a highly sophisticated functionality which essentially allows users to connect with a remote network with the help of secured connections. Crystal Eye provides cutting edge technology ensuring smooth connectivity over a VPN network. The TLS security certificate that is deployed using the Crystal Eye interface ensures a secure connection making it possible for multiple users to connect to a central site.
With the help of this quick start guide, the user would be able to extract the VPN app from the marketplace and install it. After installing the VPN app from the marketplace, the user would be able to view and use it from the navigation menu of the Crystal Eye. Multiple configurations enable the administrator to deploy a remote-access VPN successfully. Apart from these configurations, various other controls allow administrators to add new users to use Remote-access VPN.
In order to setup a Remote-access VPN with the help of Crystal Eye the user would have to,
- Install the VPN app from the Marketplace
- Configure Remote-access VPN
- Add New Remote-access VPN Users
- Configuring the OpenVPN
In Crystal Eye, the VPN App is not installed by default and must be manually installed from the Crystal Eye Marketplace
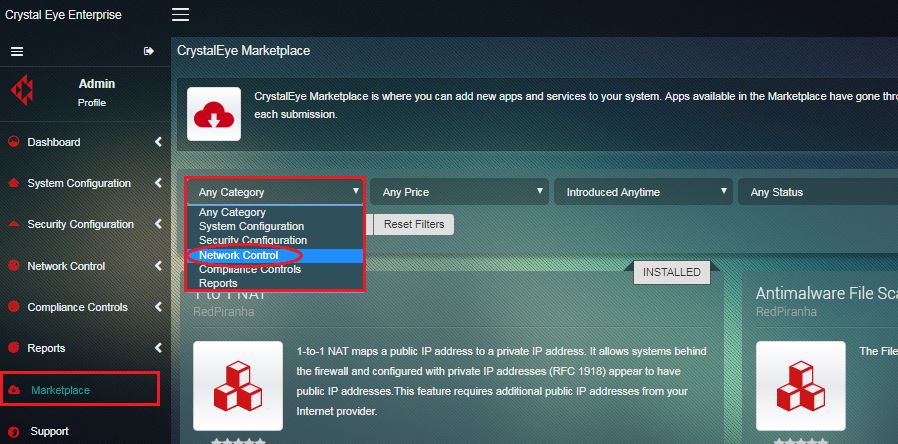
Step 1: Click ‘Marketplace’ in the Navigation Menu.
Step 2: You will now see Crystal Eye Marketplace page. Select ‘Network Control’ from the category dropdown.
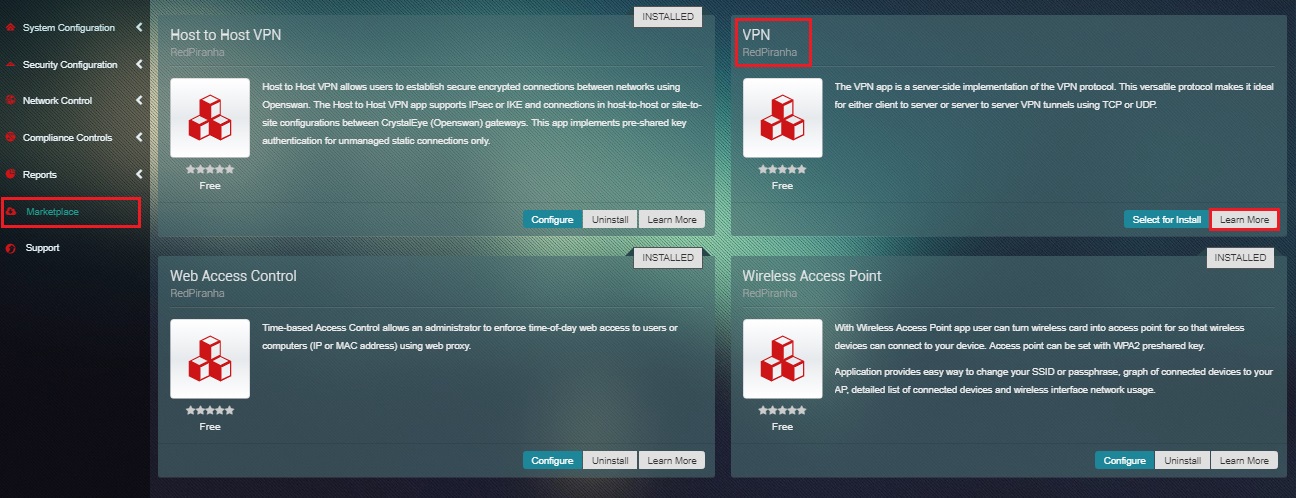
Step 3: Scroll down and click the ‘Learn More’ button in the VPN App section.
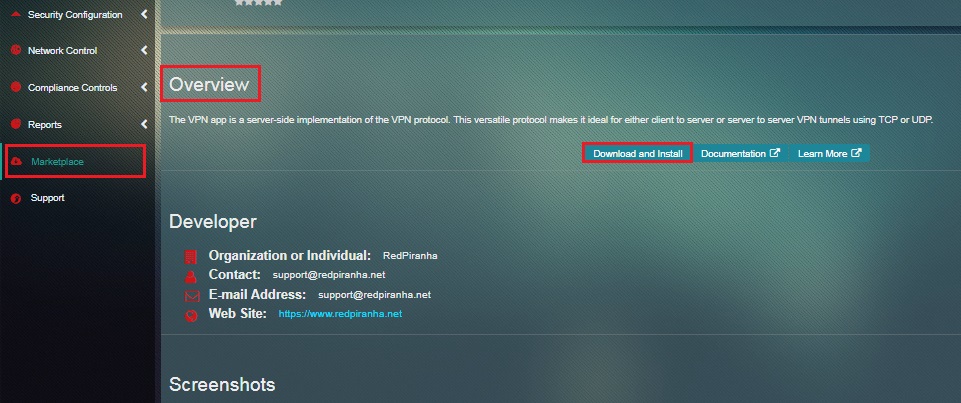
Step 4: You will see VPN App Marketplace page. Click the ‘Download and Install’ button in the Overview section.
 Please note, Crystal Eye’s VPN application is not installed by default and must be manually installed from Crystal Eye Marketplace.
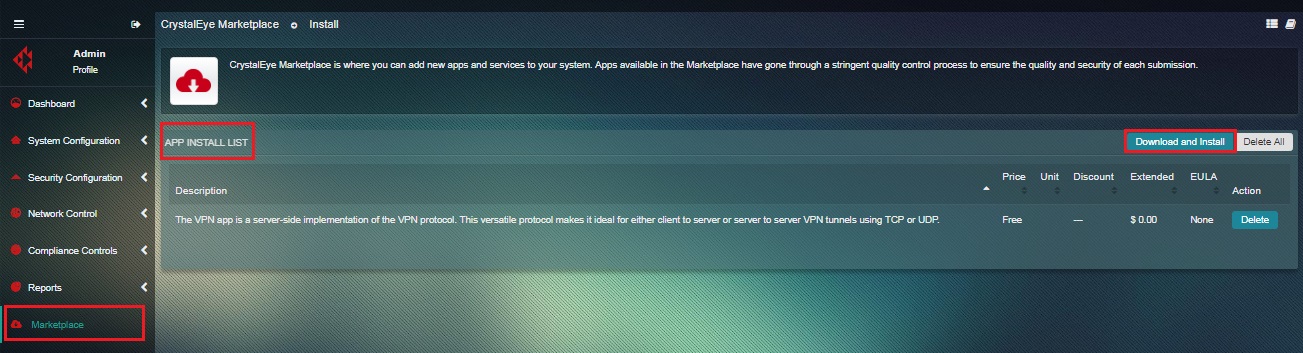
Step 5: You will now see the App Install List page. Click ‘Download and Install’
Step 6: You will be directed to the Installation Progress page. Once the installation is complete, click ‘Update Navigation Menus and Move to Dashboard’
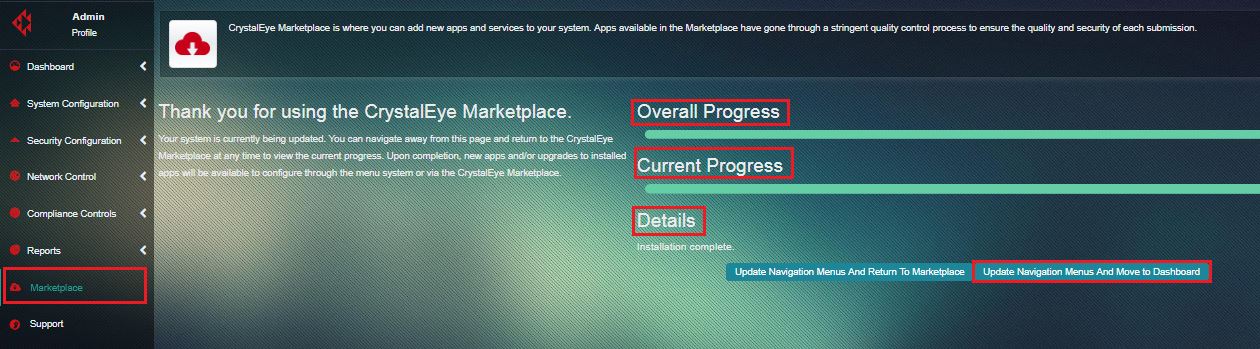 Please note, you will see an Installation Wizard Complete Status message on successful completion of the installation, and after you click the Update Navigation Menus and Move to Dashboard button, you will be able to see VPN app in the Navigation Menu.
Configuring a Remote-access VPN Connection includes generating a self-signed Transport Layer Security (TLS) Certificate and deploying it. The TLS certificate when deployed provides an extra layer of security by providing an encrypted connection.
The configuration process also includes entering the A record. An A record in your DNS that points to your external IP makes management more manageable in the future. Doing so means that in the event of your IP address changing, you only need to make one change to allow your users to continue connecting, compared to having to edit each configuration file manually.
Due to the number of DNS providers, you may need to refer to your DNS provider for instructions on how to do this. Please note that you can easily find your connection’s external IP with a quick Google search for “What is my IP”.
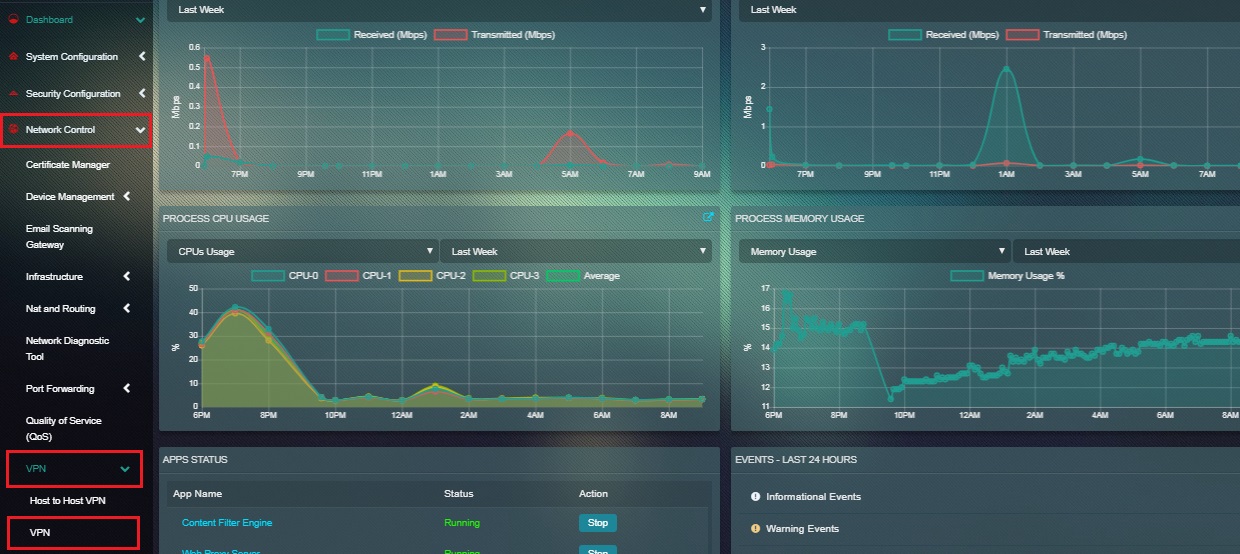
Step 1: First, navigate to the VPN app. In the left-hand navigation menu, click ‘Network Control’, and then ‘VPN’
 Step 2: You will now see the VPN app page. Click ‘Configure TLS Security Certificates’
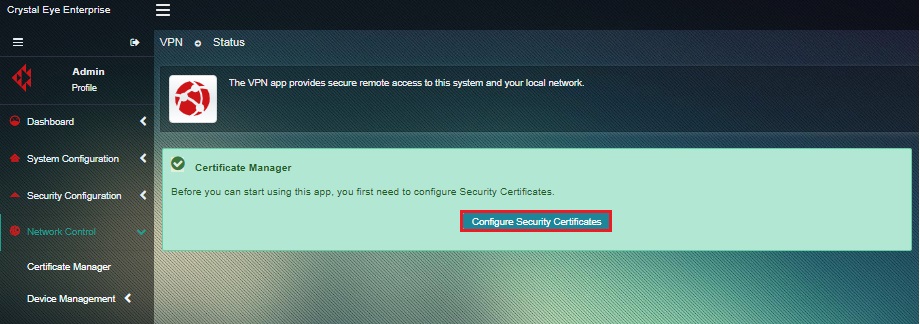 Please note, Step 2 initiates the process of generating a security certificate which plays a crucial role in providing an extra layer of security by providing an encrypted connection. If the warning about allowing outside connections appears, click on the 'Allow Connections' to automatically configure the firewall
Step 3: You will now see the Certificate Authority page. Enter the Internet Hostname, Organization Name, Unit Name, City, State, and Country in the respective text boxes and click ‘Create Certificate’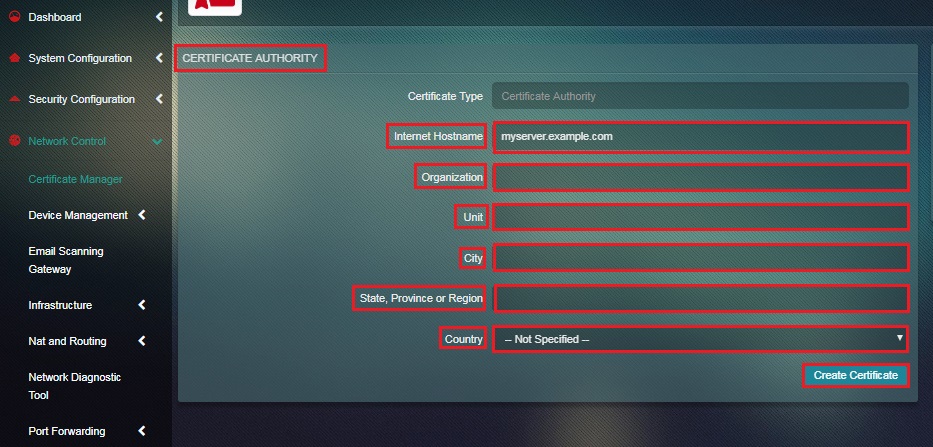 Please note, if you are running system as a standalone server on your local network, your internet hostname (e.g. myserver.example.com) may differ from the internal hostname used by Crystal Eye (e.g. myserver.lan)
Step 4: Click the ‘Continue’ button to move on with the new TLS security certificates. Please note, after clicking the continue button, the web interface will automatically restart after generating the new TLS security certificates.
Next, you need to add an A record to your DNS that points to your external IP, to make management more manageable in the future. Doing so means that in the event of your IP address changing, you only need to make one change to allow your users to continue connecting, compared to having to edit each configuration file manually.
Due to the number of DNS providers, you may need to refer to your DNS provider for instructions on how to do this. Please note that you can easily find your connection’s external IP with a quick Google search for “What is my IP”.
Step 5: Once the A Record has been added, navigate to the IP Settings app. Navigate to IP Settings app: Left-hand Navigation Panel > Network Controls > Infrastructure > IP Settings 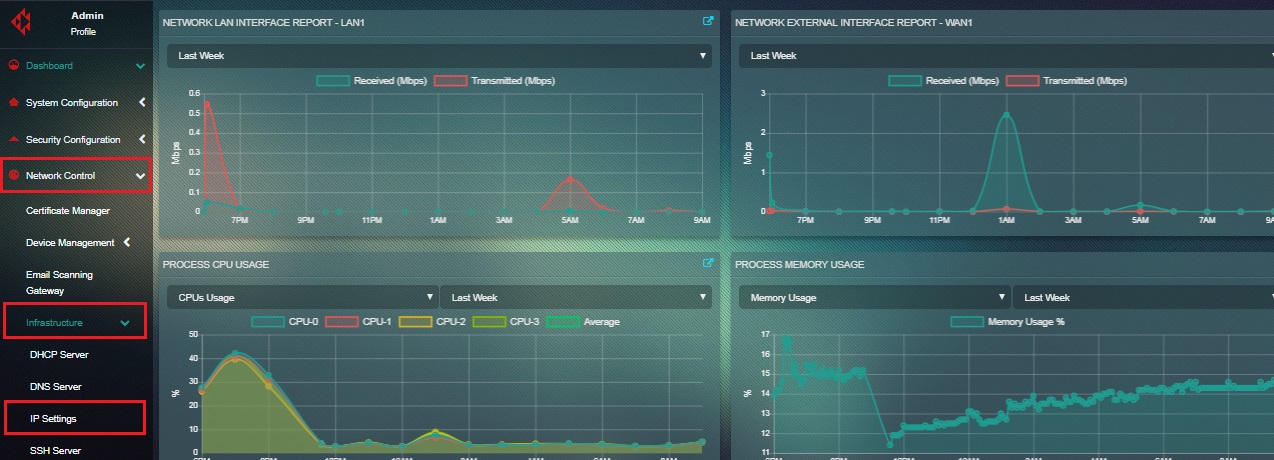
Step 6: You will now see the IP Settings app page. Click ‘Edit’ in the Settings section.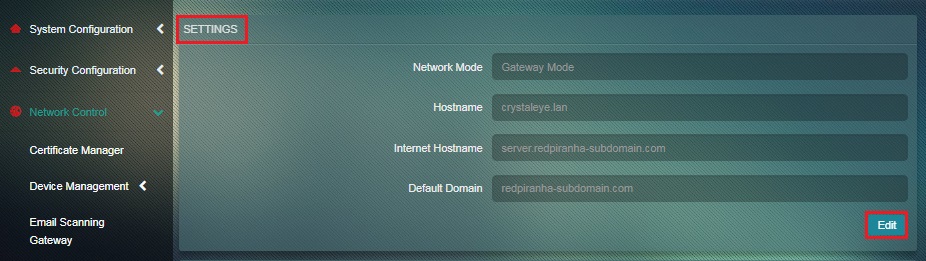
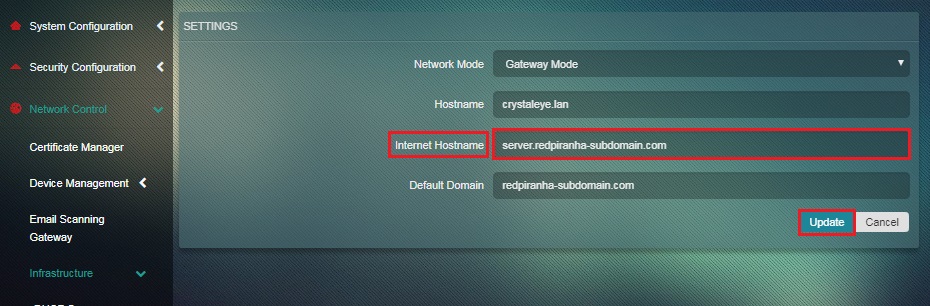
Step 7: You will now see the Settings page. Replace the contents of the Internet Hostname field with your new A record and click ‘Update’.
Please note, in this example we will use vpn-example.redpiranha.net
Step 1: Navigate to the Users app in the left-hand navigation panel.
Navigate to Users app: Left-hand Navigation Panel > System Configuration > Account Manager > Users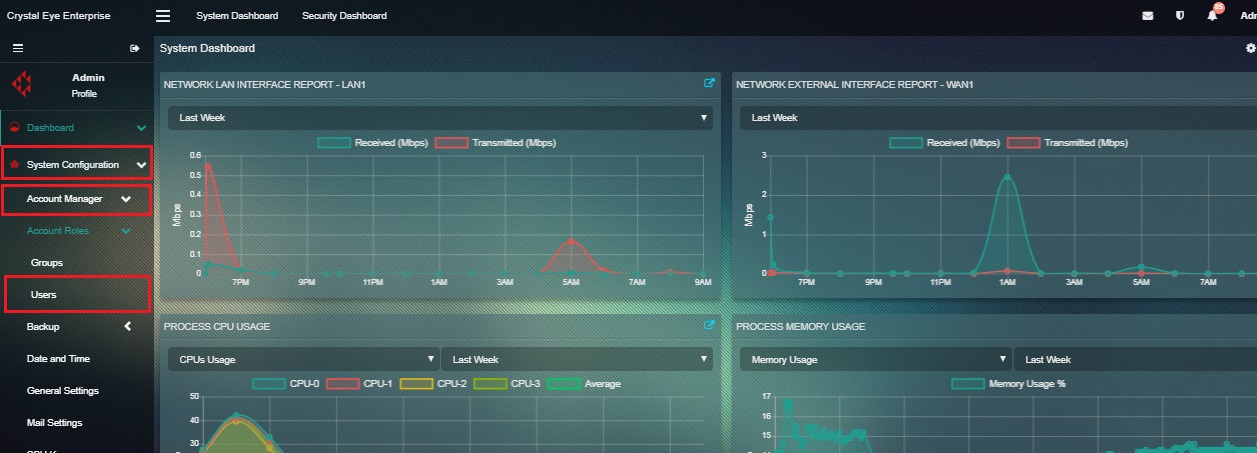 Step 2: You will now see the Users app page. To add a new user, click ‘Add’
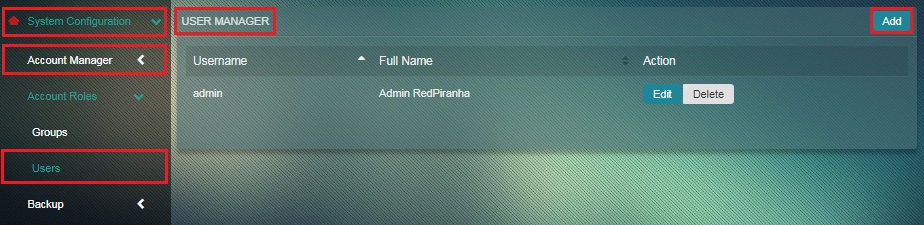 Step 3: You will now see the User Manager Form page. Enter the Username, First Name, Last Name in the Name section.
  Step 4: Now, enter the desired password and re-enter it in the field below.
  Please note, Red Piranha recommends using strong passwords of at least 20 characters in length made up of numbers (123) letters of mixed case (ABCabc) and symbols ($%^&) in your passwords. We also recommend instructing your users in proper password storage, to prevent loss or leaking of credentials)
Step 5: In the App Policies section, use the Enable/Disable dropdown to enable or disable OpenVPN User, Security Certificate User, and Web Proxy User.
Please note, Red Piranha recommends using strong passwords of at least 20 characters in length made up of numbers (123) letters of mixed case (ABCabc) and symbols ($%^&) in your passwords. We also recommend instructing your users in proper password storage, to prevent loss or leaking of credentials)
Step 5: In the App Policies section, use the Enable/Disable dropdown to enable or disable OpenVPN User, Security Certificate User, and Web Proxy User.  Please note, by default, users created will have OpenVPN, Security Certificate and Web Proxy enabled.
Step 6: In the Groups section, select the tick box against the desired group the user is designated to and click ‘Add’
Please note, by default, users created will have OpenVPN, Security Certificate and Web Proxy enabled.
Step 6: In the Groups section, select the tick box against the desired group the user is designated to and click ‘Add’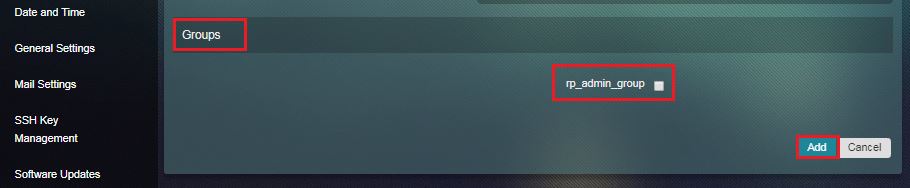 Please note, after filling in the form and saving it, you will be presented with the user list again, with your newly created user.
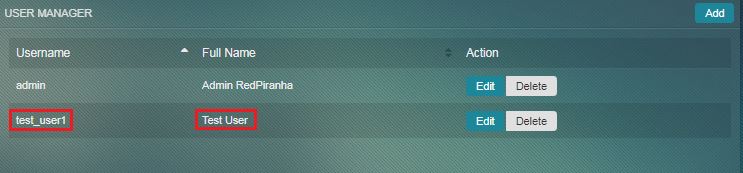
Step 7: Log in to CE as the newly created user using the new password
Note: In this case the new username is test_user1  Step 8: Navigate to User Certificates app. Navigation Panel.
 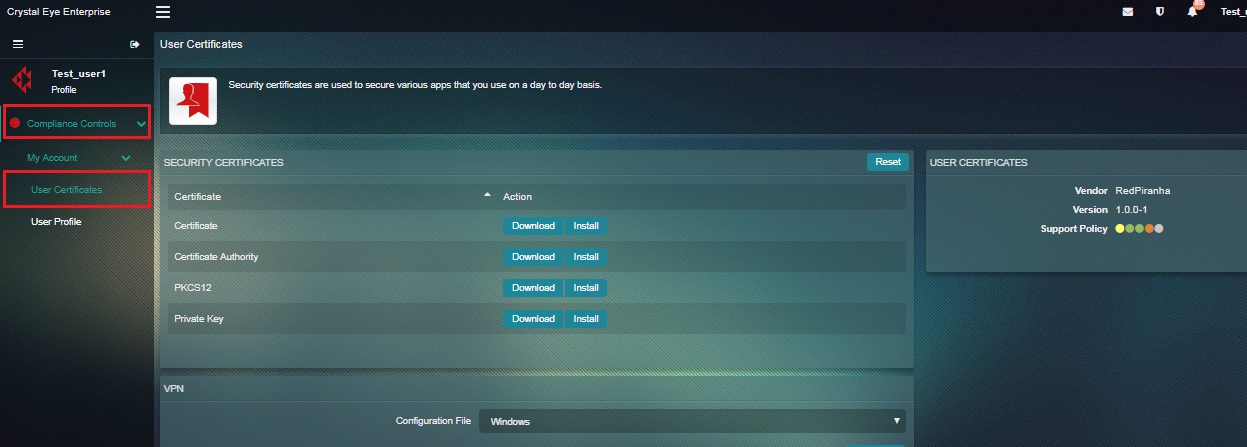 Step 9: You will now see the User Certificates app page. In the Settings section, enter the password of the newly created user and click the ‘Create Certificates’ button.
Step 10: You will now see the interface to download the configurationfor the OpenVPN client. Select the Operating System for which the OpenVPN Configuration File is required from the dropdown and click the Download button. 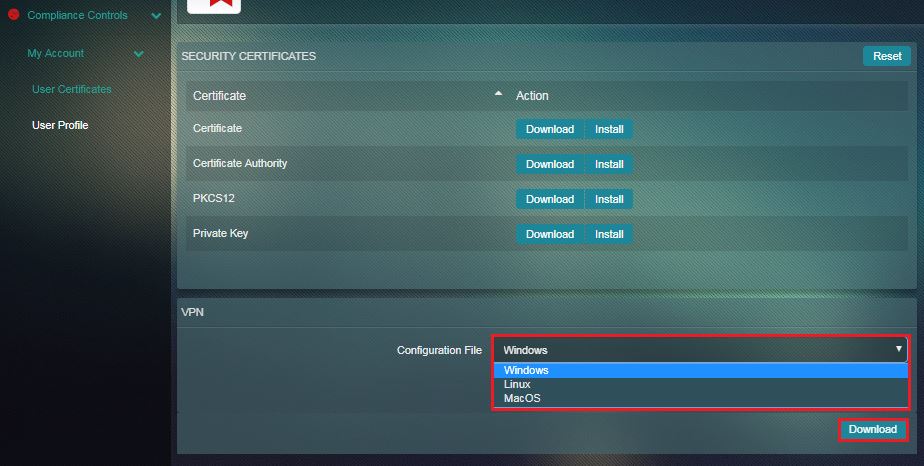 Please note, users can download OpenVPN configuration files for Windows, Linux and MacOS. Each configuration contains each user's unique certificates. You cannot reuse a configuration file for every user.
Step 1: Download and install OpenVPN from https://openvpn.net/community-downloads/
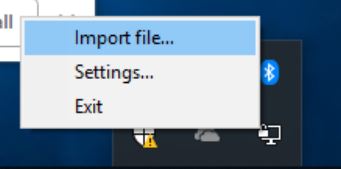
Step 2: Start the OpenVPN GUI As Administrator from the desktop / start menu icon, then right click the icon in the task bar icon and click on Import File.
 Step 3: Browse to the .ovpn file and open it. After it is imported, right click on the OpenVPN icon again, and click Connect.
Enter the user’s credentials, and they will be granted access to the network, and will be able to access the internet as if they were at the office, as well as access the LAN!
Please note, OpenVPN will NOT function properly if not run as administrator.