Content Filter
The primary functionality of the Content Filter application is to block websites that are considered ‘inappropriate’ and work as web filter. Although the application comes with default settings, the administrator can setup customized content filtering policies based on standard block parameters such as Blacklists, Phrase Lists, MIME Types, File Extensions, Banned Sites, Gray Sites, and Exception Sites. The content filter application is capable of blocking both ‘http’ and ‘https’ connections with the help of default or manually configured content filtering policies. The content filter policies can be assigned to a group of users or to specific devices connected to the Crystal Eye network.
Left-Hand Navigation Panel > Security Configuration > Content Filter 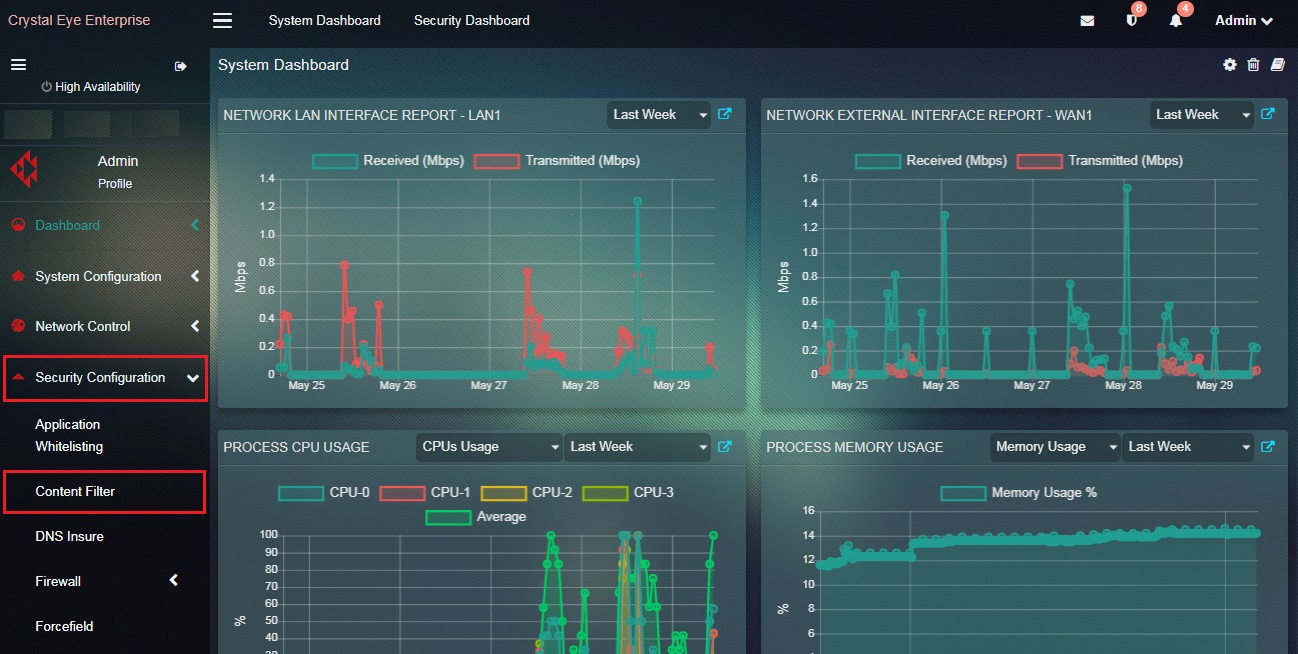 |
|---|
The Exception IPs feature of Crystal Eye’s content filter application provides the much required leverage for CE administrators to quickly permit IPs and exclude them from various block categories. This feature of Crystal Eye is widely appreciated for its ability to reduce the administrative burden of CE administrators because the policy assigned to the end clients are not changed during this process.
How to Add Exception IPs Applicable to All Users & Groups in the Crystal Eye Network?
Step 1: In the Configuration Settings page, click the Edit button next to Exception IPs under the Global Settings section.
Step 2: You will now see the Listing page of the Exception IPs. Click the Add button under the Exception IPs section.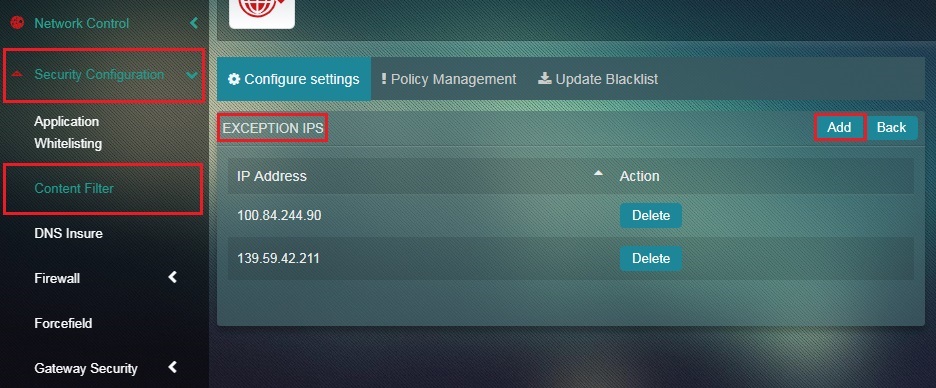
Note: The whitelisted IP address can also be deleted from the IP listing page by clicking the delete button.
Step 3: You will now see the Exception IPs page. Enter the IP Address that needs to be whitelisted in the textbox and click Add button.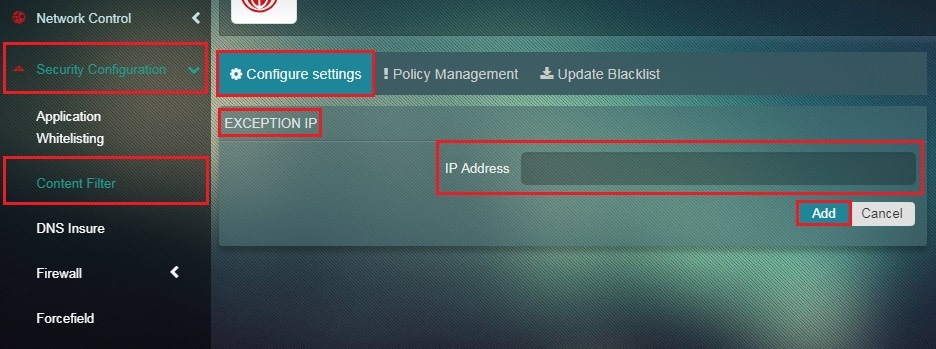
The Banned IPs feature of Crystal Eye’s content filter would block the listed IPs from accessing the internet.
How to Add Banned IPs Applicable to All Users & Groups in the Crystal Eye Network?
Step 1: In the Configuration page, click the Edit button next to Banned IPs in the Global Settings section.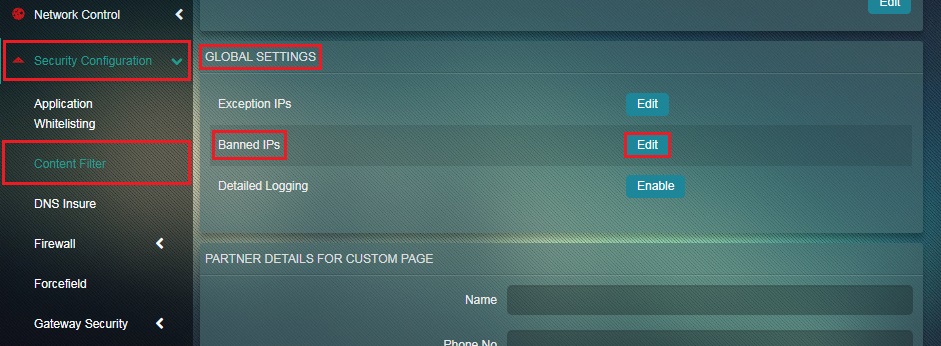 Step 2: You will now see the listing page of the Banned IPs. Click the Add button under the Banned IPs section.
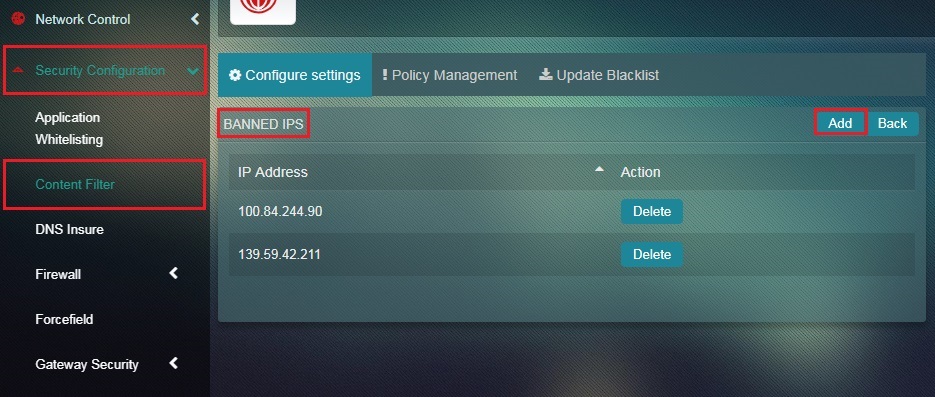
Note: The Banned IPs can be deleted if required from the listing page.
Step 3: You will now see the Banned IP page. Enter the IP Address which needs to be banned in the textbox and click the Add button.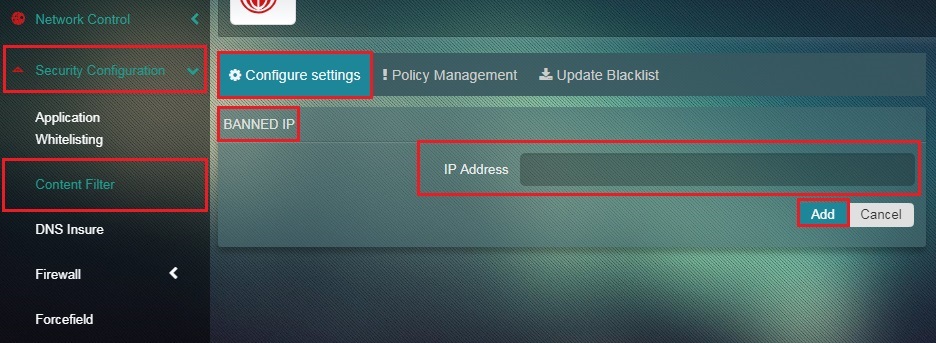
The detailed logging feature of the Content Filter application when enabled enhances logging capabilities of the Crystal Eye with more verbosity to provide more information. Detailed logging can be enabled to set a higher log level which can be effectively used while troubleshooting and for diagnostic purpose.
Note: The detailed logging feature is disabled by default. It is recommended to enable detailed logging only for diagnostic purpose as the logging might consume more disk space.
How to enable/disable detailed logging?
Step 1: In the Configuration page, click the enable/disable button in the Global Settings section.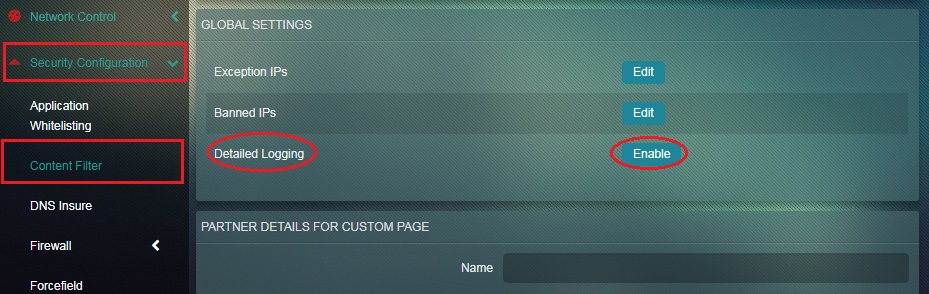
Crystal Eye’s Content Filter application can be setup to filter both HTTP and HTTPS traffic. This can be done when the CE appliance runs on Transparant Proxy + No Authentication mode, Explicit Proxy + User Authentication mode and Explicit Proxy + No User Authentication mode.
The Content Filter application filters only HTTP traffic while the CE runs on the above mentioned proxy modes. However, HTTPS traffic can be filtered by enabling SSL Decryption in the Rules section of the Web Proxy Server application.
Note: By default, Crystal Eye’s Content Filter application is configured to run on Transparent Proxy + No Authentication mode with SSL decryption disabled. This also means that the CE appliance filters only HTTP traffic while it runs on this web proxy mode.
How to configure CE’s Content Filter application to filter both http and https traffic simultaneously?
Step 1: In the Web Proxy Server application, select the desired web proxy mode. You may select Transparant Proxy + No Authentication mode, Explicit Proxy + User Authentication mode or Explicit Proxy + No User Authentication mode.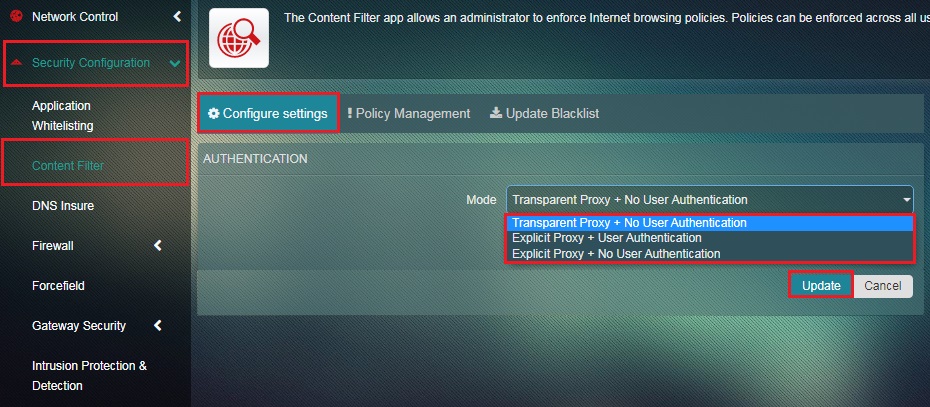
Note: If there is a requirement for proxy user authentication then select Explicit + No User Authentication mode. In context to content filter application; this web proxy mode will enable web traffic filtering when the user enters the designated user credentials on the browser.
Step 2: To ensure HTTPS traffic is filtered, click the Enable button in the SSL Decryption row of the Rules section. 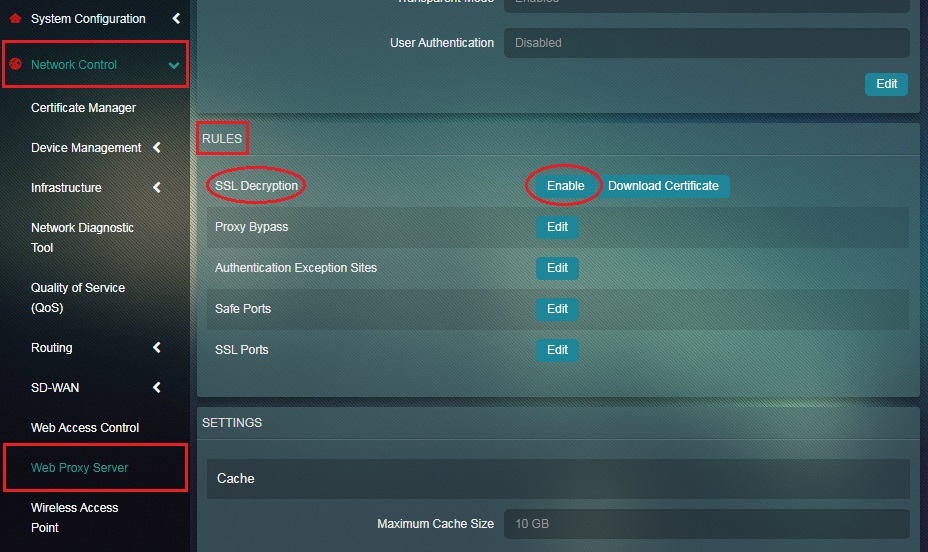 Step 3: Click the Download Certificate button in the SSL Decryption column under the Rules section.
 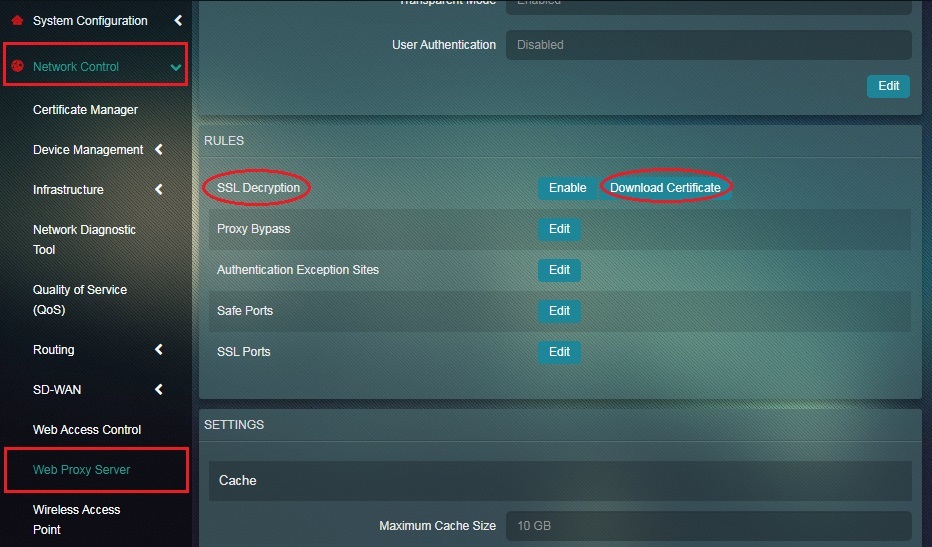 Step 4: Install the CE Certificate to the browser if you are using a Laptop. Read below to know how to install certificates in Google Chrome and Morzilla Firefox browsers.
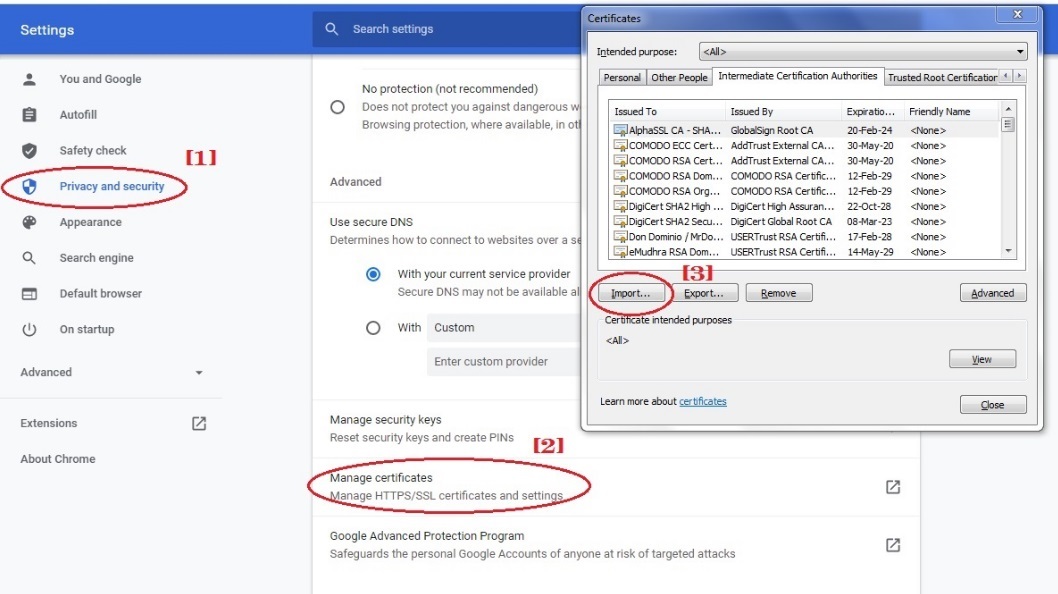
Follow the steps below to install CE certificate in Google Chrome:
Go to Settings > Privacy and security > Security > Manage Certificates > Intermidiate Certification Authorities > Click Import button and import the CE certificate
Note: Ensure that the browser is set up to automatically detect proxy settings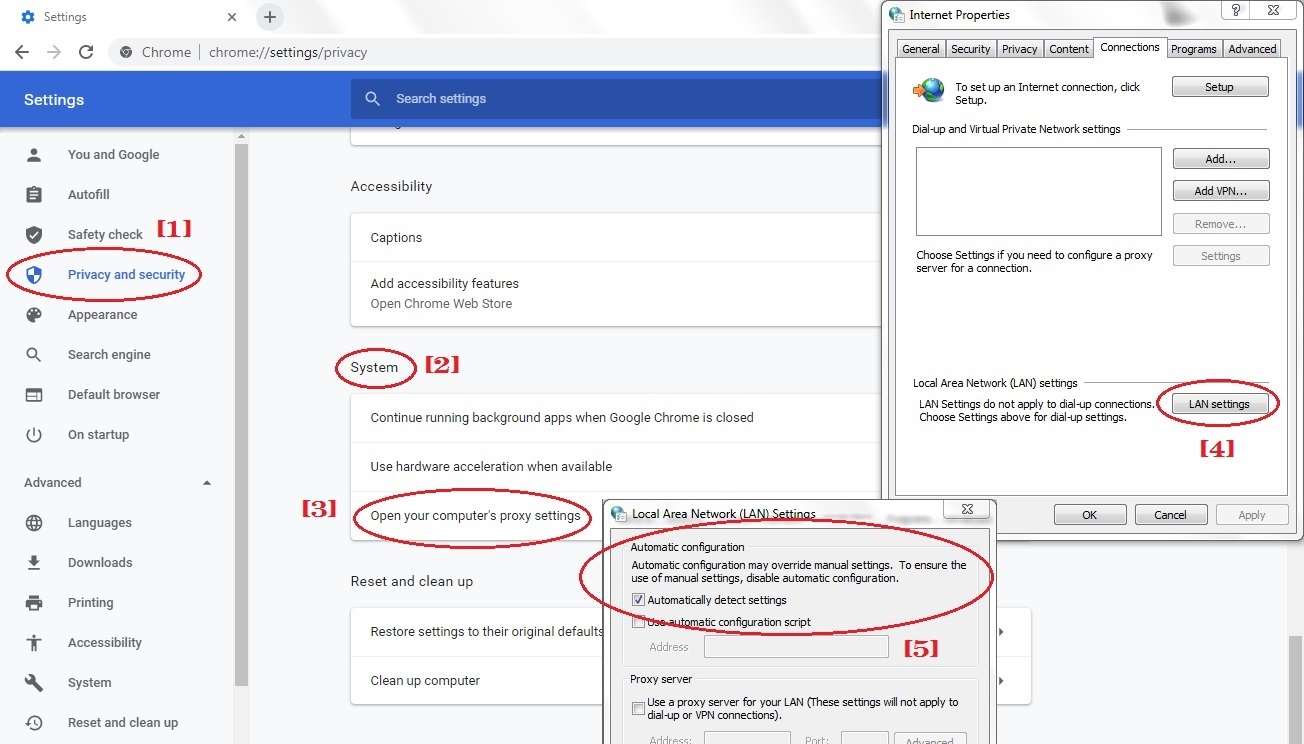
Follow the steps below to install CE certificate in Morzilla Firefox:
Type ‘about:preferences’ in the browser > Privacy and Security > Certificates > Certificates Manager > Authorities > Click Import button and import the CE certificate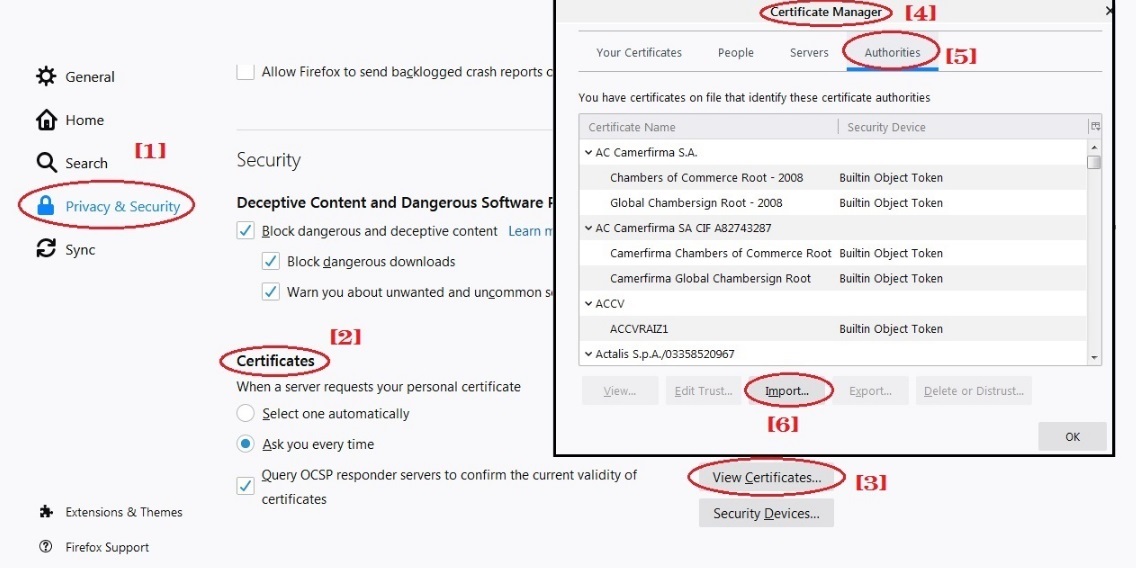
Note: Ensure that the browser is set to automatically detect proxy settings (Go to Network Settings > Select Auto-detect proxy settings for this network)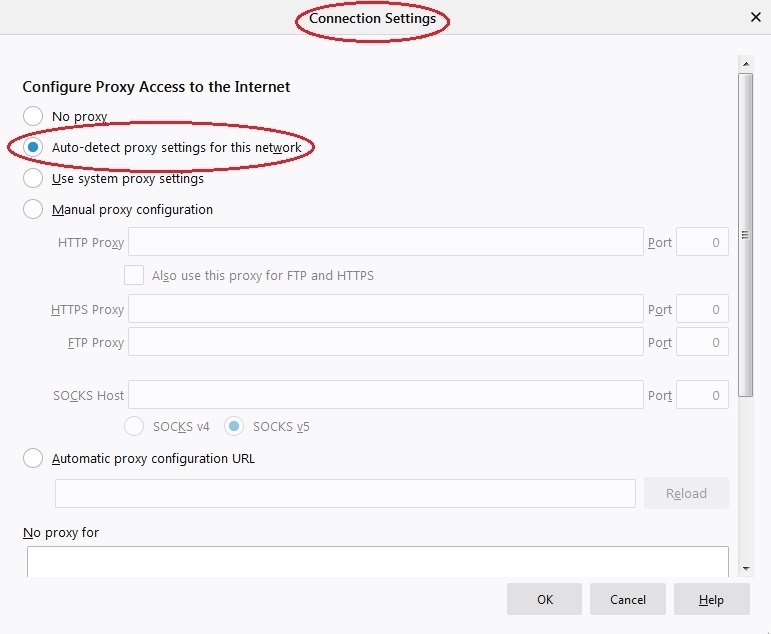
The core functionality of Crystal Eye’s Content Filter application is to enable policy based web filtering. Hence, content filter policy plays an important role to define what kind of online content to filter. The application comes with default policy settings, however, if required, customized content filter policies can also be created.
Here under the Policy Management page the CE administrators can create and name a content filter policy and then assign it to a particular IP address or MAC address. Creating a content filter policy primarily involves naming it and post that various content filter components are fine tuned as per requirements.
How to create a content filter policy and name it?
Step 1: Go to Policy Management page.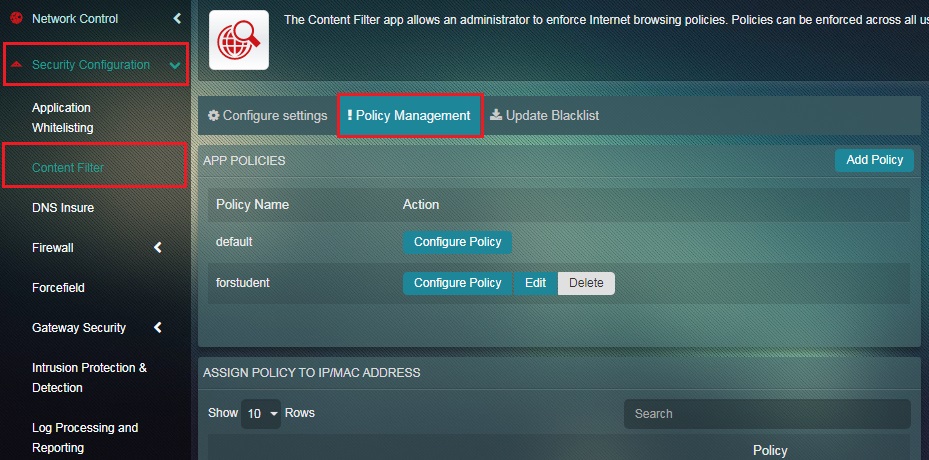 Step 2: Click the Add Policy button in the App Policies section.
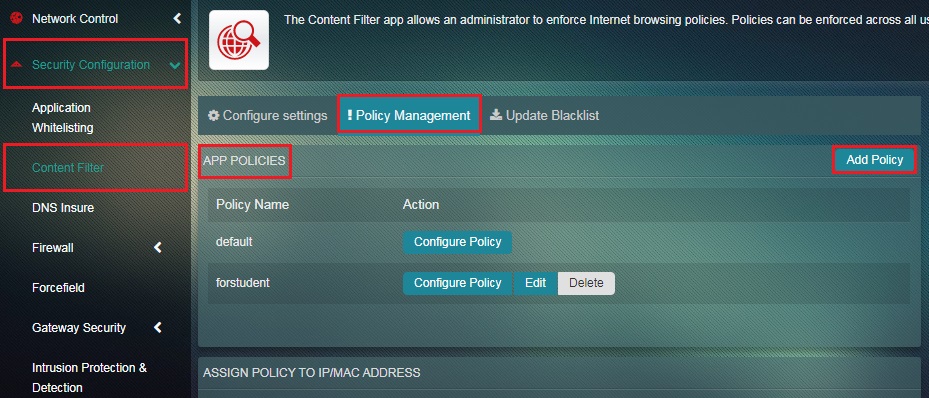 Step 3: You will now be directed to the policy page. Enter the Policy Name in the textbox and click the Add button.
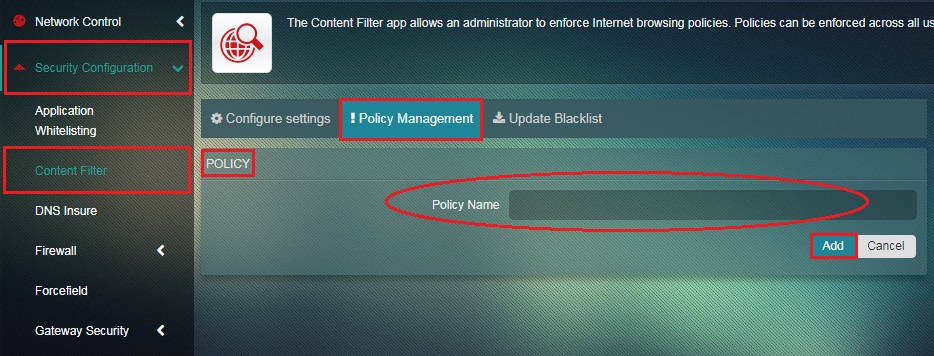 Step 4: You will now see the policy in the App Policies section.
Important: Click the Configure Policy button to manage various content filter components such as General Settings, Blacklists, Phrase Lists, MIME Types, File Extensions, Banned Sites, Gray Sites, and Exception Sites. 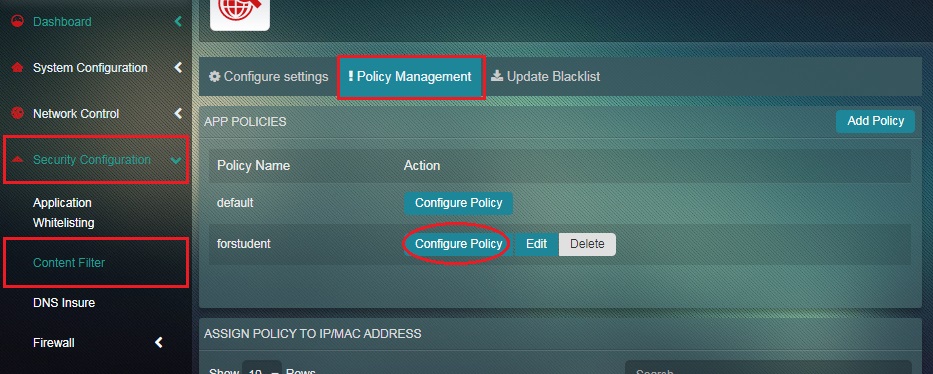
Step 5: You will now see various components of the content filter app such as General Settings, Blacklists, Phrase Lists, MIME Types, File Extensions, Banned Sites, Gray Sites, and Exception Sites. Click the Edit button to customize the content filter policy. 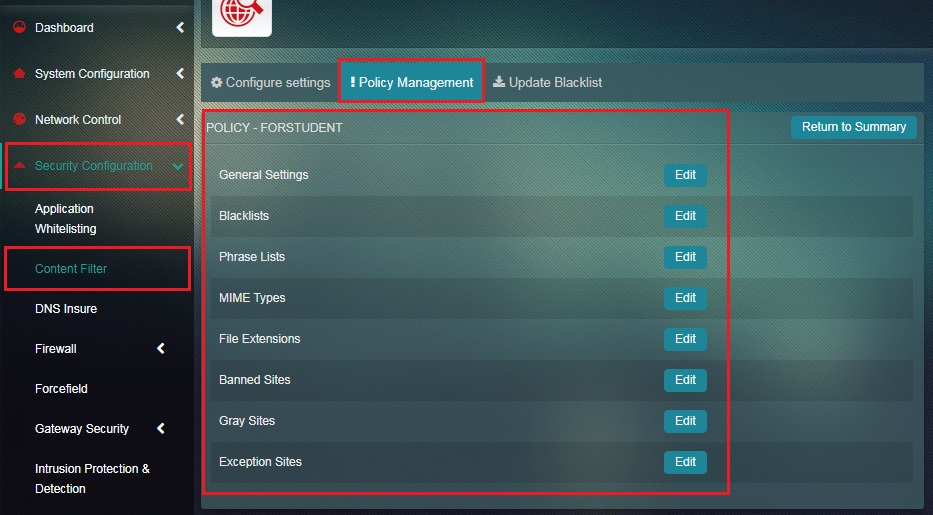
The General Settings component of the content filter policy enables the administrator to define various parameters such as Dynamic Scan Sensitivity, Reporting Level, Virus Scan, Deep URL Analysis, Blanket Block, Blanket SSL/CONNECT block, Block IP Domains, Google Safe Search, YouTube Safe Search & Advertisement.
Dynamic Scan Sensitivity: This filtering parameter is used to define the sensitivity levels of how aggressively the content filter application will scan for an assigned phrase list and block the user.
There are three options that can be selected namely,
- Very Lax - if the content is to be filtered for adults
- Normal - if the content is to be filtered for mid-aged children
- Very Aggressive – if the content is to be filtered for small children
Reporting Level: The administrator can select options such as Stealth Mode, Short Report, Full Report, and Custom Report that defines what would happen if a content filter policy is violated.
- In Stealth Mode, the bad web link will be accessible but a log for the policy violation will be created.
- In Short Report mode, an error message will be displayed.
- In Full Report mode, an error message will be displayed specifying the actual value and weighted limit.
- In Custom Report mode, a customizable HTML page is displayed.
Virus Scan: Performs a simple virus scan.
Deep URL Analysis: On enabling this option, Crystal Eye scans URLs embedded in banned websites and checks them against banned site list.
Blanket Block: This policy parameter is the most restrictive setting of the content filter application. On enabling this feature Crystal Eye will block all websites accessed from the client machine leaving the sites added to the Exception Sites List.
Blanket SSL/CONNECT Block: Enabling this feature will block SSL anonymous proxies without using SSL bump.
Block IP Domains: This feature prevents the users from using IP addresses of the banned URL to access the web link.
The Crystal Eye administrator can blacklist all websites related to a specific subject for example, abortion, alcohol, cellphone and a lot more.
Note: By default, Crystal Eye appliance filters only http websites while it runs on all three proxy modes. However, if you want to filter https websites you would have to enable SSL decryption. Thesee configurations are also applicable if you want to blacklist HTTP or HTTPs websites.
How to Blacklist Websites Related to a Particular Subject?
Step 1: In the Content Filter application page, click the Policy Management tab.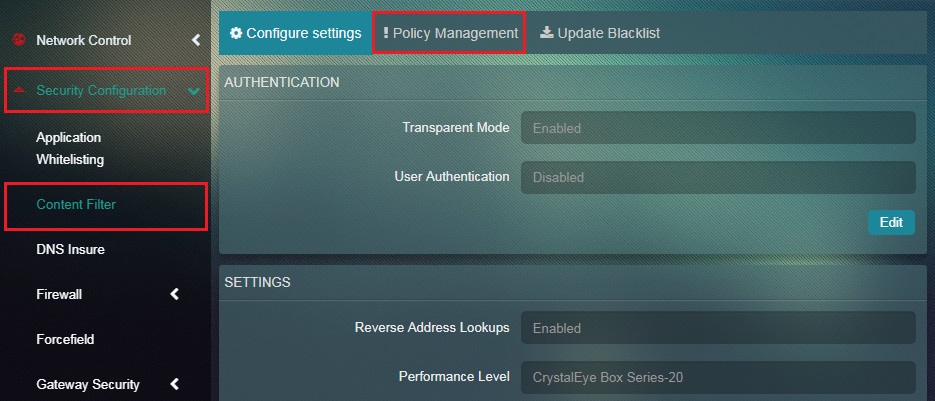 Step 2: Click the Configure Policy button under the App Policies section.
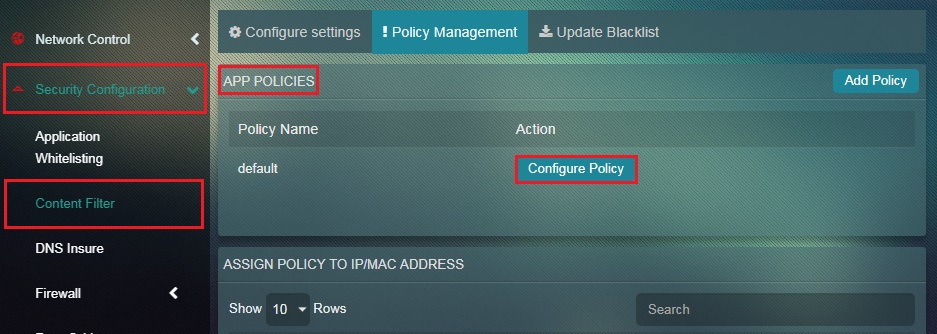 Step 3: You will now see the policy settings page. Click the Edit button next to Blacklists.
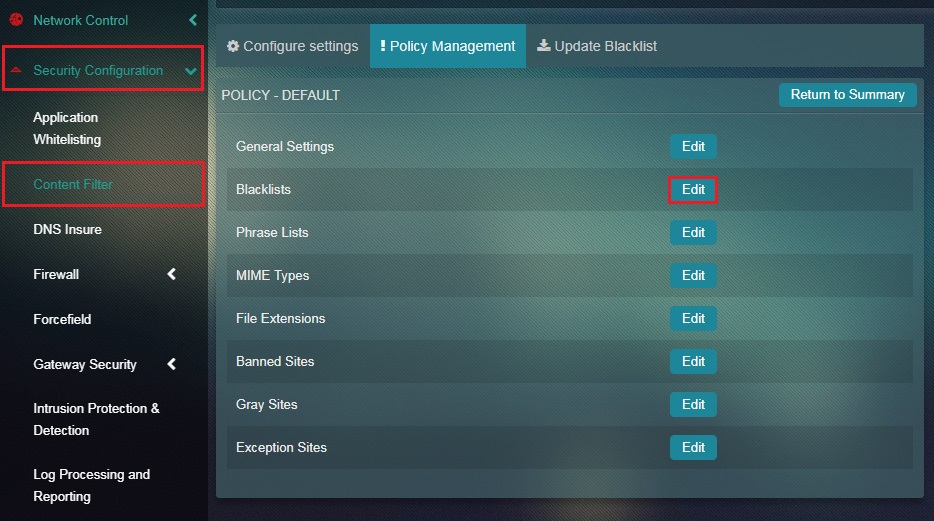 Step 4: Check the tick box next to the category of websites that needs to be blacklisted and click the Update button.
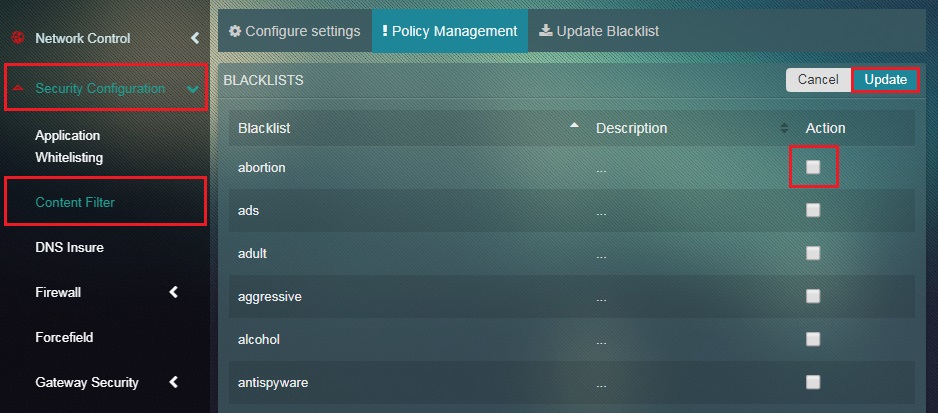
There are a set of Phrase List categories that can be selected in order to filter relevant browsing content. Crystal Eye would scan the browsing content for the selected phrase list based on the sensitivity levels opted in the Dynamic Scan Sensitivity section. The content filter application calculates a score for each web page based on the number of times a forbidden phrase is detected and then blocks the content accordingly.
Note: By default, Crystal Eye appliance filters only http websites while it runs on all three proxy modes. However, if you want to filter https websites you would have to enable SSL decryption. These configurations are also applicable if you want to ban phrase lists in HTTP and HTTPs websites.
How to Select Phrase List to Block/Filter Content?
Step 1: In the Content Filter Application page, click the Policy Management tab.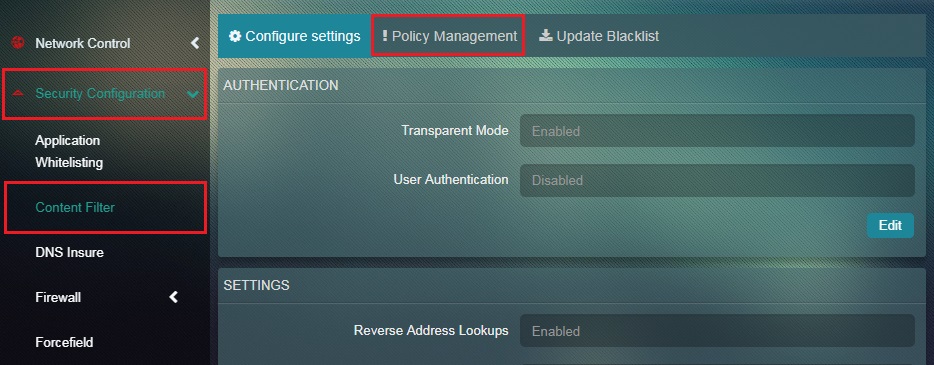 Step 2: Click the Configure Policy button in the App Policies section.
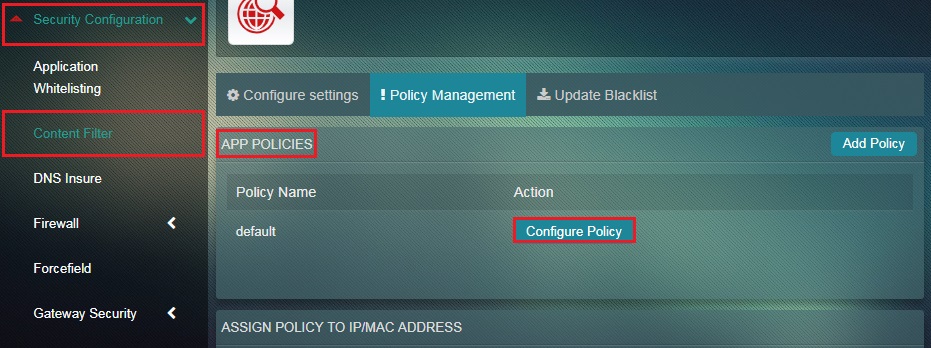 Step 3: You will now see the Policy page. Click the Edit button next to Phrase Lists.
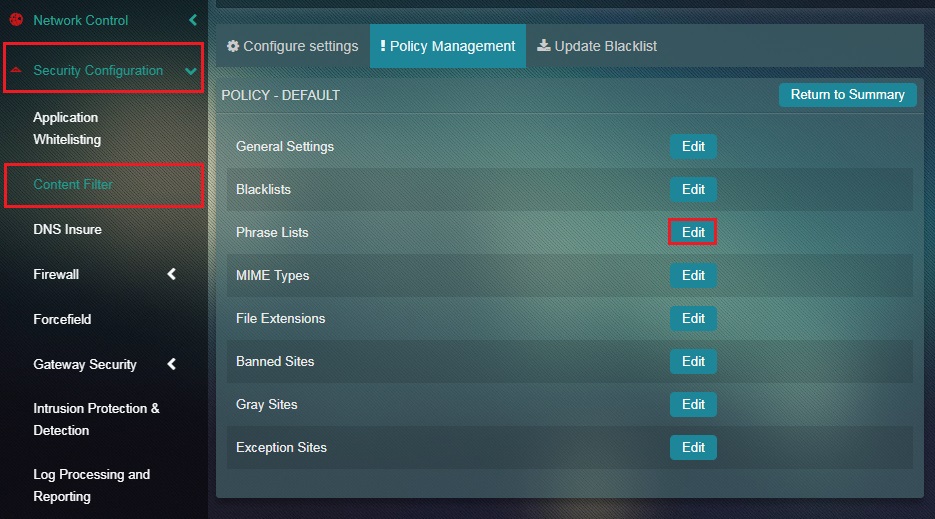 Step 4: You will now see the Phrase Lists page. Check the tick box next to the desired phrase category and click the Update button.
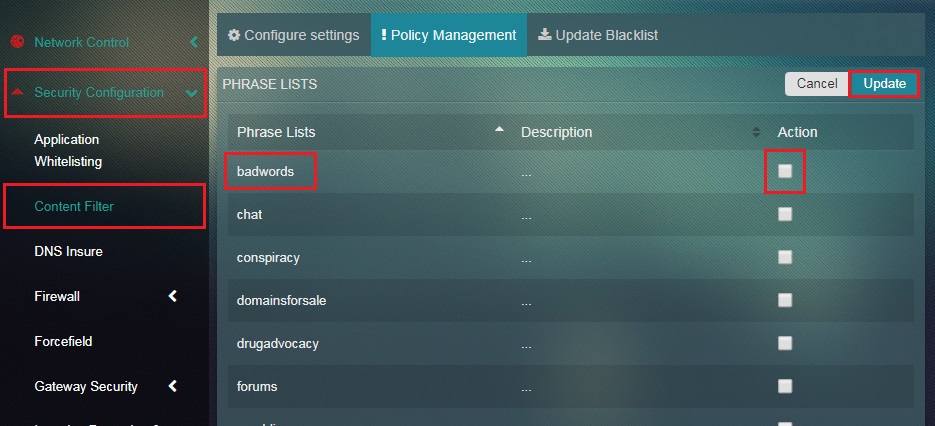
MIME Types are used by browser’s to recognize and display the contents of a file. Crystal Eye’s content filter application rigorously scans MIME Types as they play an important role in providing instructions to the browser to use certain applications to display content. However, there could be instances when the applications itself are vulnerable to security exploits turning out to be a soft target for attackers resulting to compromised computers. Taking this into consideration certain MIME Types can be banned by the administrator which results to a blanket block of files containing those MIME Types. This promotes a robust security stance securing the network infrastructure.
How to Ban/Block MIME Types?
Step 1: In the Content Filter application page, click the Policy Management tab.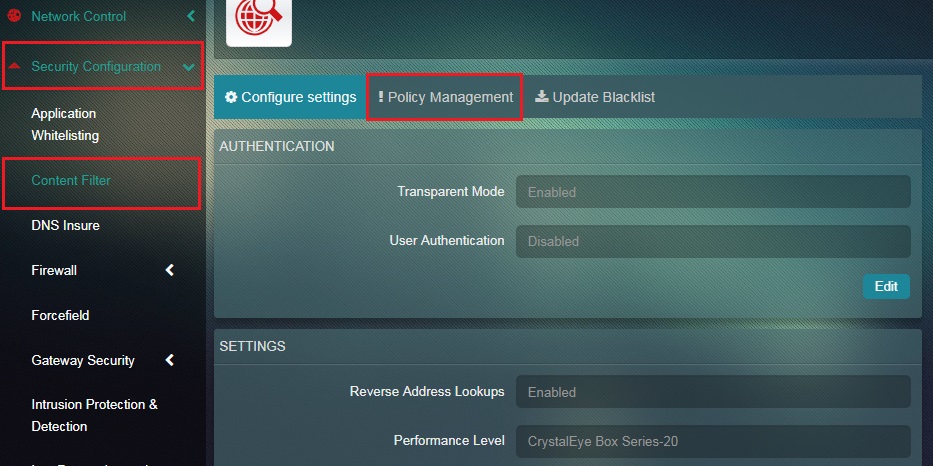
Step 2: Click the Configure Policy button under App Policies section.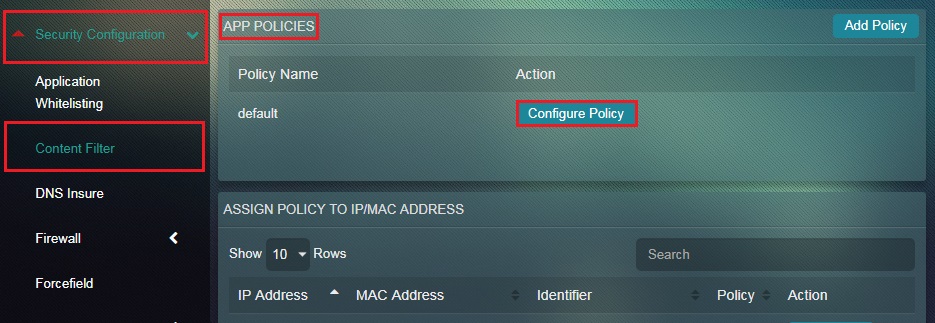
Step 3: You will now see the Policies page. Click the Edit button next to MIME Types. 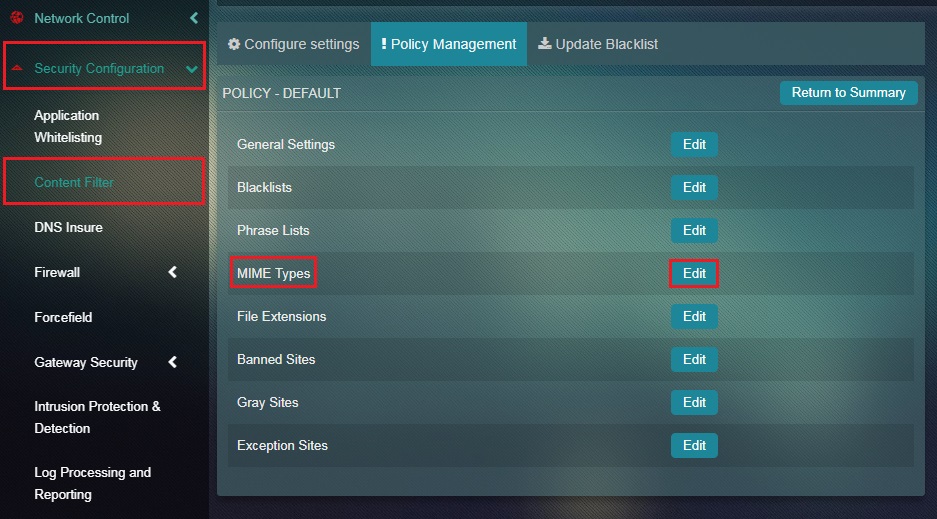
Step 4: You will now see the MIME Types page. Check the tick box next to the desired MIME Type and click the Update button.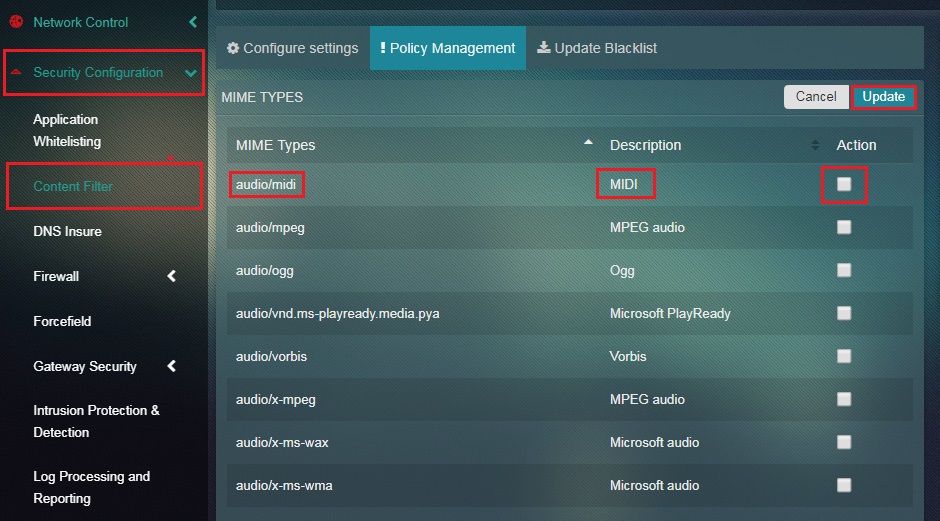
This content filtering feature can be used to ban specific file extensions so that there are fewer chances of malicious codes and viruses being downloaded by the end users in the Crystal Eye network.
How to Ban/Block File Extensions?
Step 1: In the Content Filter application page, click the Policy Management tab.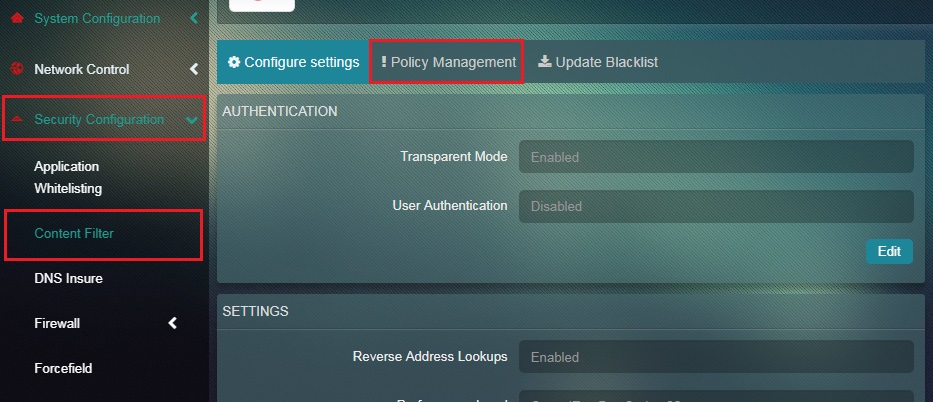 Step 2: Click the Configure Policy button under the App Policies section.
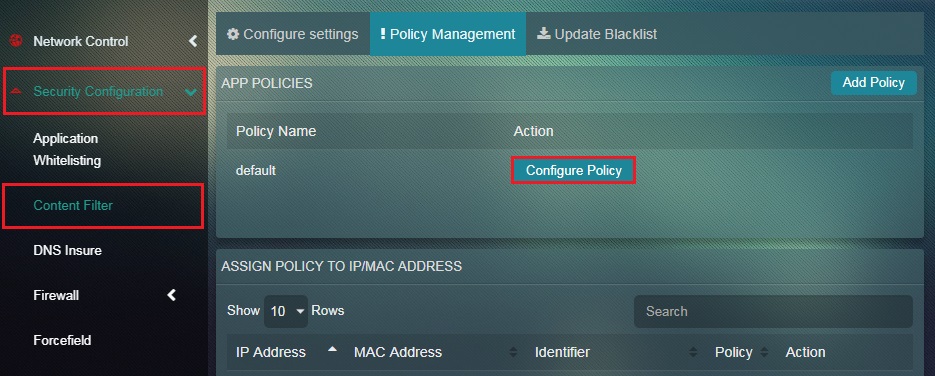 Step 3: You will now see the Policy page. Click the Edit button next to File Extensions.
 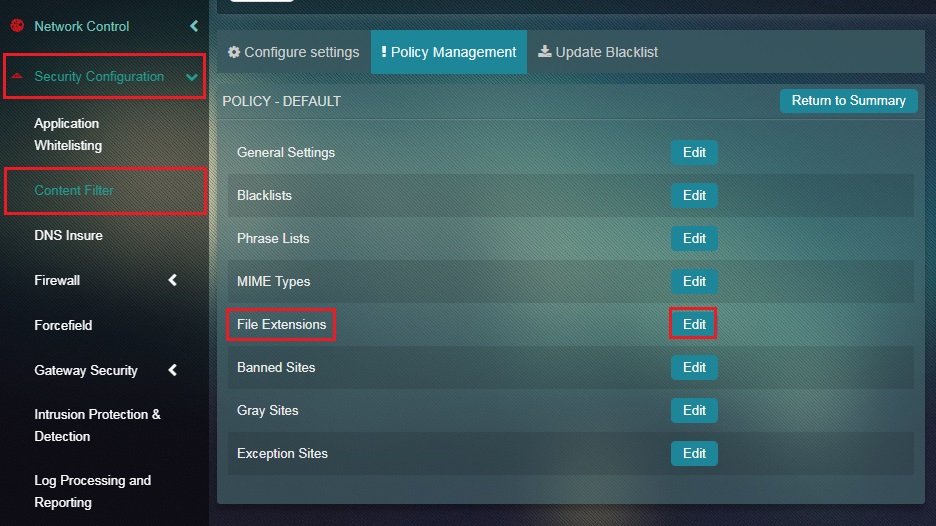 Step 4: Check the tick box next to the File Extension and click the Update button.
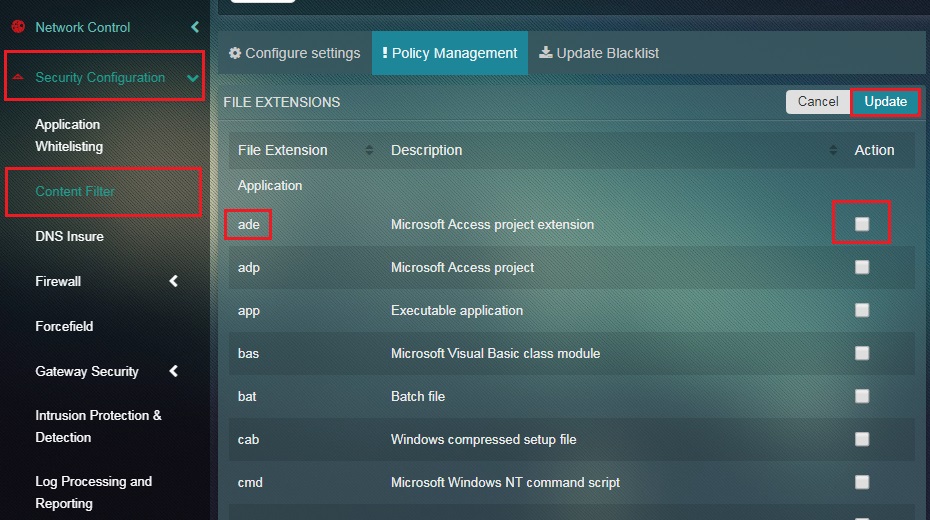
The Banned Sites feature of the Content Filter application is used to block certain websites manually regardless of its content.
Note: By default, Crystal Eye appliance filters only http websites while it runs on all three proxy modes. However, if you want to filter https websites you would have to enable SSL decryption. Thesee configurations are also applicable if you want to ban HTTP or HTTPs websites manually.
How to Block a Website Manually Using the Banned Sites Feature of the Content Filter Application?
Step 1: In the Content Filter application page, click the Policy Management tab.
Step 2: Click the Configure Policy button under the App Policies section.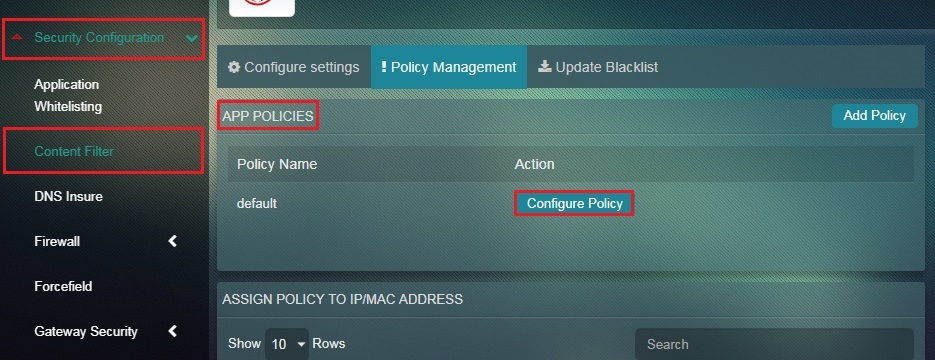
Step 3: You will now see the Policy page. Click the Edit button next to Banned Sites.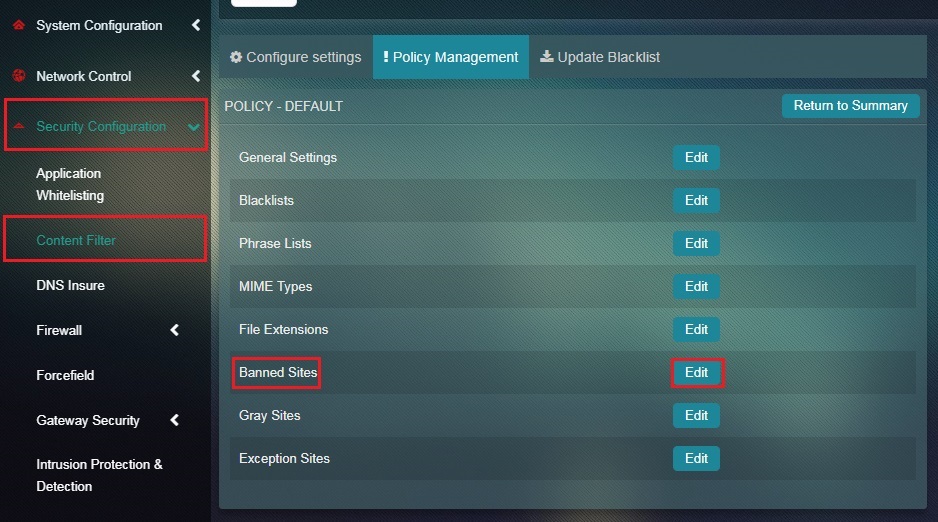
Step 4: You will now see the Banned Sites section. Click the Add button.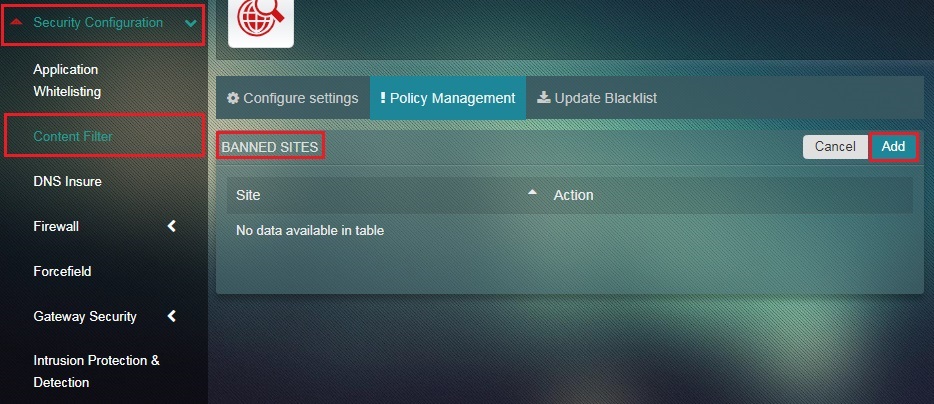
Step 5: Enter the website name in the Site textbox and click the Add button.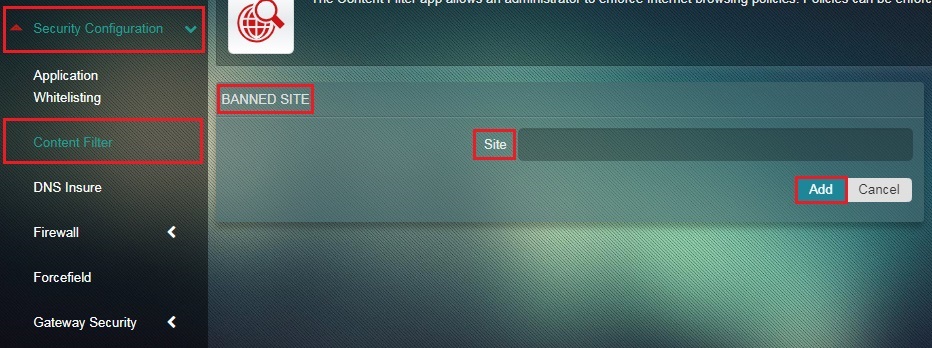
Adding websites to the Gray Sites lists allows users to access the listed website but at the same time it’s also scanned for some dodgy web pages irrespective of the fact that the website is blocked using the category based blacklist feature of the app.
So, for instance if the Crystal Eye administrator has blocked all news websites using the category based blacklist feature of the app but have added a particular news website to the Gray Sites list, then the end users will be allowed to access the website except for some dodgy pages like this.
How to Add Websites to the Gray Sites List?
Step 1: In the Content Filter application page, click the Policy Management tab.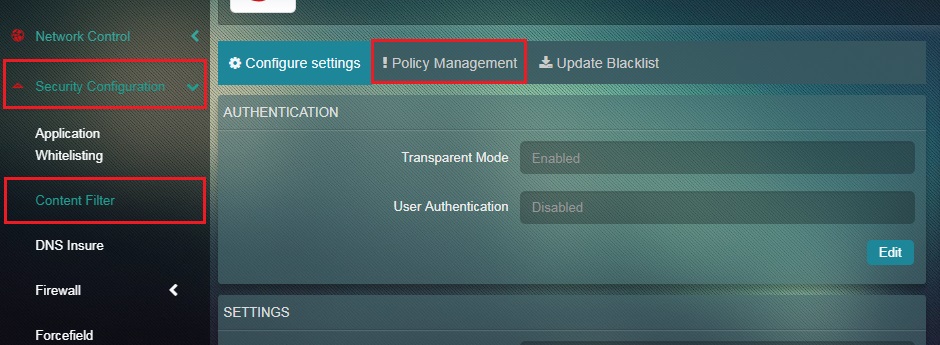
Step 2: Click the Configure Policy button under the App Policies section.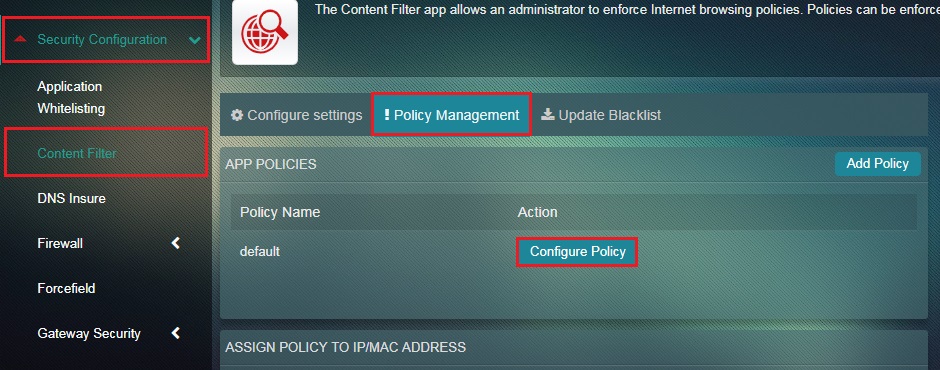
Step 3: You will now see the Policy page. Click the Edit button next to Gray Sites. 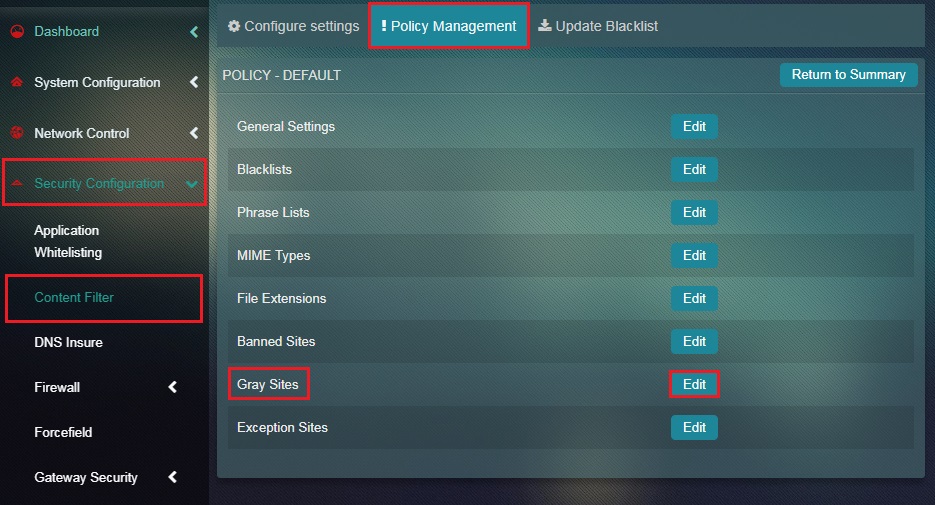
Step 4: Click the Add button.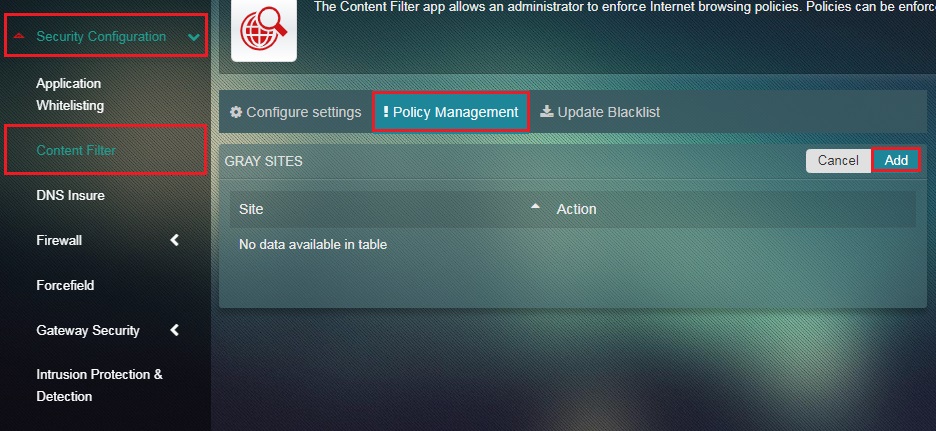
Step 5: Enter the website name in the Site textbox and click the Add button.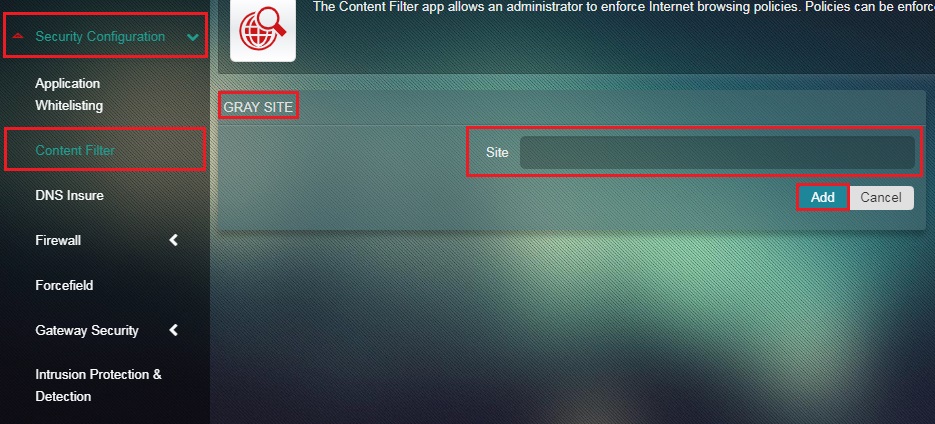
The websites added in the Exception Sites list are automatically made accessible irrespective of the site’s content. An administrator might come across instances where a website could be wrongly blocked. In such cases, the Exception Sites feature does the job of over riding ‘false positives’.
How to Add a Website to the Exception Sites List?
Step 1: In the Content Filter application page, click the Policy Management tab.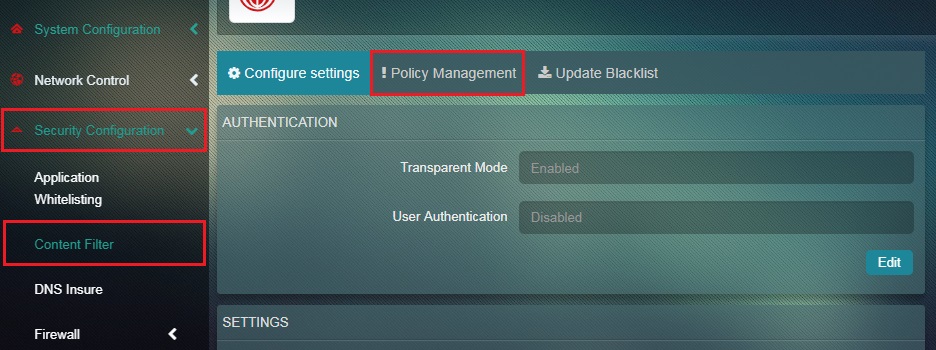
Step 2: Click the Configure Policy button under the App Policies section.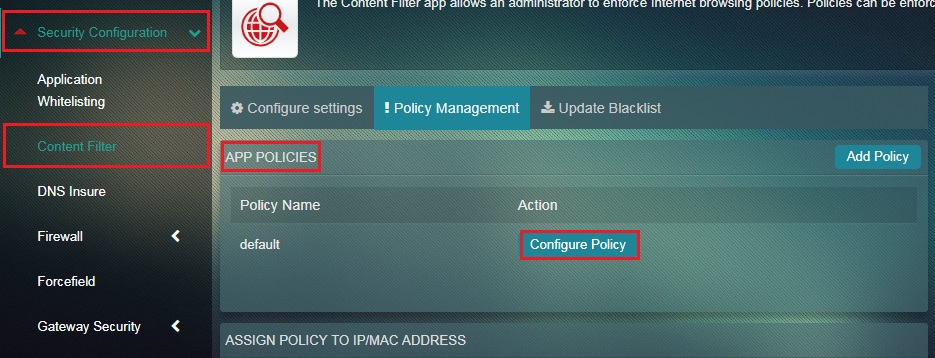
Step 3: You will now see the Policy page. Click the Edit button next to Exception Sites.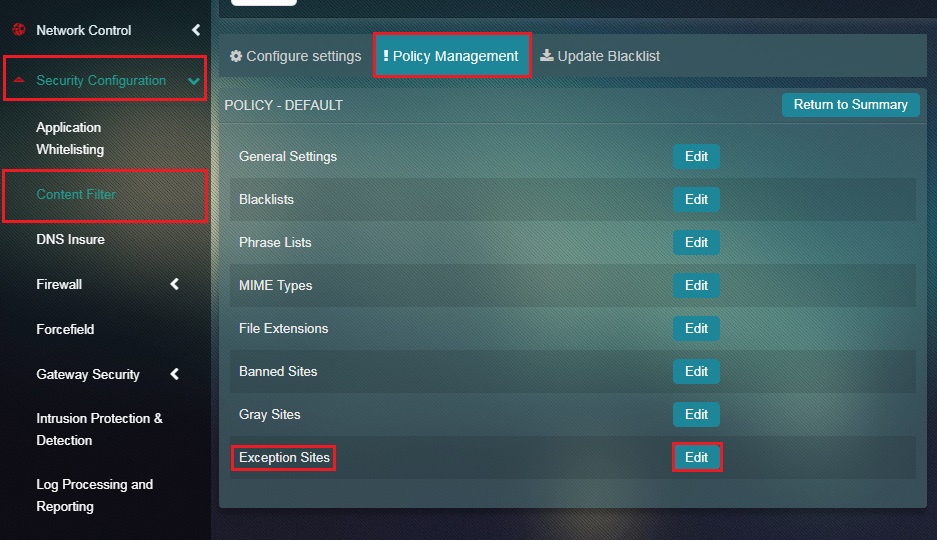
You will now see the list of default Exception Websites. However, you can also add a particular exception website to this list using the add feature.
Step 4: To add a new exception website, click the Add button in the Exception Sites page. 
Step 5: Enter the exception website in the Site textbox and click the Add button.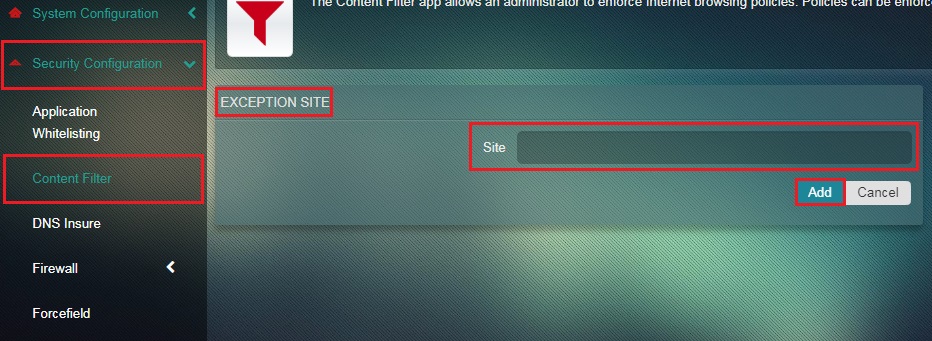
An administrator can assign content filter policies to specific devices (IP addresses/MAC addresses) connected to the CE network. These policies can be created to filter both http and https traffic.
Note: Refer to Filtering HTTP/HTTPs Traffic to know how to configure CE’s Content Filter application to filter both http and https traffic simultaneously.
How to Assign a Content Filter Policy to a Specific Device (IP addresses/MAC addresses)?
Step 1: In the Content Filter application page, click the Policy Management tab.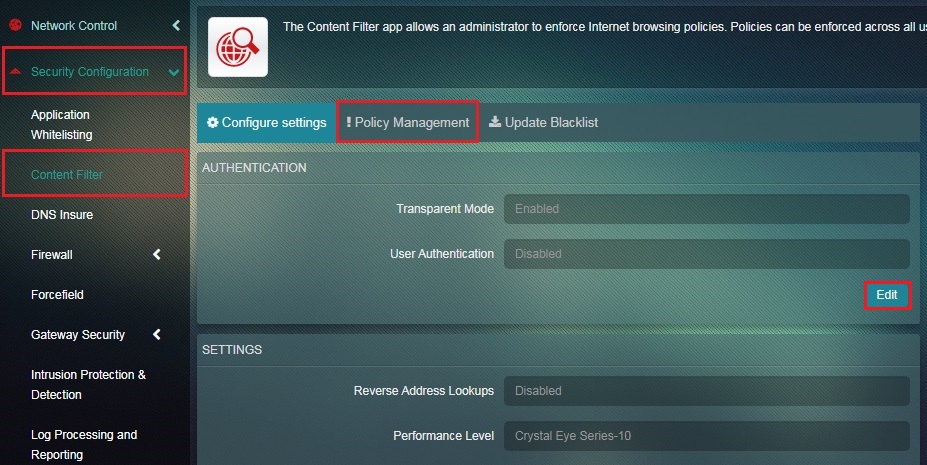 Step 2: You will now see the Policy Management page where all the devices will be listed in the Assign Policy to IP/MAC Address section.
 Step 3: Click the Edit Policy button adjacent to the device MAC address, IP address and the hostname.
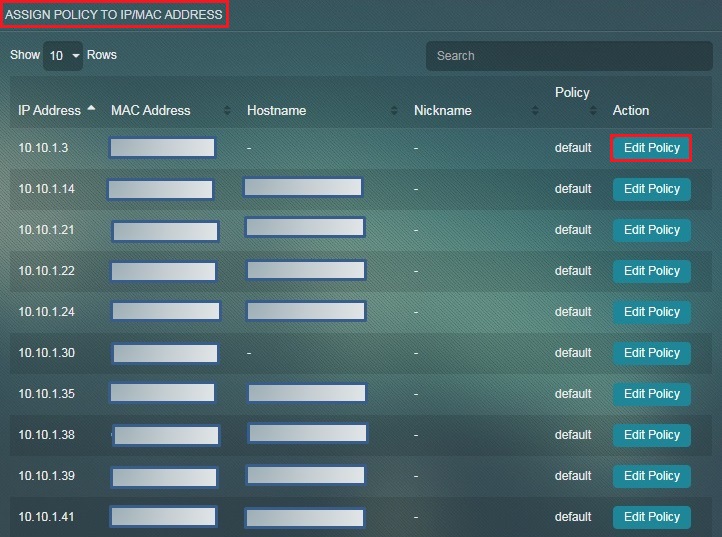 Step 4: You will now be directed to the Policy page. Select the Policy of your choice from the Policy Type dropdown and click the Update button.
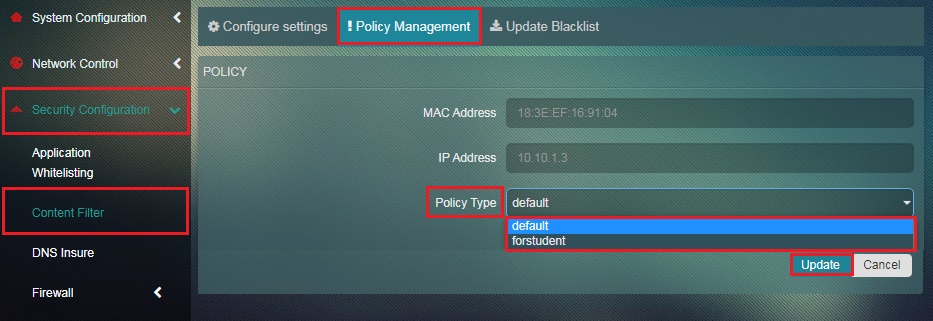
Note: Refer to Naming & Creating a Content Filter Policy to know how to name a content filter policy. Also, refer to General, Settings, Blacklists, Phrase List, MIME Types, File Extensions, Banned Sites, Grey Sites, Exception Sites.
The administrator can enforce content filter policies for a group of end users connected to the Crystal Eye Network. To do so, the content filter policies must be imposed through User Authentication. The administrator can easily create groups, add users to it and then these groups can then be aligned to customized content filter policies.
Note: Authentication based content filter policy can be enabled only if the web proxy mode is set to Explicit + User Authentication mode.
The administrator can generate credentials for users connected to the CE network and assign a content filter policy to the group of users. These credentials can then be provided to the respective users so that the predefined customized content filter policy is enforced on the device they are accessing the browser from.
Note: This method of enforcing content filter policies are generally used when different types of filters are to be assigned for different groups in an organization. For example, the content filter policies imposed upon the marketing department would be different from the policies assigned to the customer service department of the company.
How to Assign Content Filter Policy to a Group of Users?
Step 1: In the Configure Settings switch view page, click the Edit button under the Authentication section.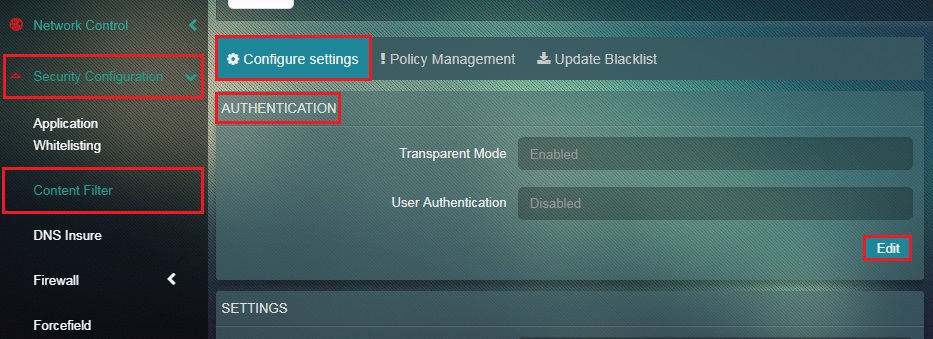
Note: Before you go ahead and click the edit button you would notice that user Authentication is disabled by default in the Authentication section.
Step 2: You will now see the editable version of the authentication page. Select Explicit Proxy + User Authentication from the Mode dropdown and click the Update button.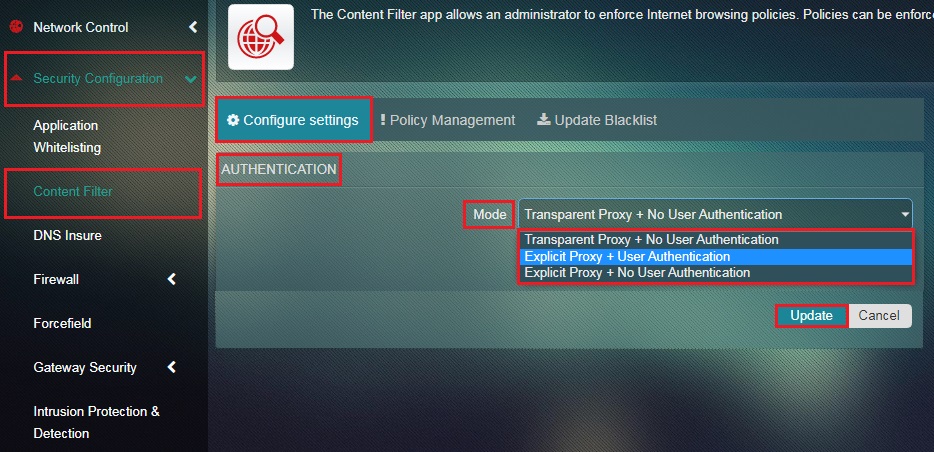
Step 3: In the Content Filter application page, click the Policy Management tab.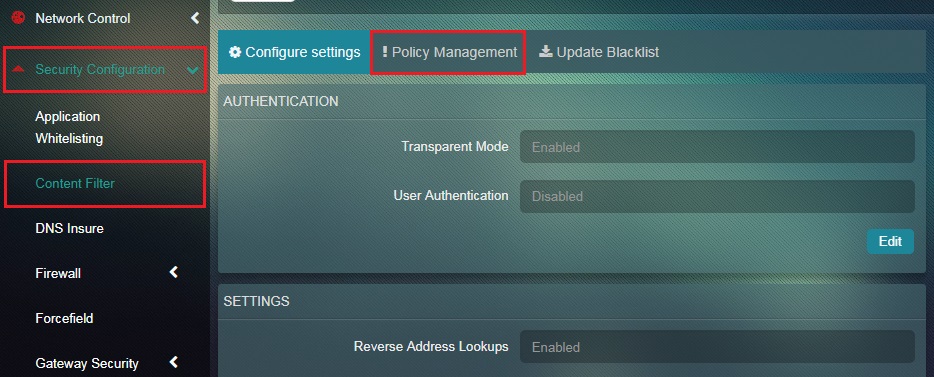
Step 4: You will now see the Policy Management switch view. Click the Edit Policy button under Assign Policy to Groups section.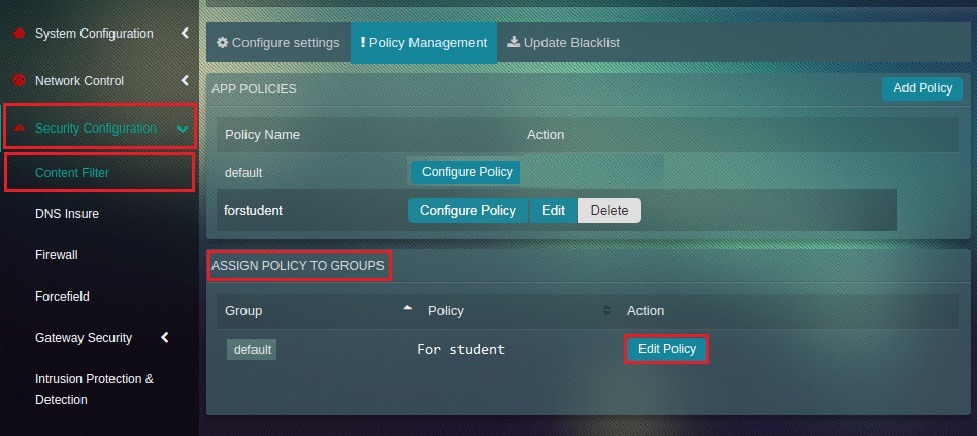
Step 5: You will now see the Policy section. Select the Policy Name from the dropdown and click Update button.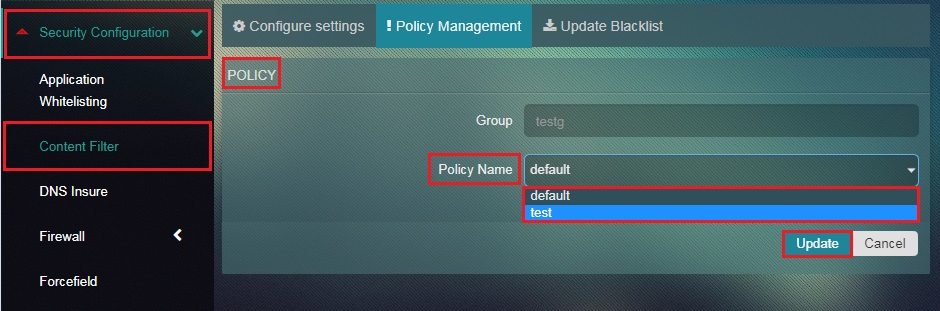
Step 6: After the policy is aligned with the desired group, the end user will be prompted to enter user credentials while browsing the internet. Enter the user credentials to browse the internet.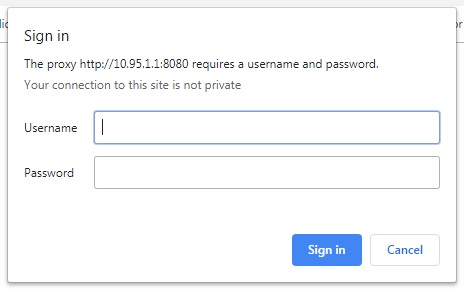
Note: These credentials can be obtained by the administrator while creating users. Click here to know how to create users in crystal eye (Refer to step 3 on that page). Once the end user enters the user credentials Crystal Eye will automatically enforce the content filter policies to the users based on the groups they belong to. Ensure that the users created in the user app have web proxy enabled.