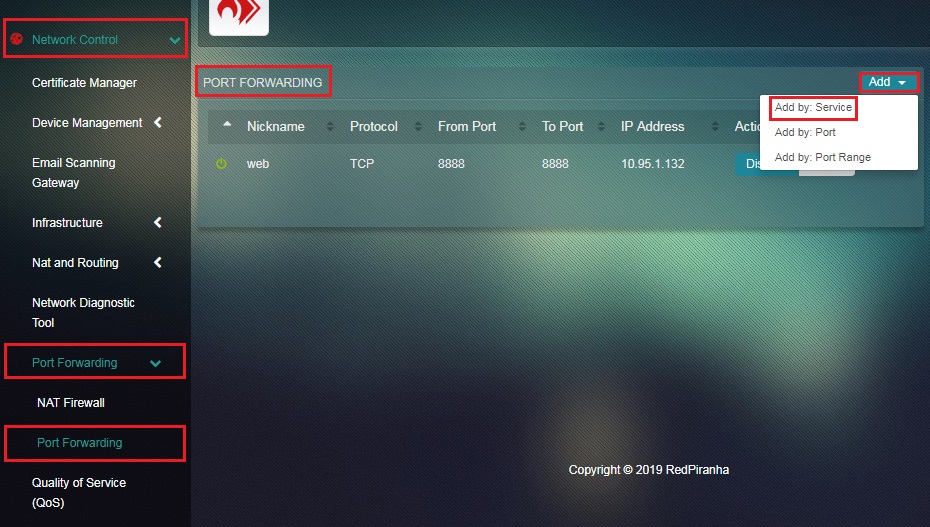
Port Forwarding
Crystal Eye’s port forwarding app allows administrators to create provisions for a server (that exists in the local area network) to be accessed publicly. Using the app, services running on a LAN server can be accessed through a standard port, a dedicated port or or a dedicated port range.
Note: There is an inexhaustible list of services that can be accessed through Crystal Eye’s port forwarding app. Some of the prominent services to name few are, such as FTP, HTTP, HTTPS, IRC, OpenVPN, wenconfig, SIP, SMB etc.
There are basically three ways a server can be accessed using Crystal Eye’s Port forwarding App:
- By Service
- By Port
- By Port Range.
The designated port can also be Disabled or Deleted if required, from the Port Forwarding app page.
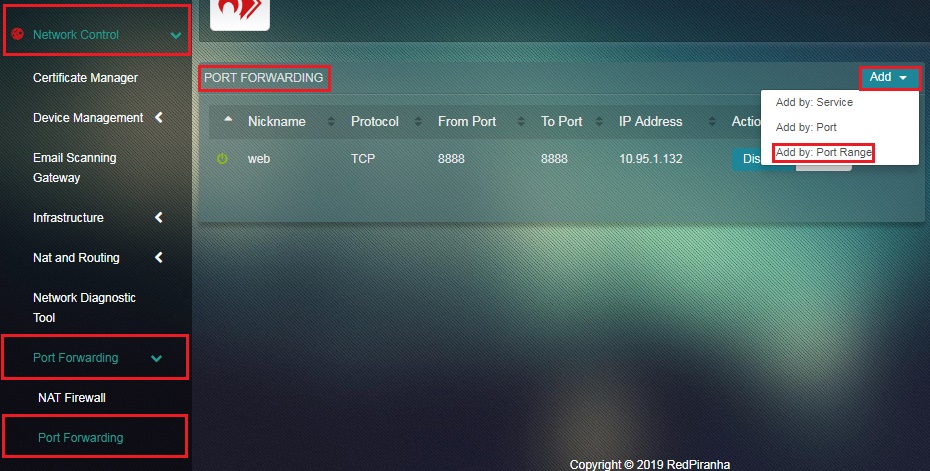
Left-hand Navigation Panel > Network Control > Port Forwarding > Port Forwarding 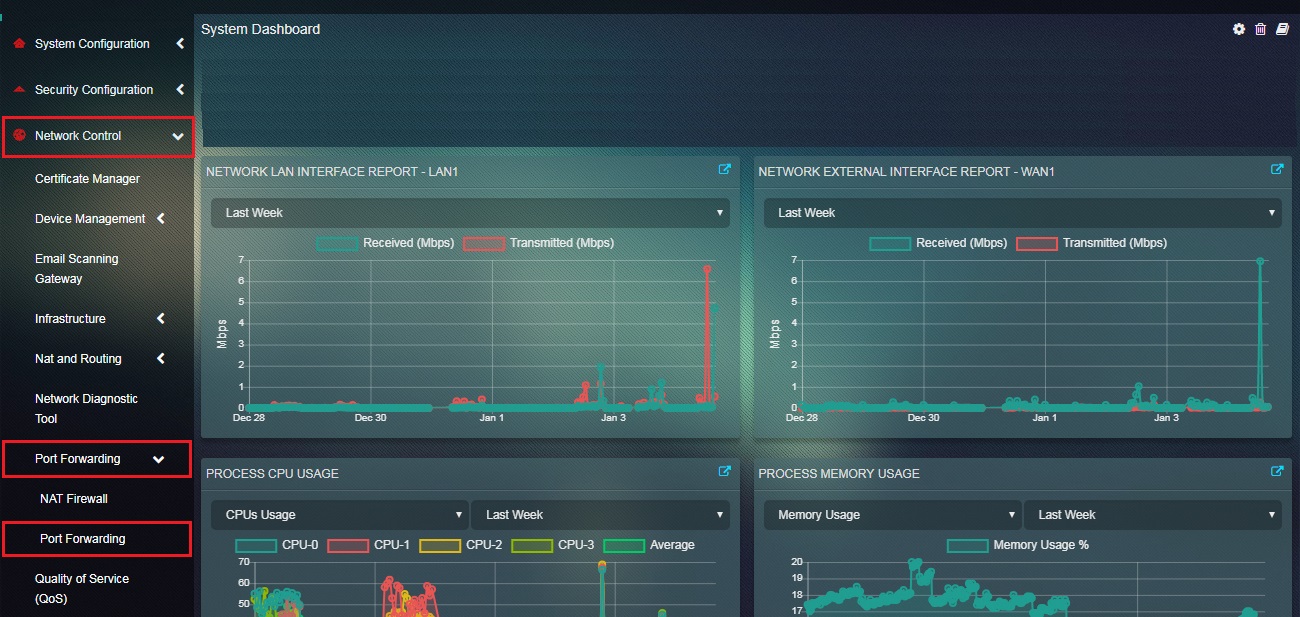 |
|---|
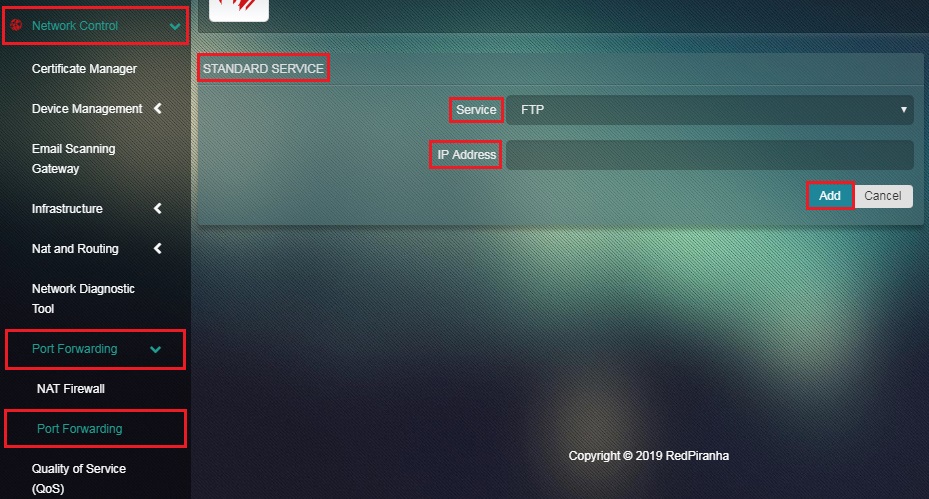
It involves accessing a Service running on LAN server using standard ports. Example: Port 25 is widely used as a standard port for SMTP servers. By selecting the service and entering the public ip of the LAN server Crystal Eye will automatically assign the default port number. Port forwarding by service is functionally the same as port forwarding by other methods, but saves the inconvenience of looking up standard port numbers and recording their intended use in the nickname field.
How to Port Forward by Service Using Crystal Eye?
Step 1: In the Port Forwarding App page, click the Add dropdown button and select Add by: Service.
Step 2: You will now see the Standard Service page. Select the Service running on the server in the LAN from the dropdown, enter the IP Address in the textbox and click the Add button.
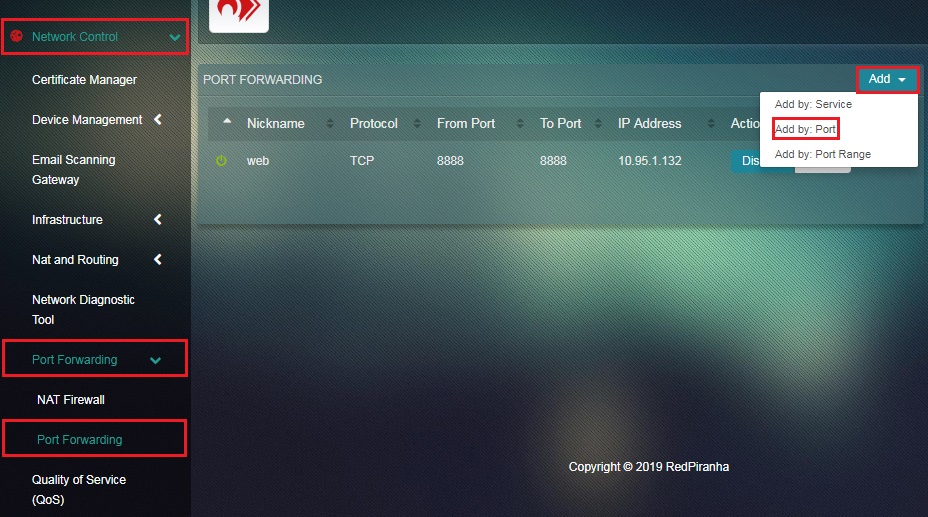
It involves accessing a Service in the local area network using specific ports. Example: You can assign a port number of your choice for SMTP servers instead of having a standard port for it, or you can assign a port for a specialized non-standard use. It is particularly common to run http(s) servers that provide specialized services, such as web applications, on non-standard ports. It is useful to record the name of the application that is being accessed or the service that is being provided in the nickname field.
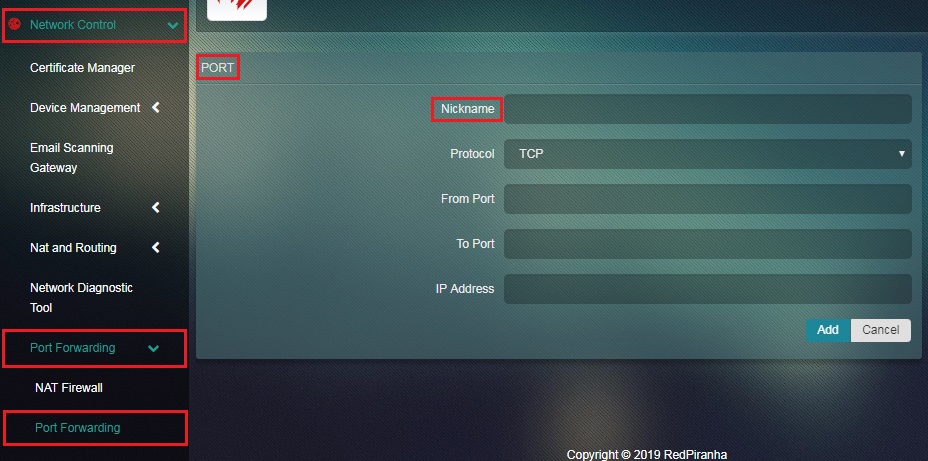
How to Port Forward by Port Using Crystal Eye?
Step 1: In the Port Forwarding App page, click the Add dropdown button and select Add by: Port.
Step 2: You will now see the Port page. Enter the Nickname of the Service in the textbox.
Step 3: Select the Protocol Type (TDP or UDP) from the dropdown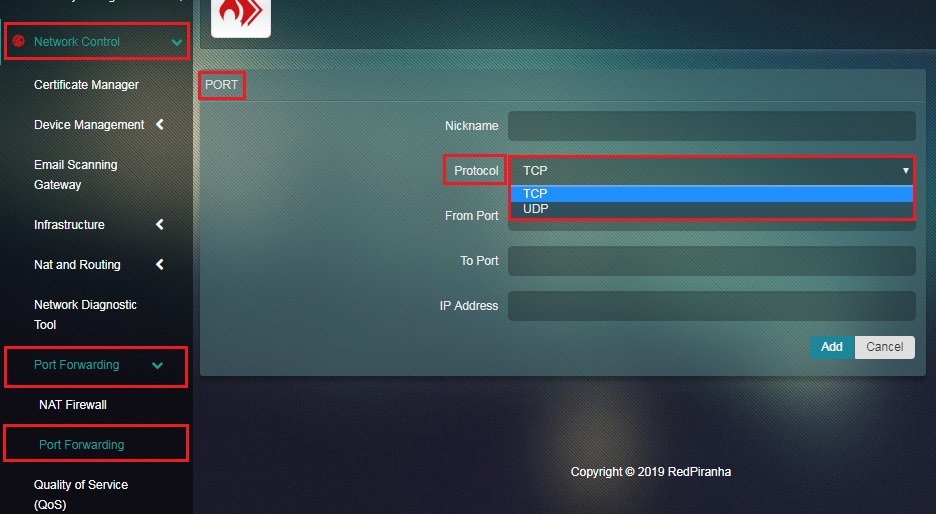 .
.
Step 4: Enter the standard port of the service running on the LAN server in the From Port textbox.
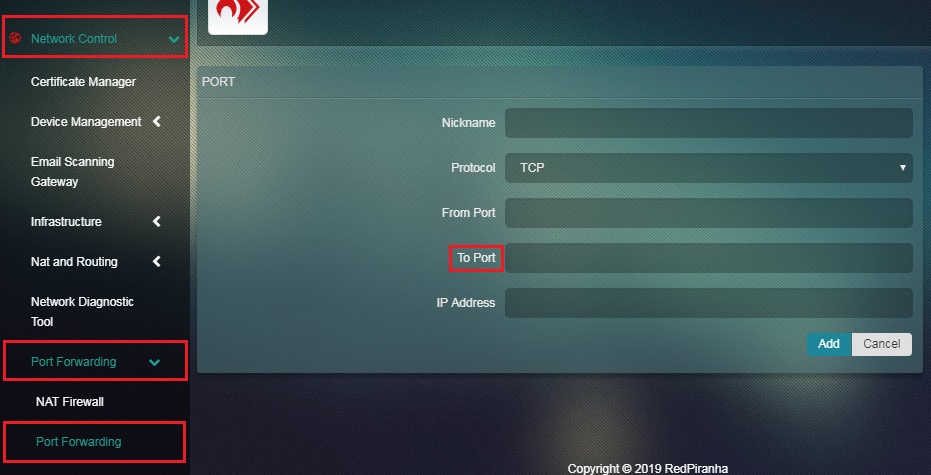
Step 5: Enter the desired port that is required instead of the standard port of the service running on the LAN server in the To Port textbox.
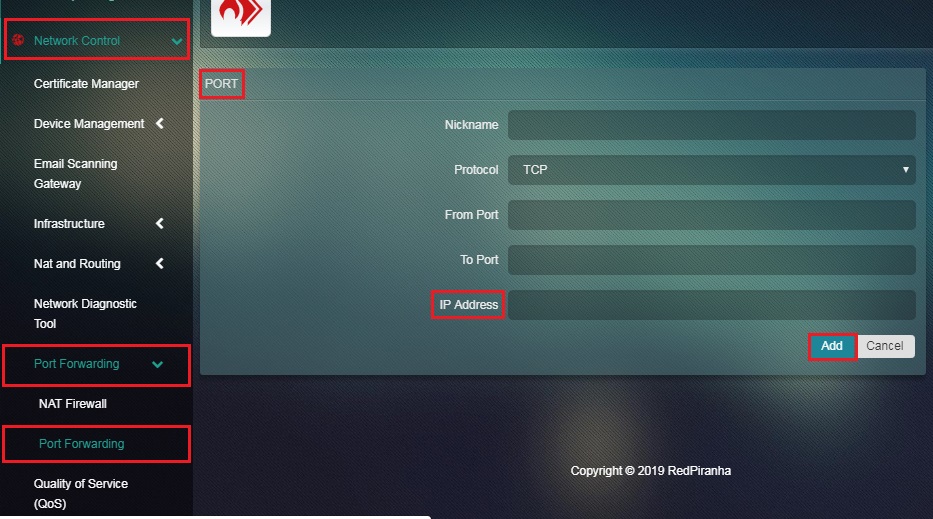
Step 6: Enter the public IP Address in the textbox and click the Add button
It involves accessing a Service in the local area network using a specific port range. Example you may assign a custom port range for VoIP services running on a LAN server.
How to Assign a Port Range for a Service?
Step 1: In the Port Forwarding App page, click the Add dropdown button and select Add by: Port Range.
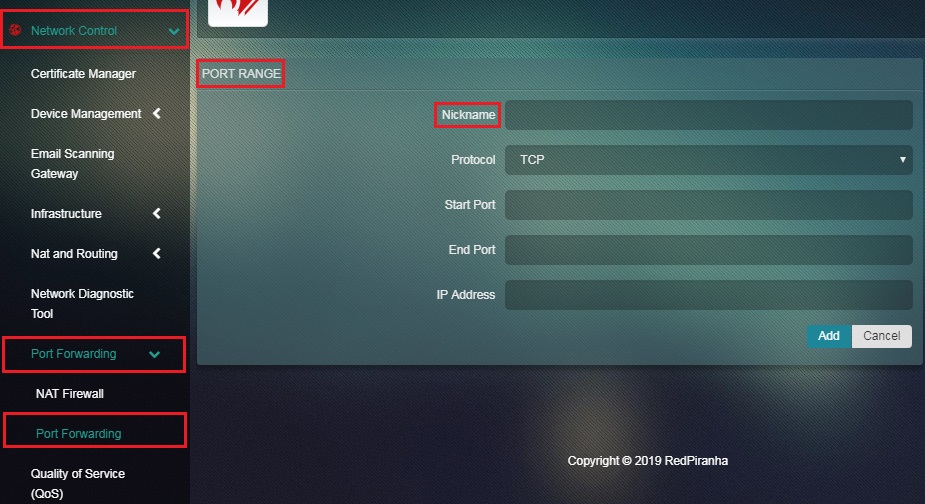
Step 2: You will now see the Port Range page. Enter the Nickname of the Service in the textbox.
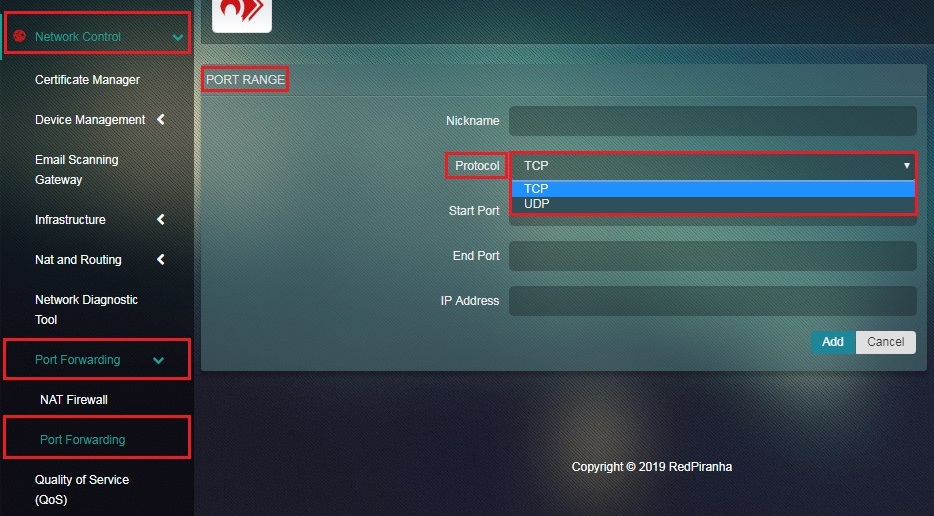
Step 3: Select the Protocol Type (TDP or UDP) from the dropdown.
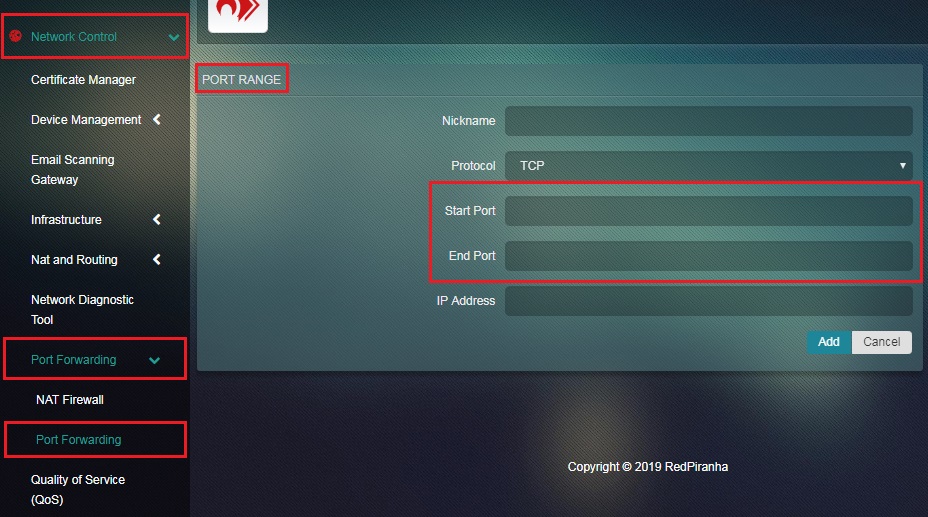
Step 4: Enter the Start Port and the End Port of the service in the textboxes respectively.
Step 5: Enter the IP Address in the textbox and click the Add button.