NAT Firewall
Overview
1-to-1 NAT maps a public Internet IP to an IP on the local area network (LAN). 1-to-1 NAT IPs can be mapped either with no firewall at all or with selective ports open. The 1-to-1 NAT app is required if you plan to have publicly available IP addresses correlate with servers running on your local network. For example, you may need a server placed in your network but have it be available on a separate IP address than your Crystal Eye server, often because you may need to have multiple servers serving the same port (for example, multiple web servers on port 80).
The Crystal Eye 1-to-1 NAT module creates a virtual IP address on the WAN side (public network) of your Crystal Eye and then correlates that to a server on the inside of your network. The module handles the IP address aliasing, the firewalling, and the NAT port forwarding. If your public address pool is capable of being subnetted, you can use the DMZ module instead if you want your server behind the firewall to be in a public IP address space.
Note: In order to use the 1-to-1 NAT module properly, you must not have previously created any alias address which overlaps or have created any Port Forwarding policy which attempts to do the same thing. Also, the target internal system on your local network must have the default gateway set to Crystal Eye.
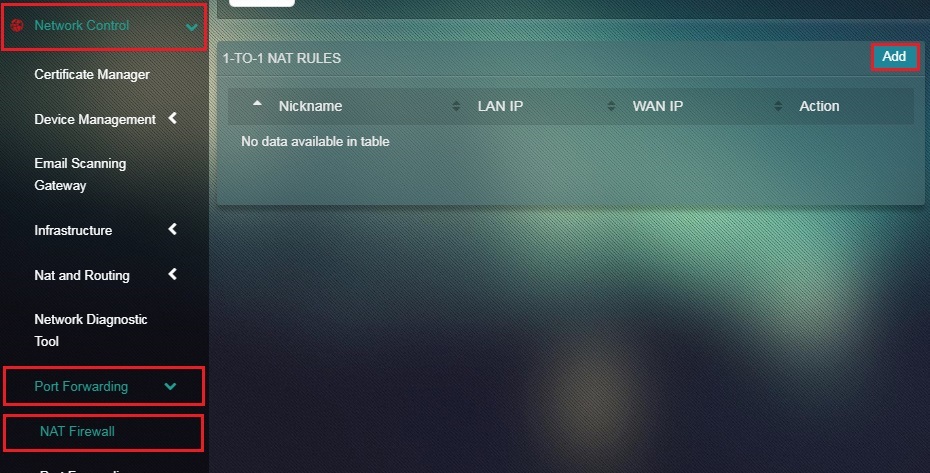
Navigation to 1:1 NAT Firewall
Left-hand Navigation Panel > Network Control > Port Forwarding > 1:1 NAT Firewall  |
|---|
Adding 1:1 NAT Entry
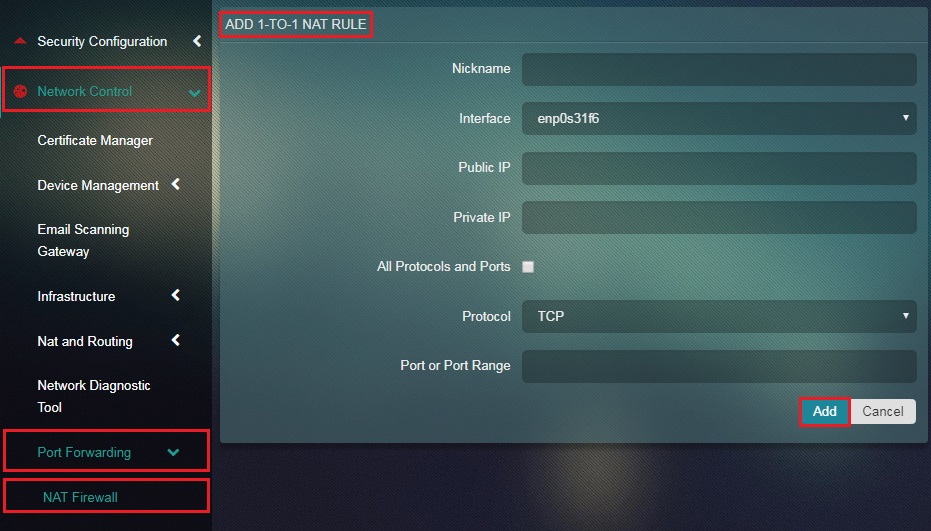
A public internet IP can be mapped to a LAN IP. This can be done through Add 1-to-1 Nat Rule page by selecting an Interface where NAT must happen, specifying the Public IP and the Private IP. Advanced controls can be used to mention a Port or Port Range and can also be used to specify Port Type (TCP/UDP).
Note: Again, if you are trying to make a 1:1 NAT rule work you will NOT use any other module to support this rule. The 1:1 NAT module provisions all the required components for the forward rule to work including the IP address (don't configure one as an alias in IP Settings), the incoming firewall rule (do not configure them in the Incoming firewall as that module is for ports going to the CrystalEye server itself), and the port forwarding (do not also set up a port forwarding rule to cover this 1:1 NAT rule).
How to Add 1:1 NAT Entry?
Step 1: In the 1:1 NAT Firewall page, click the Add button.
Step 2: You will see the Add 1:1 NAT Rule page. Enter the desired Nickname of the entry in the textbox.
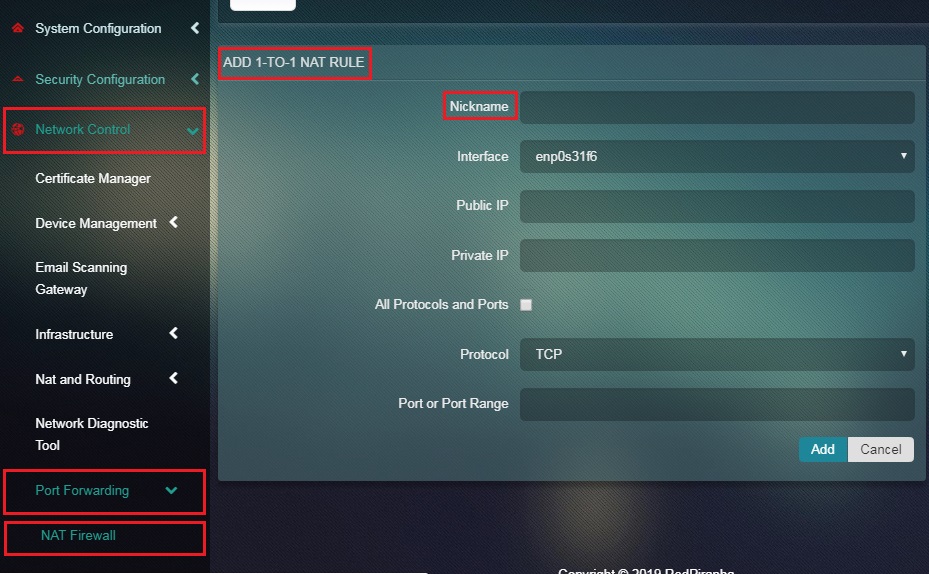
Step 3: Select the Interface from the dropdown.
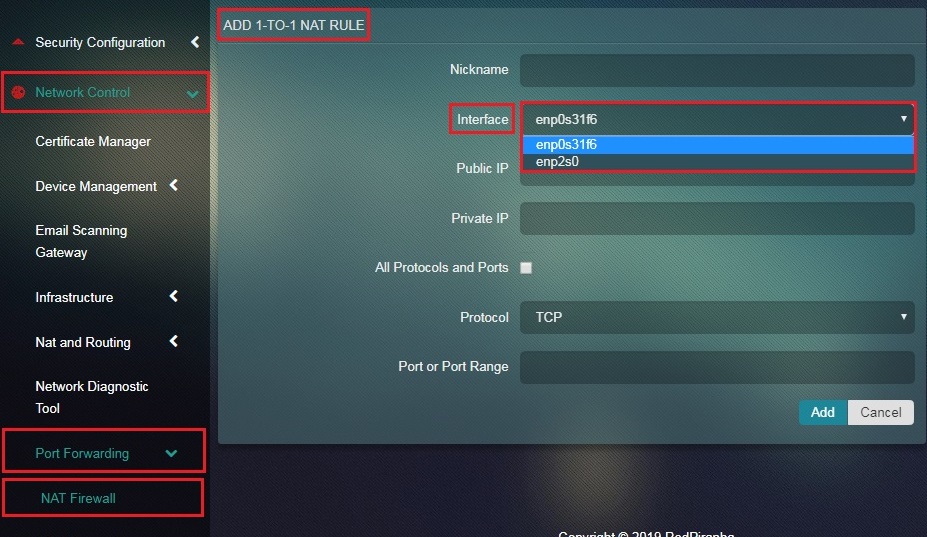
Note: This will essentially be the Interface where the NAT should happen.
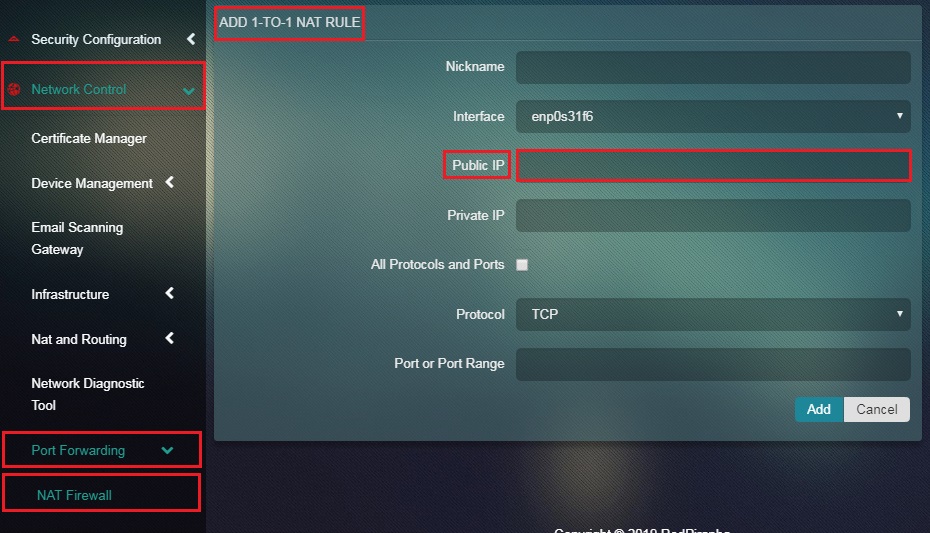
Step 4: Enter the Public IP in the textbox.
Step 5: Enter the Private IP in the textbox.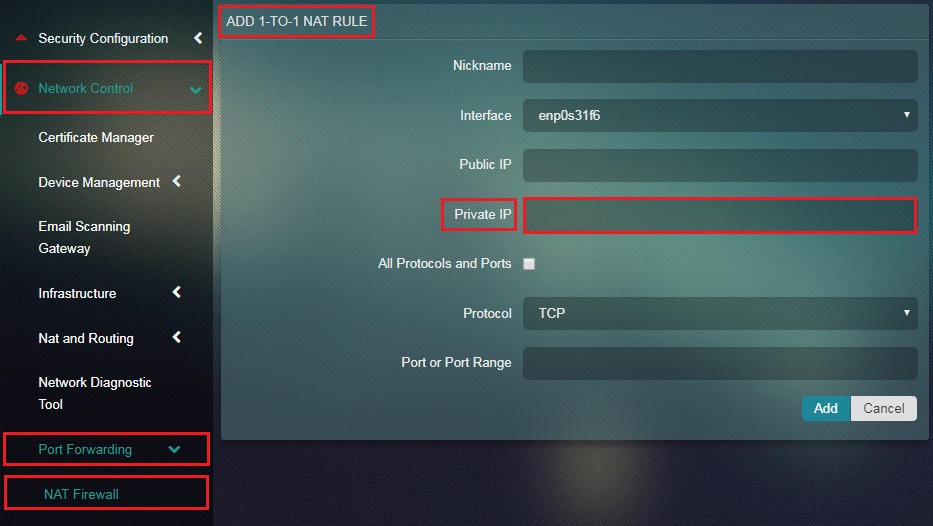
Step 6: Select or Unselect the All Protocols and Ports tick box.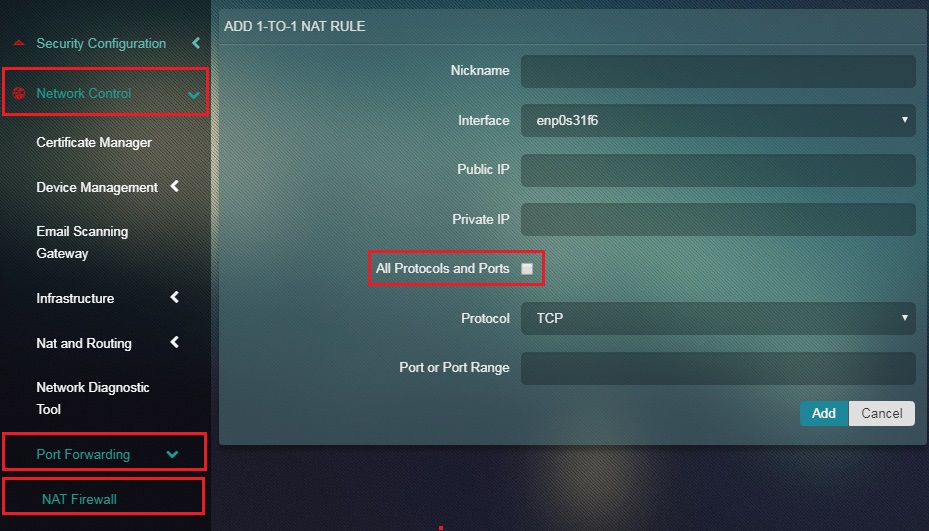
Note: If you want to specify the Port or Port Range and the Port Type Unselect the All Portocols and Ports tick box
Step 7: Click the Add button.