IP Settings
The IP Settings app provides a wide range of controls to configure the Crystal Eye network including hostnames and DNS server. Using this app, the administrator can set the network mode of the CE box and run it as a Gateway, and as a standalone server with or without a firewall. The app provides advanced network settings options to fulfill complex networking requirements such as adding VLAN Interface and Virtual Interface. All the network interfaces are listed in a tabular format which allows administrators to detect whether they are active or inactive. The other parameters that can be detected are IP type (Dynamic or Static), Network Interface Type (LAN, WAN, Virtual, and Wireless) and the IP address of each network interface. The administrator can also perform a speed test of the selected network interface which helps in evaluating performance.
Left-hand Navigation Panel > Network Control > Infrastructure > IP Settings 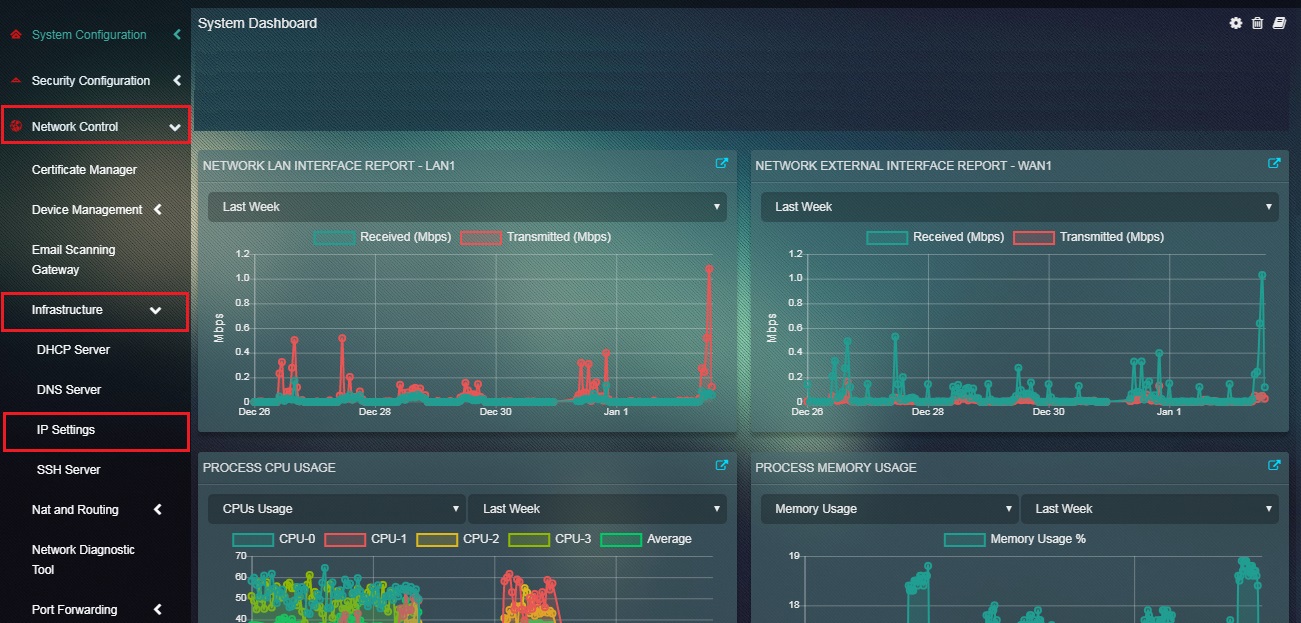 |
|---|
IP Settings app has a dedicated section that allows administrators to select the Network Mode of the Crystal Eye box. There are three mode options to choose from namely, Gateway, Standalone and Standalone-No Firewall.
The administrator can run the Crystal Eye box in the following modes:
-
In the Gateway Mode, CE appliancebox will provide internetworking between the different network segments, including the external WAN segments if present. Effectively, CE is running as a layer 3 router, but also running firewall and other security services on traffic that passes through CEoperability between networks such as DMZ, LAN, and Hot LAN, and routing between network segments may be subject to strict rules (particularly if configurations such as DMZ or Hot LAN are used). .Often this configuration will include Network Address Translation.
-
In the Standalone – No Firewall Mode, the CE appliancebox will act as a standalone server without a firewall.
-
Whereas, in the Standalone Mode, the CE box will act as a standalone server, but the CE firewall will still be enabled, which may restrict access to some services on the CE appliance. Note that in Standalone mode, the CE appliance will still be able to access more than one network segment itself, it will just not route packets for other devices.
How to Select a Network Mode of the Crystal Eye appliance?
Step 1: In the IP Settings app page, click the Edit button under the Settings section.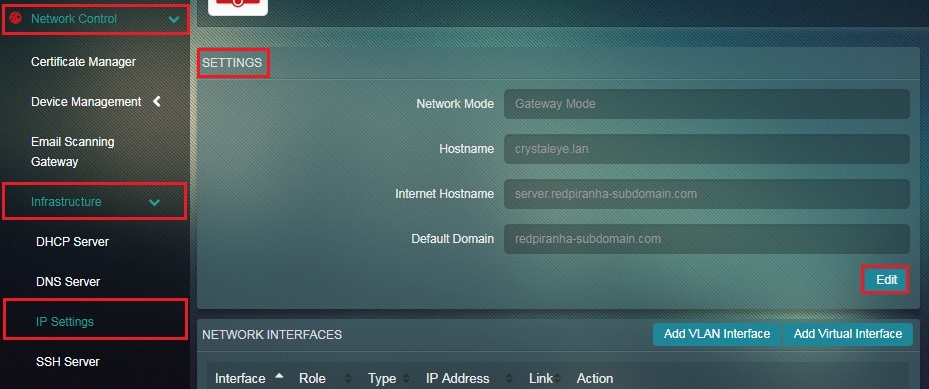 Step 2: You will now see the editable version of the Settings section. Select the desired mode from the Network Mode dropdown and click the Update button.
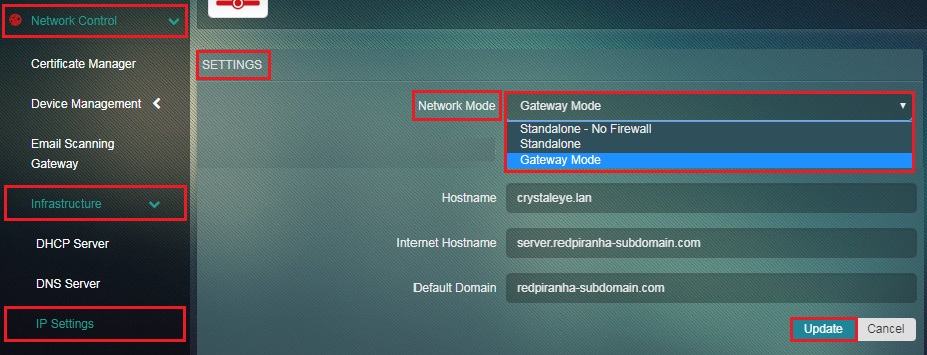
Note: There are three modes that the administrator can choose, namely Gateway, Standalone and Standalone-No Firewall
A hostname is the full name of your system in FQDN format. The hostname does require at least one period (.).
If you have your own domain, hostname of CE can be from your domain as well. For example: If your domain is example.com, then you can use a hostname like ce.example.com, ce.internal.example.com, etc.
The Crystal Eye appliance GUI can be accessed from the CE network through a domain name of your choice instead of a LAN IP address. Similarly, you can also access the CE appliance GUI from an external network using a domain name instead of a WAN IP address. By doing this you would essentially be able to access the Crystal Eye appliance GUI using a domain name and you will not have to bother about the LAN IP or WAN IP of the CE being changed.
How to access a Crystal Eye appliance GUI from a CE network (LAN network) using a domain name instead of the LAN IP address?
Step 1: In the IP Settings application page, click the Edit button in the Settings section. 
Step 2: You will now see the Settings section. Enter your domain name in the Hostname section and click the Update button. 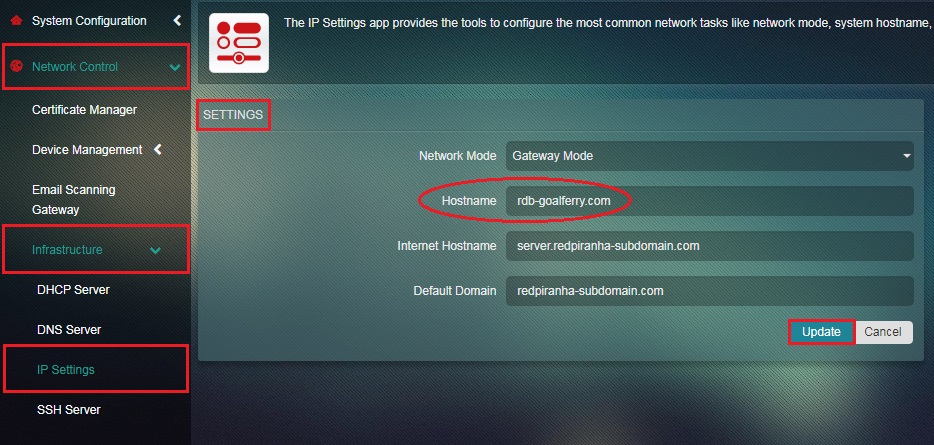
Step 3: Now go to Network Control > Infrastructure > DNS Server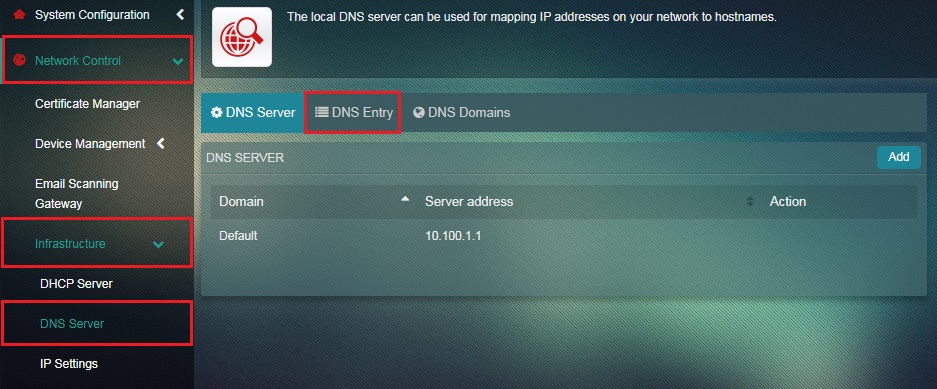
Step 4: You will now see the DNS Entry tab page. Click the Add button. 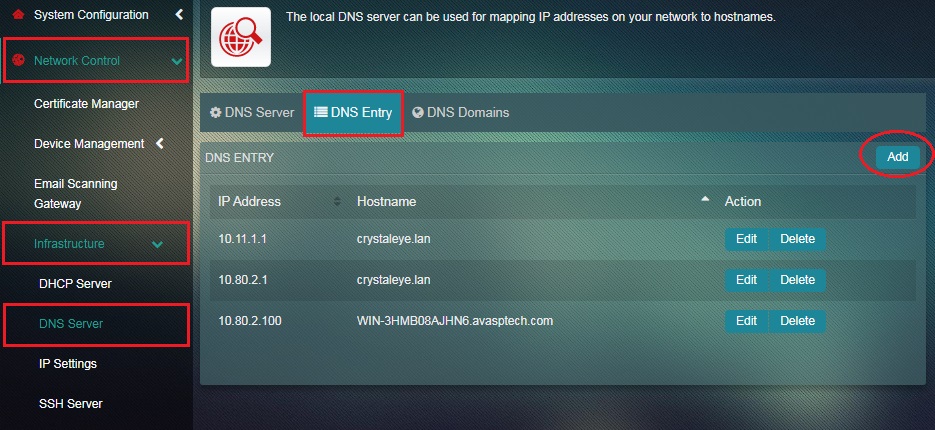
Step 5: You will now see the DNS Entry editable page. Enter the internal or local IP address of the gateway which should be the internal IP addres of the Crystal Eye appliance in the IP Address textbox.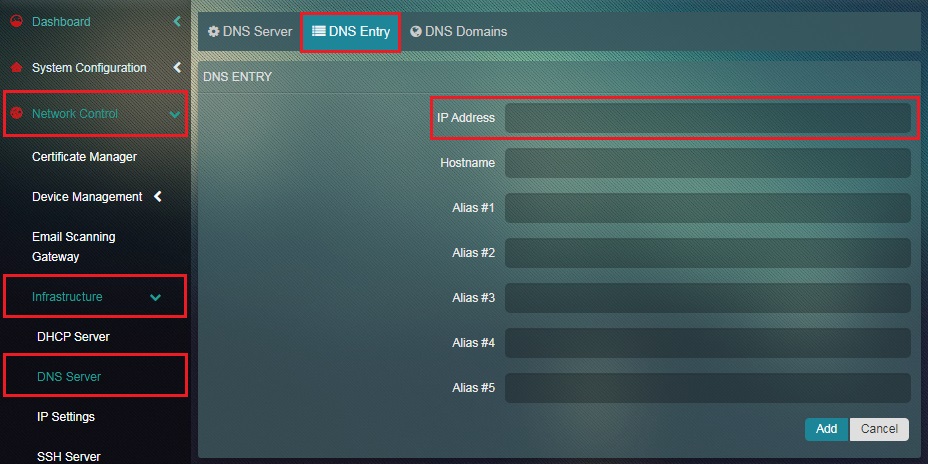
Note: You will find the internal IP address of the Crystal Eye appliance in the network interface section of the IP Settings appliance. Go to Network Control > Infrastructure > IP Settings > Network Interface section and refer to to the LAN 1 IP address.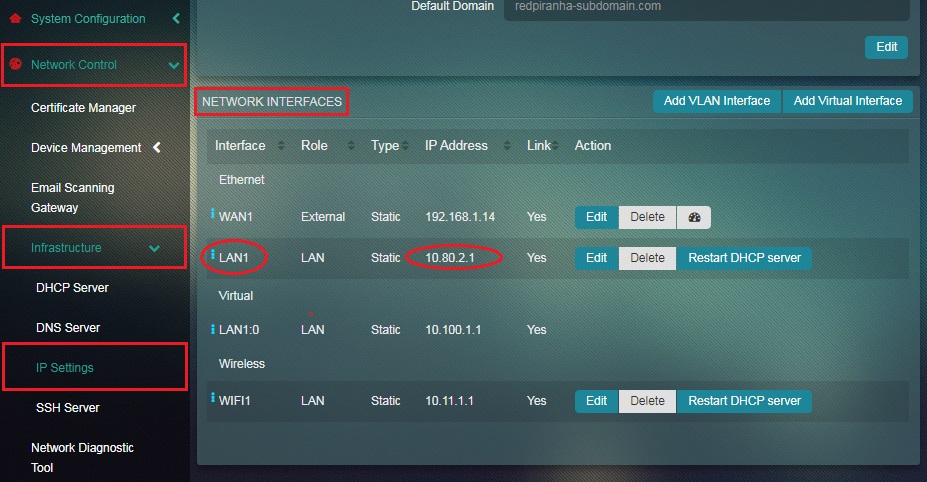
Step 6: Enter your domain name in the the Hostname textbox and click the Add button. 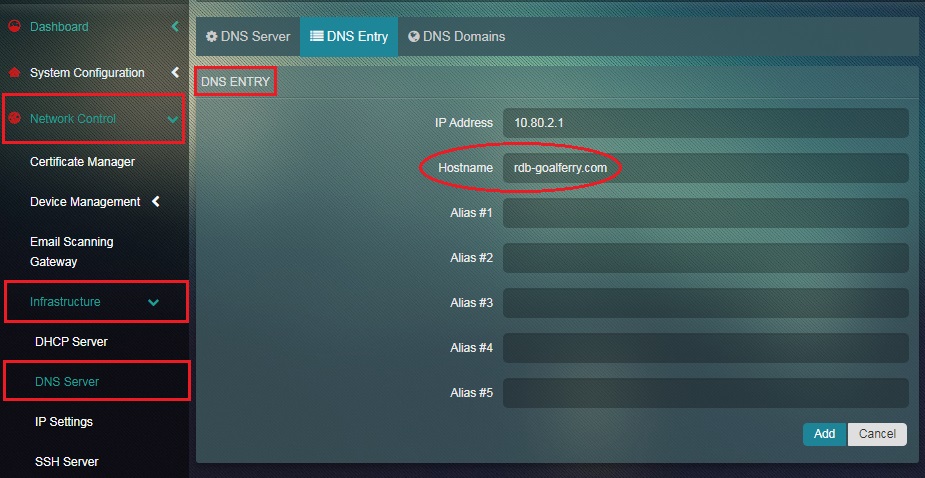
This is how you are known from the internet. It may be your DDNS name or another name. It is used by applications that need access to the external internal of the device, like SSL VPN.
Specify the Internet domain of this server. This is the domain name of your organization and not the hostname of this server but it could also be the internal domain name that you want to use on your LAN. For eg: From the above mentioned hostnames, default domain can be example.com or internal.example.com. Alternatively, you can also assign an internal domain that can be used only within the LAN network, like ce.lan, gateway.lan, etc.
A network interface can be considered as an intersection point between a private network and a computer. Crystal Eye provides an array of settings that can be configured to setup various network roles. The first thing that needs to be kept in mind while a network interface is configured is that it can be set according to various network roles. In other words, an administrator would have to take cognizance of the fact that a network card can be used to connect to a network with server systems, LAN or the Internet. As far as the capabilities of Crystal Eye are considered, it actively supports network roles such as LAN, Hot LAN, External, and DMZ.
The Network Interface Table in the IP Settings app provides a detailed view of default interfaces in the system.
Default Installation of WAN Interface: Upon installing, Crystal Eye will set one interface as WAN and configure it to obtain IP via DHCP. This will usually be the first interface in the system.
Default installation of first LAN interface: By default first LAN interface will be set as static with pre-configured IP 10.10.1.1. Also on that interface, there will be DHCP server enabled with range 10.10.1.2 - 10.10.1.254. Crystal Eye will also set one virtual interface as part of this LAN with IP set to 10.100.1.1. This interface is used to run internal DNS server. Details about DNS setup in CE can be found here. If there are any other interfaces in system those will be pre-set as LAN and with an option to obtain IP via DHCP.
Crystal Eye supports following network roles for interfaces:
- External - network interface with direct or indirect access to the Internet
- LAN - local area network
- Hot LAN - local area network for untrusted systems
- DMZ - de-militarized zone for a public network
Crystal Eye’s IP Setting app provides enhanced capabilities to Add a VLAN Interface. The VLAN interface basically provides a routable interface for the network switch. The detailed settings of this app also provide the option to assign an IP address to the VLAN interface which makes it easy to manage the switch over a network.
How to a Add VLAN Interface?
Step 1: In the IP Settings app page, click Add VLAN Interface button under the Network Interface section. 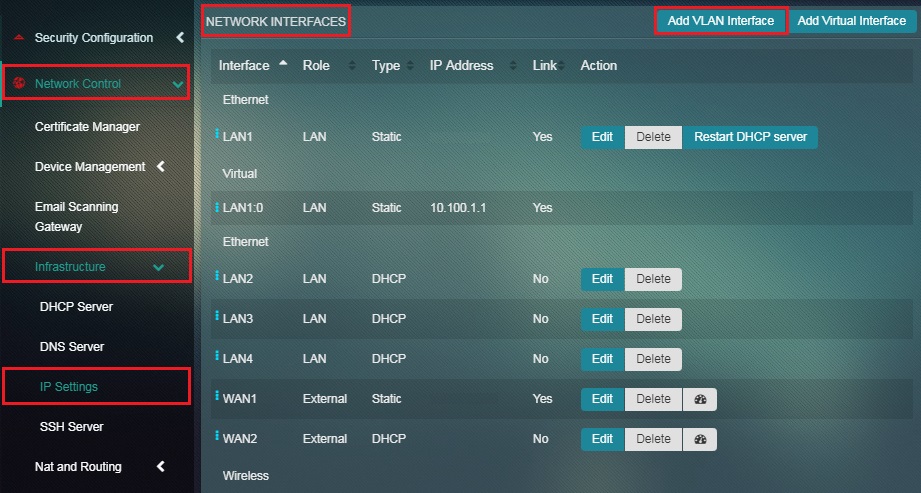 Step 2: You will now see the Interface section. Use the Interface dropdown to select the relevant Network Card.
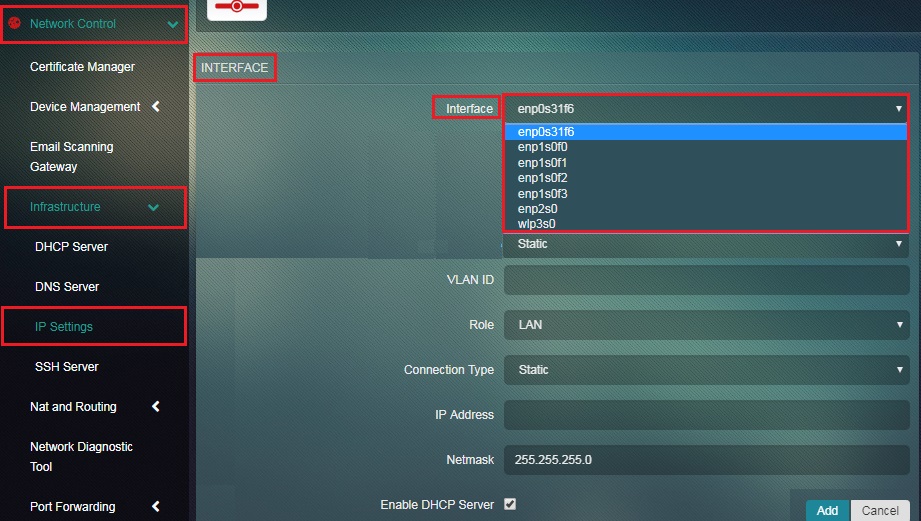 Step 3: Enter the VLAN ID of your choice.
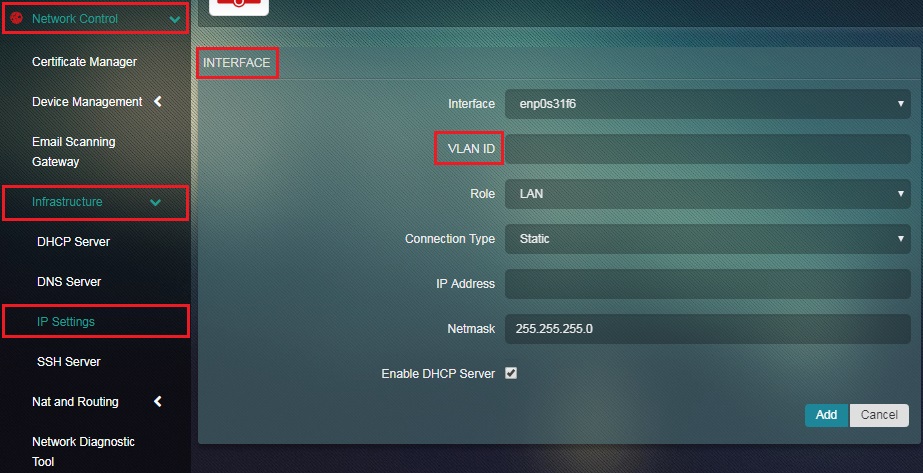
Note: VLAN ID/Number should not be greater than 4096
Step 4: Select the network role using the Role dropdown. 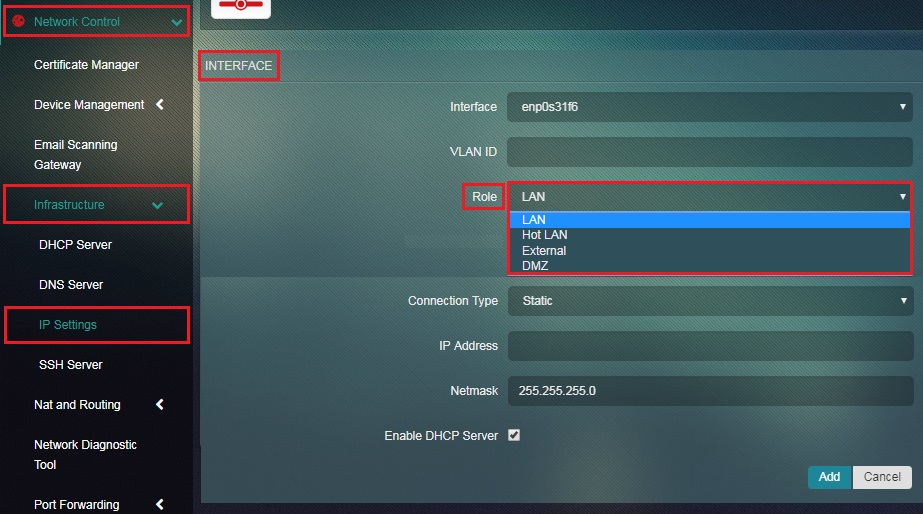
Note: The administrator can select the network roles based on how the selected role interacts with the WAN, LAN or the network with servers. The options in the Role dropdown are LAN, Hot LAN, External, and DMZ. On a standalone system, your network card should be configured with an external role, not a LAN role.
Step 5: Select the Connection Type from the dropdown.

Note: The options provided in the dropdown are Static or DHCP
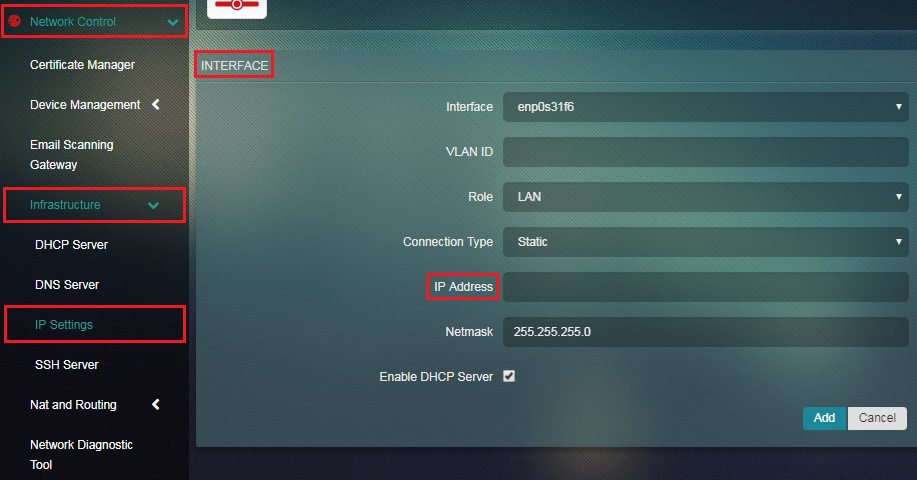
Step 6: Enter the IP Address of the VLAN interface in the textbox.
Step 7: Enter the Netmask in the textbox.
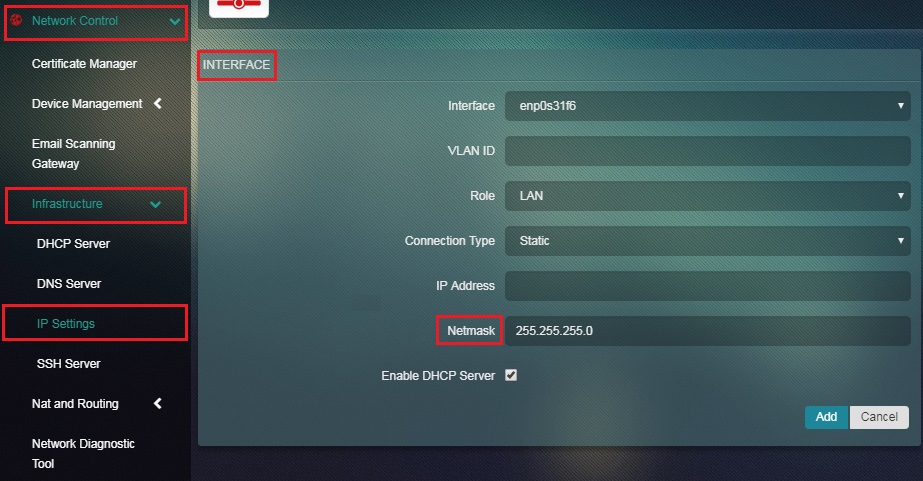
Note: By default the Netmask would be mentioned as 255.255.255.0
Step 8: Enable or disable DHCP Server using the tick box and click the Add button.

Note: DHCP Server is enabled by default
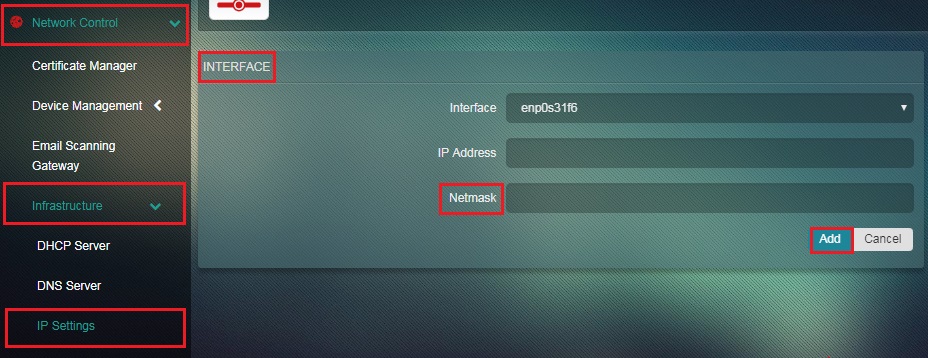
A virtual network interface (VIF) is an abstract virtualized representation of a computer network interface that may or may not correspond directly to a network interface controller. Using selective features of the IP Settings app of Crystal Eye an administrator can create a Virtual interface. For this the Network Interface Card needs to be selected, and the IP Address and Netmask must be entered.
Note: The default configuration includes an existing Virtual interface at 10.100.1.1, this is used by the Crystal Eye DNS Server, it is recommended that you do not use this vritual interface for other purposes.
How to Add a Virtual Interface?
Step 1: In the IP Settings app page, click the Add Virtual Interface button under the Network Interface section.
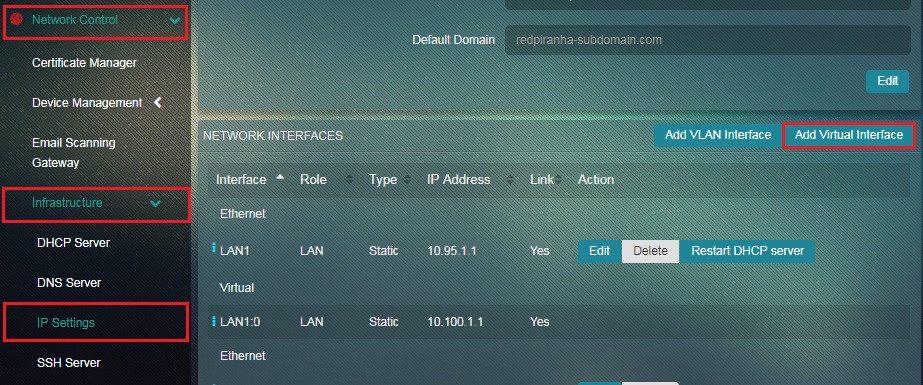
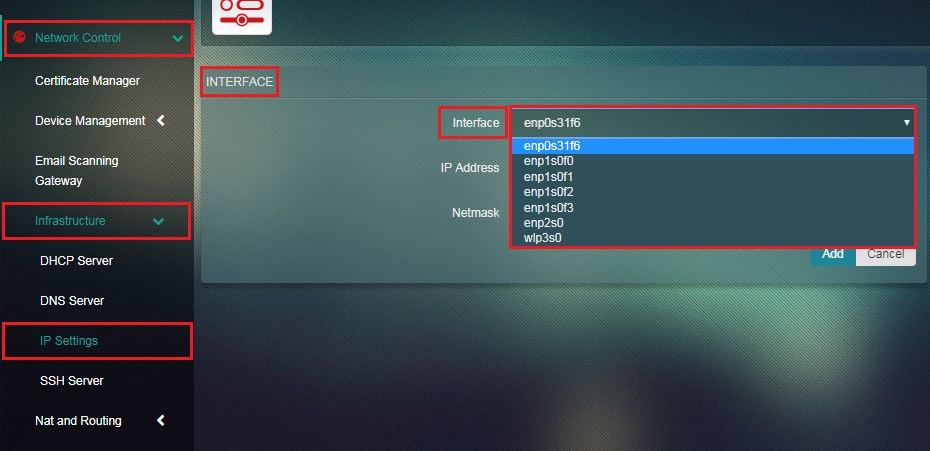
Step 2: You will now see the Interface section. Select the relevant Network Card.
Step 3: Enter the IP Address in the text box.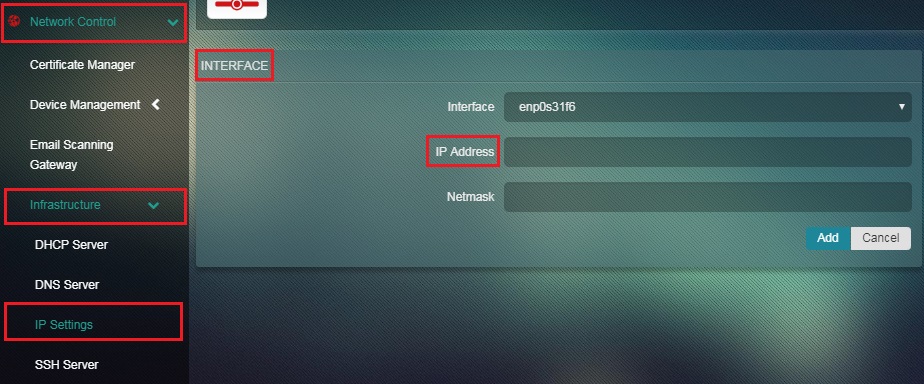
Step 4: Enter the Netmask in the text box and click the Add button.