How to Establish IPsec VPN Site-to-Site connection between a CE XDR on-premise and a D-Link DSR router?
This knowledge base article describes how an IPSec Site-to-Site tunnel can be established between a Crystal Eye XDR on-premise and a D-Link DSR router. The IPSec Site-to-Site tunnel was established while the D-Link DSR router was running on firmware 3.17B401C_WW and the Crystal Eye XDR on-premise was running on CE version 3.5. 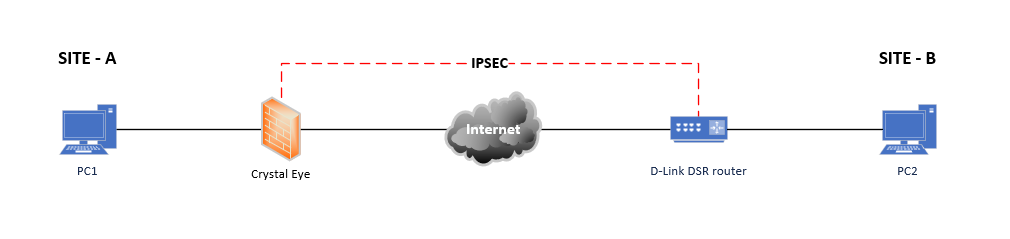 In this scenario mentioned in the above diagram, we have two sites namely, Site A and Site B which have a CE XDR on-premise and a D-Link DSR router as their respective gateway appliances. IPsec Site-to-Site VPN shall be established between Site A and Site B so that data can be exchanged among these two geographical locations using IPSec VPN technology. As soon as the IPsec VPN tunnel is established between these two sites, the end client devices located in both these sites start acting as devices as part of internal networks.
- Crystal Eye XDR on-premise or an appliance that supports IPSec VPN must be deployed on all the sites.
- All Crystal Eye XDR on-premise must be configured such that the LAN IP subnet for each side of the connection must be unique.
- Each site must have a dedicated internet connection.
The following set of configurations must be done to establish IPsec VPN Connection between a CE XDR on-premise and D-Link DSR Router. The phase I configurations are done in the Crystal Eye XDR on-premise and the phase II configuration is done in the D-Link DSR Router.
Phase I Configuration – CE XDR on-Premise
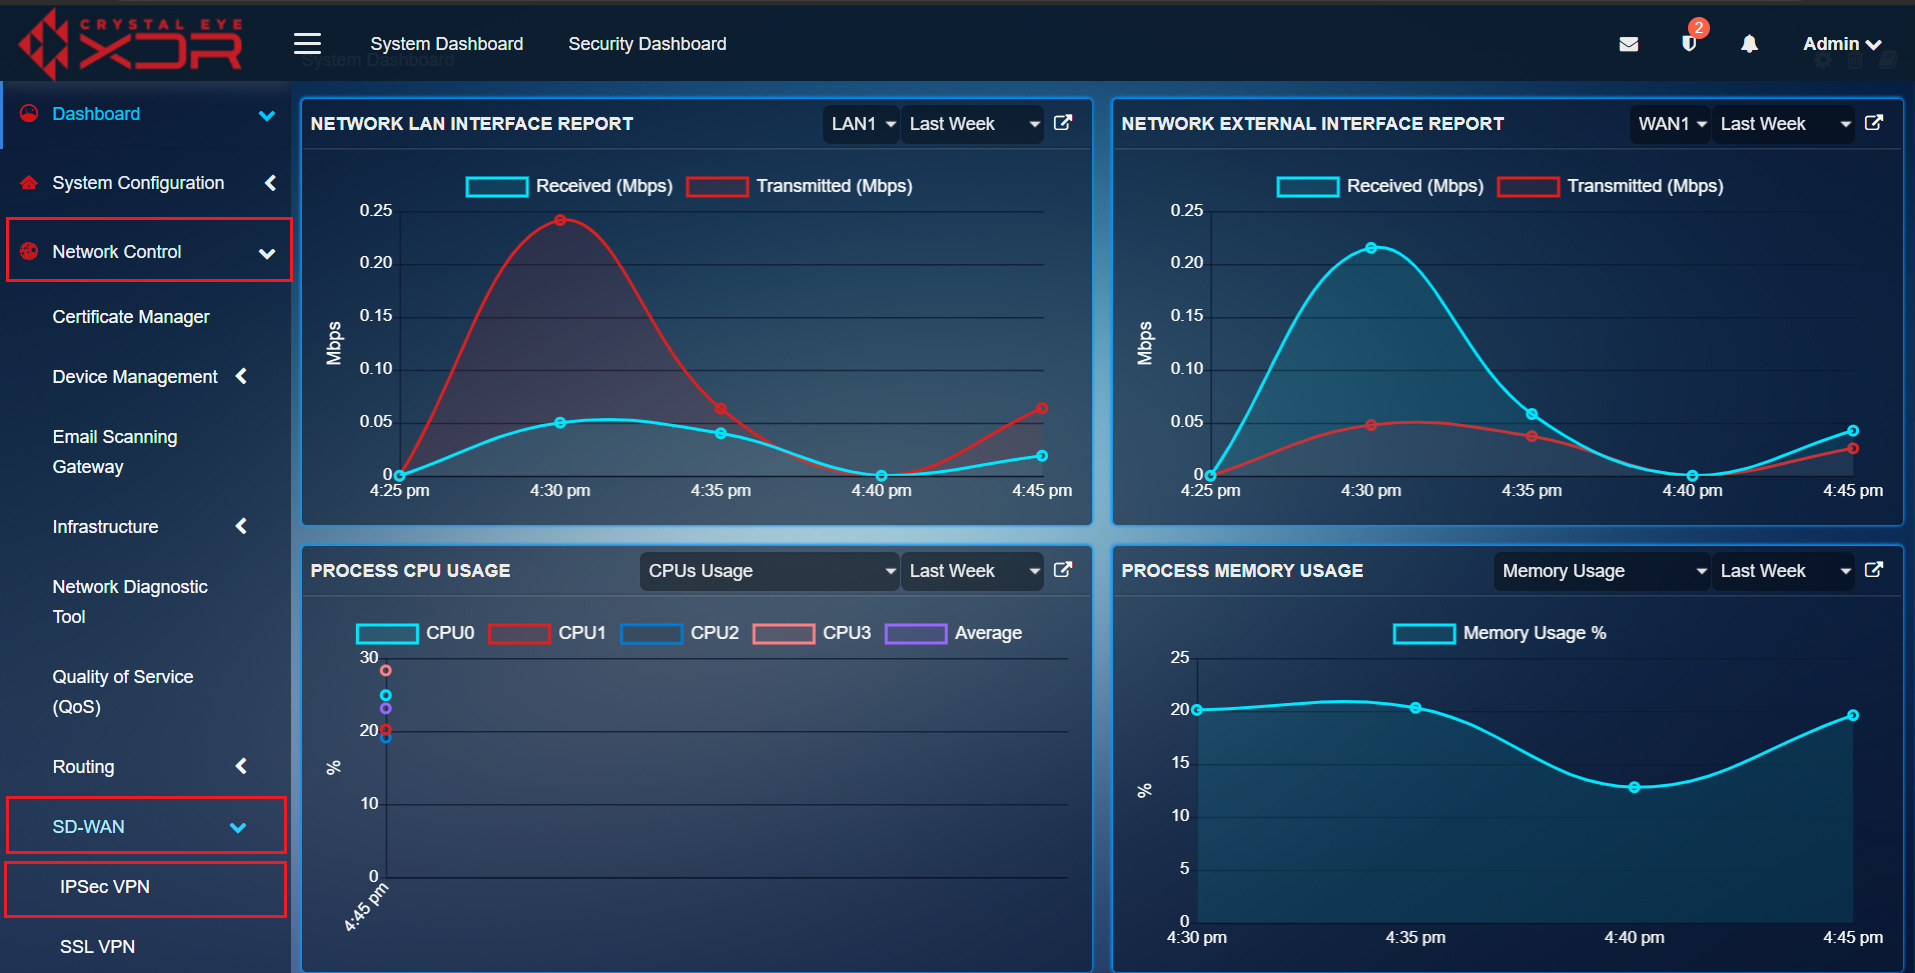
Step 1: Go to Network Control > SD-WAN > IPsec VPN
Step 2: In the IPsec VPN Server Connections section, click the Add button in the top right corner.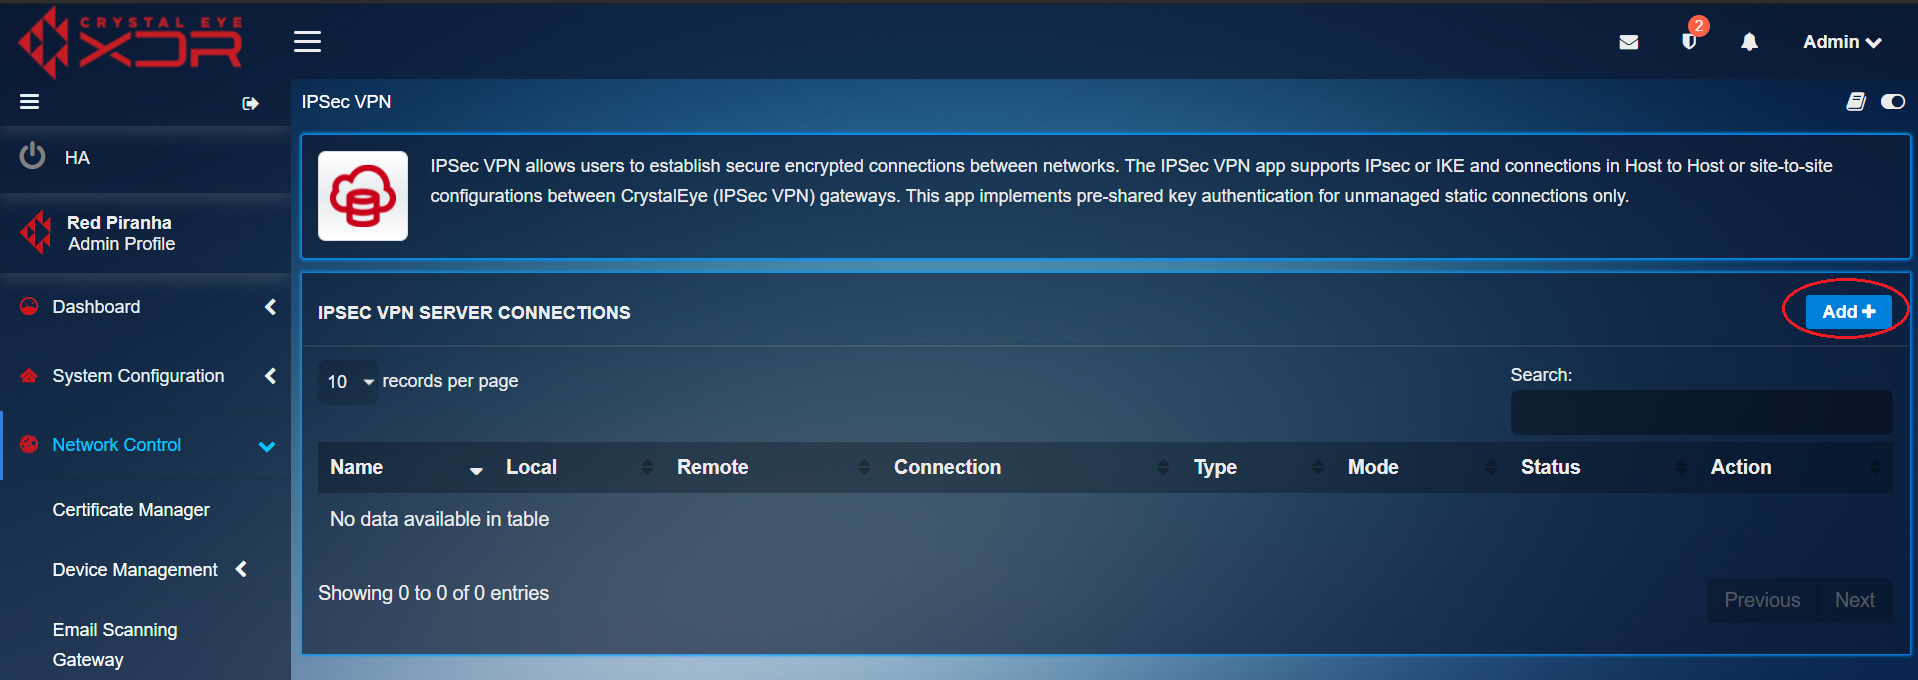
Step 3: You will now be directed to the Settings page of the IPsec VPN application. In the General Settings section, Enter the Connection Name, select the Connection Type, IKE Version, Connection Policy Mode and the Mode. 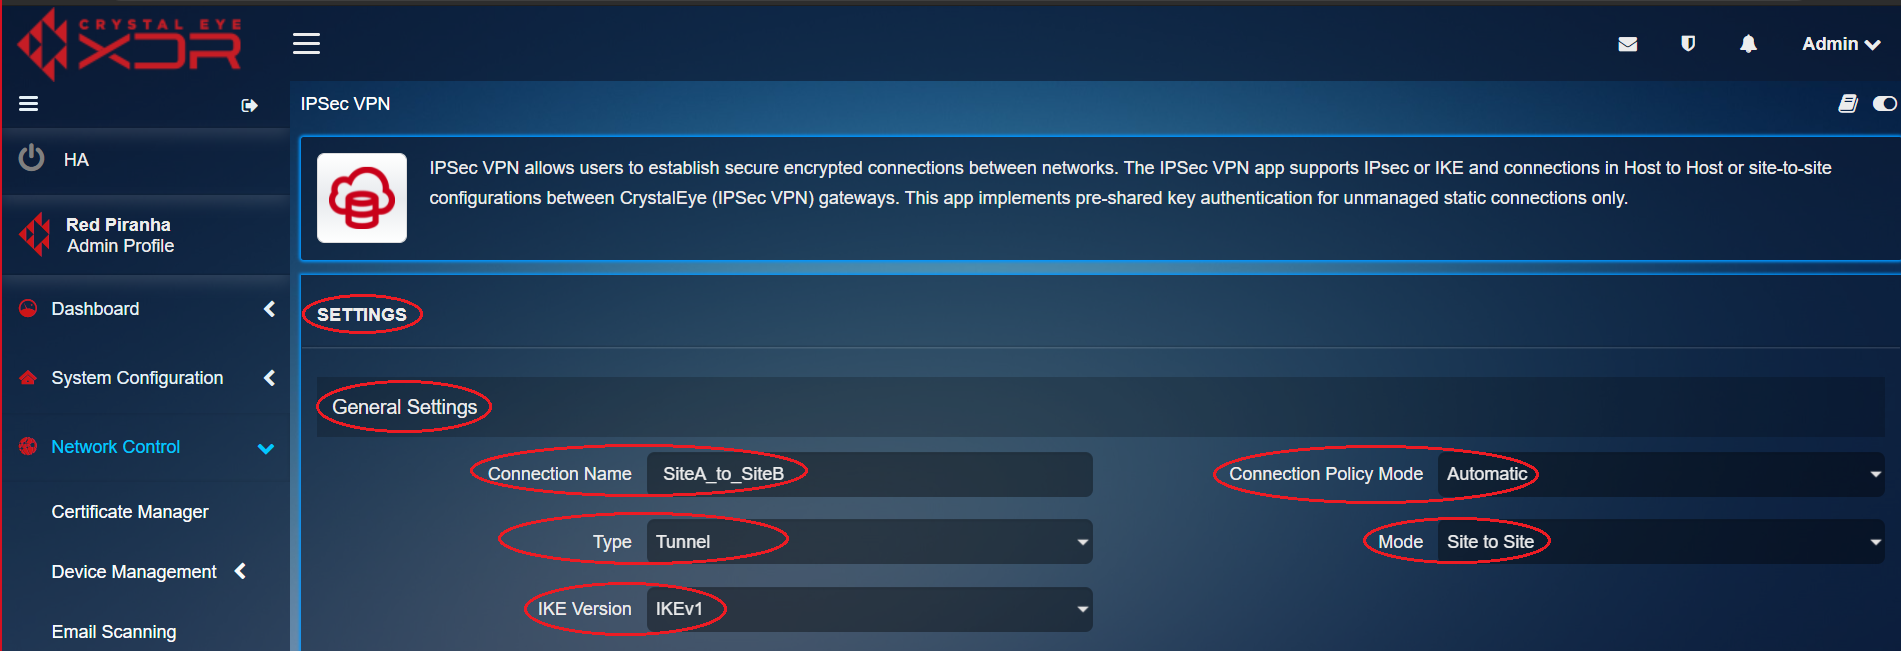
Note: Make sure that these configuration options are selected as follows. Connection Name: SiteA_to_SiteB, Connection Type: Tunnel, IKE Version: IKEv1, Connection Policy Mode: Automatic, and Mode: Site to Site. It is suggested to avoid usage of IKEv1 wherever possible.
Step 4: Enter the Local Settings, Remote Settings, Pre-shared Key and then click the Submit button.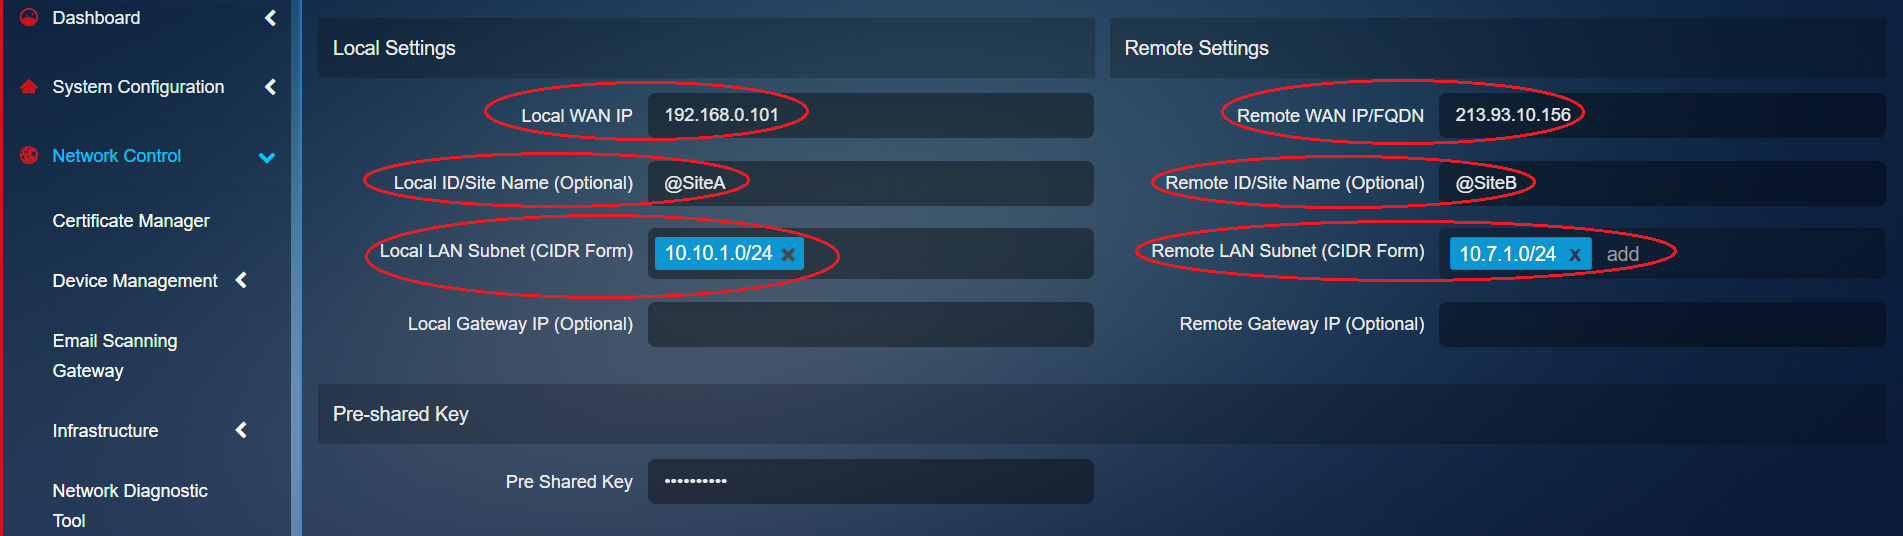
Note: These local settings configurations must be added to the Local Settings section. Local WAN IP: 192.168. 0.101 (this option can be selected), Local ID/Site Name (Optional): @SiteA, Local LAN Subnet (CIDR Form): 10.10.1.0/24 (this option can be selected). The Remote settings must be added to the Remote Settings section as follows. Remote WAN IP/FQDN: 213.93.10.156, Remote ID/Site Name:@SiteB, Remote LAN Subnet (CIDR Form): 10.7.1.0/24.
Phase II Configurations – DLink DSR Router
Step 5: Enter the General Settings in the IPsec Policy Configuration page.
Step 6: Enter the rest of the General Settings in the IPsec Configuration page.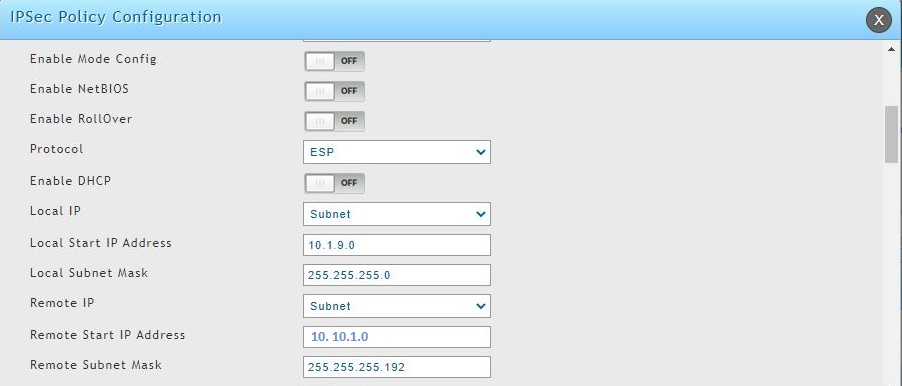
Step 7: Enter the Phase 1 (IKE SA Parameters).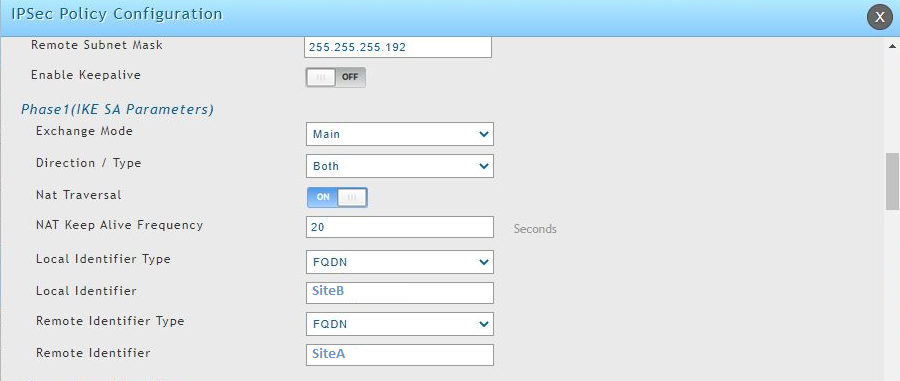
Step 8: Enter the Encryption Algorithm and the Authentication Algorithm related settings. 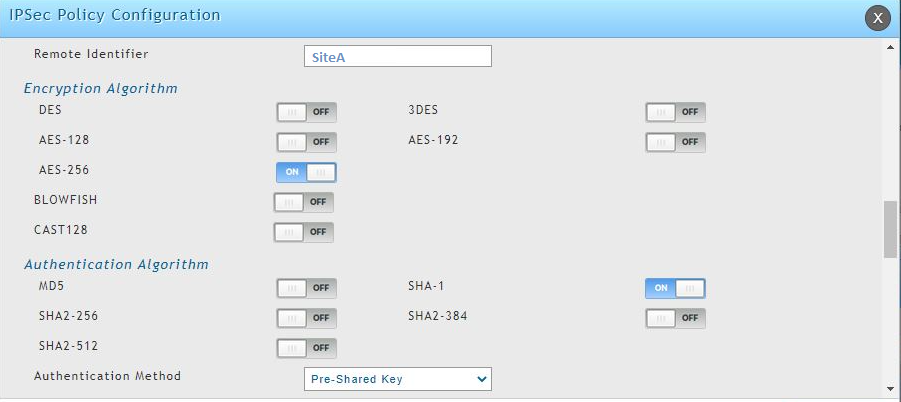
Step 9: Now enter the details in the rest of the fields under the Authentication Algorithm and then update the fields under phase 2-(Auto Policy Parameters).
Step 10: Select the options in the Encryption Algorithm and Integrity Algorithm section.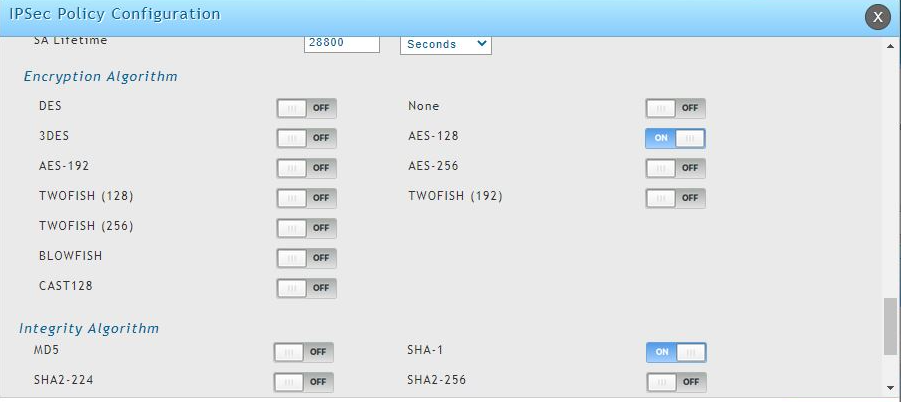 Step 11: Select the options under Redundant VPN Gateway parameters.
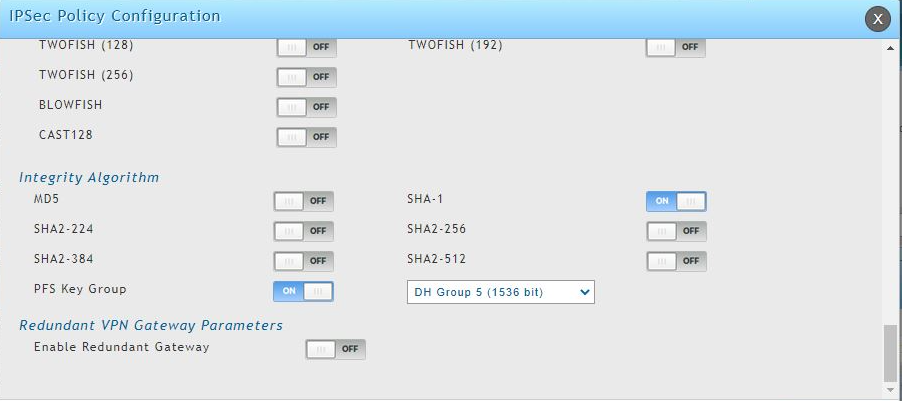
Note: Now once these configurations are processed in the D-Link DSR router you will see that the IPsec VPN connection is activated in the CE XDR on-premise GUI. Refer to the screenshot below.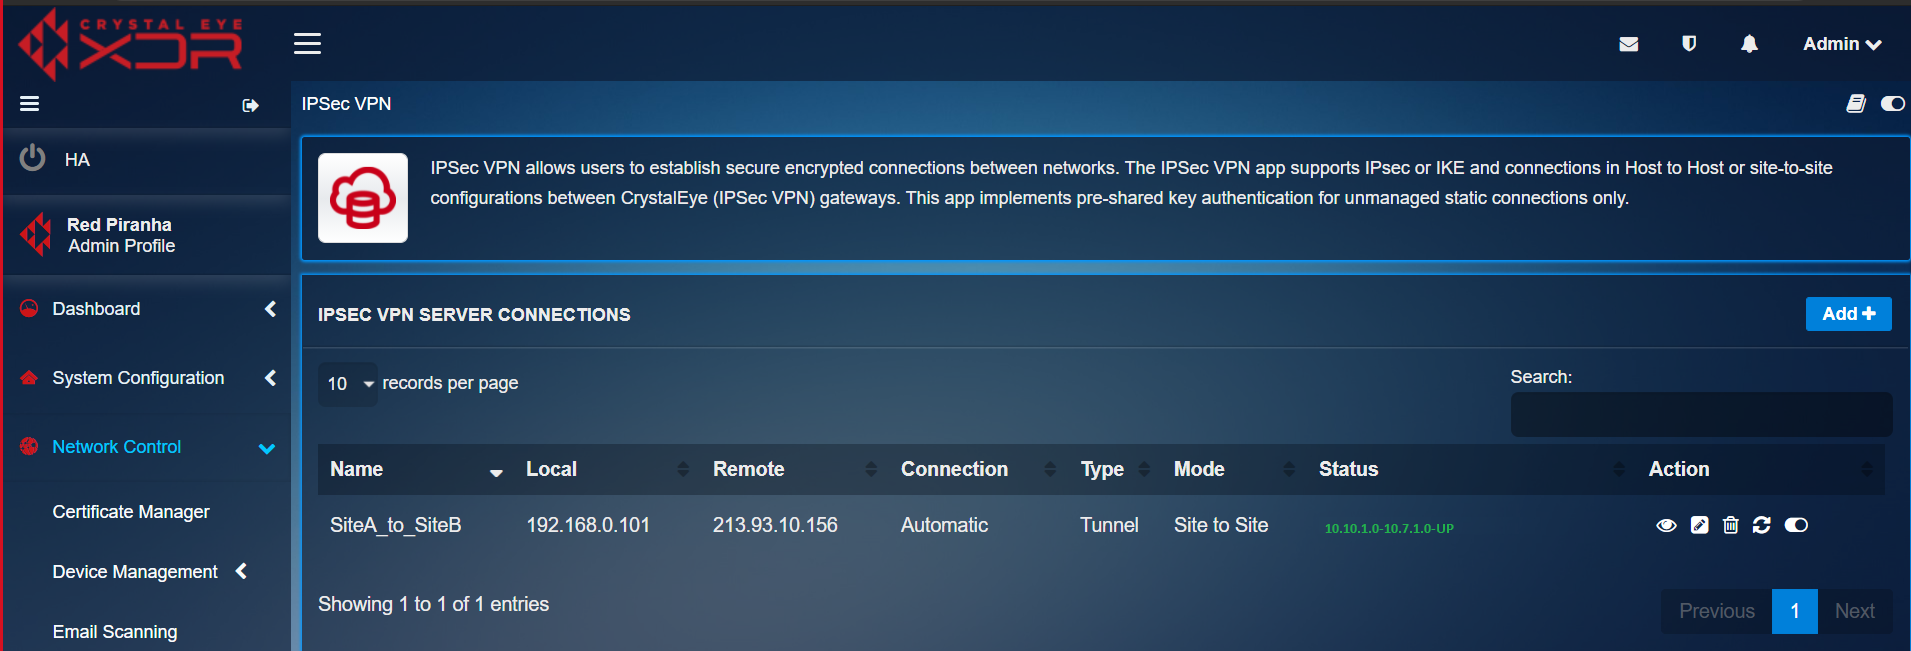
| Associated Links—IPsec VPN application |
|---|
| IPsec VPN Forum |
| CE Manual – IPsec VPN application |
| CE Manual – SD-WAN |