IP/MAC Based Content Filtering for Desktops, Laptops, Phones and Tablets
Summary
This KB article has been created as a reference to aid customized requirements for setting up advanced web filtering capabilities on your network. Crystal Eye can be used to enforce IP/MAC based content filter policies on various devices deployed in the network such as desktops, laptops, phones and tablets.
Crystal Eye’s graphic user interface can be used to enforce IP/MAC based content filter policies to fulfill the following three major requirements.
-
Scan and filter http/https traffic: This can be done when CE has Deep Packet Inspection enabled (auto proxy settings must be done in all the devices connected to the CE network).
-
Only filter http/https traffic: This can be done if CE is running on Non-Transparent + No Authentication mode and the auto proxy settings must be done in all the devices connected to the CE network.
-
Only filter http traffic: This can be done if the CE is running on Transparent + No Authentication mode.
Network Setup
In order to enforce IP/MAC based content filter policies make sure all the devices are connected to the Crystal Eye appliance. The devices can be either be connected to the LAN ports of CE or the Wi-Fi interface of CE. It is recommended to segregate your network assign CE security zones to each segmented network (Learn more about how to Security Zones of Crystal Eye)
The following diagram shows the ideal segregated network sample recommended by Red Piranha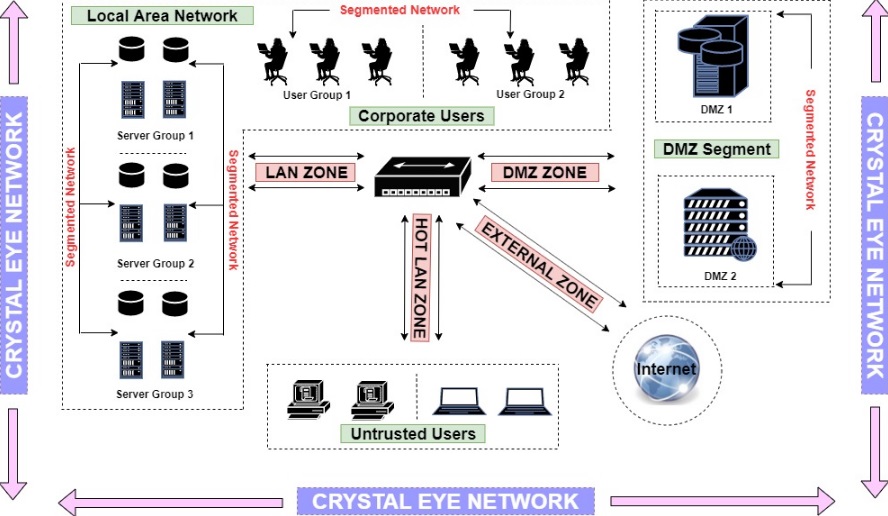
Crystal Eye Configurations to Enforce IP/MAC Content Filter Policies on Various Device Types
In this setup, we will enforce policies to filter http and https web traffic. Before imposing content filter policies to the various devices on your network make sure the global authentication settings is Non-Transparent + No Authentication. We will also ensure that all the devices in the CE network are mapped with the CE and the IP addresses of the devices are set as static.
To set global authentication settings to Non-Transparent + No Authentication pursue the following steps:
Step 1: Go to Security Configuration > Content Filter Step 2: Click the Edit button under Authentication section.
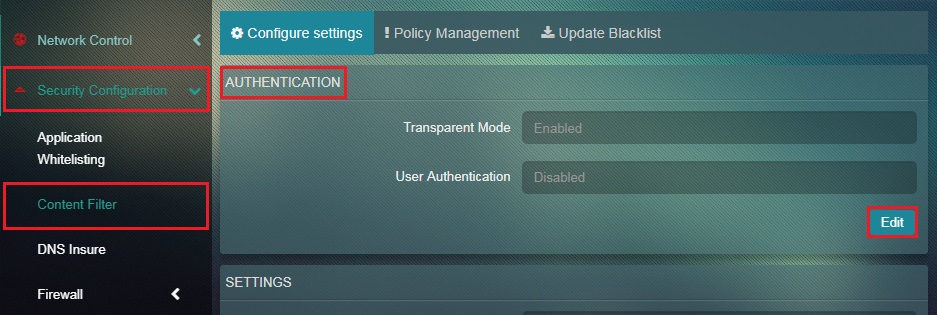 Step 3: Select Non-Transparent + No User Authentication mode and click the Update button.
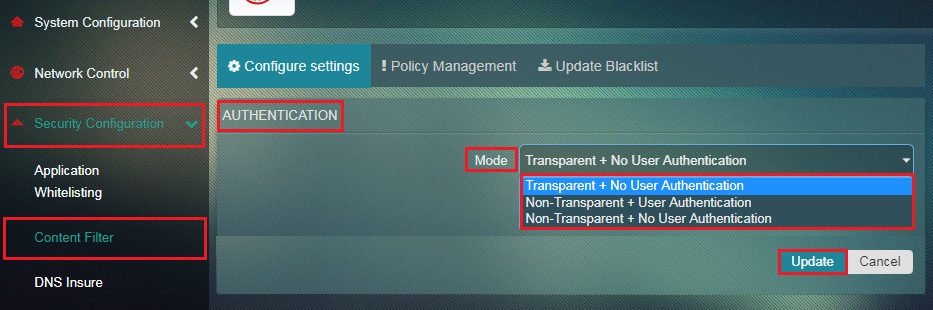
Now that global authentication settings is set to Non-Transparent + No Authentication we shall ensure that auto proxy is configured in all devices connected to the CE network.
Note: Click here to learn more on how to ensure that auto proxy has been selected in the devices connected to the CE network (the device types that we support are laptops, desktops, android phones, android tablets, iPhones, and iPad)
Now that you are done with the global authentication settings (i.e Non-Transparent + No Authentication mode) and have ensure that auto proxy has been selected in your devices proceed to creating customized content filter policies and assign it to the IP/MAC addresses.
Pursue these steps to create customized content filter policies and assign it to the IP/MAC addresses:
Step 1: Click to Policy Management tab and create content filter policies (App Policies) as per requirement. To do so, click the Add Policy button and name the content filter policy in the Policy Name textbox.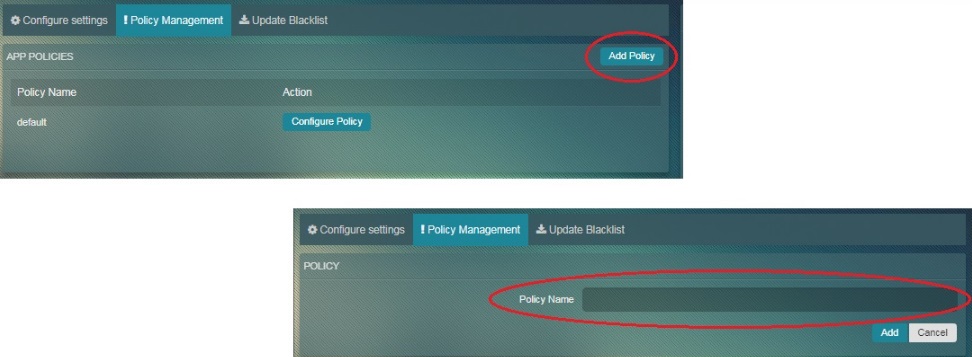
Note: Refer to the Create Content Filter Policies section to learn how to set different parameters of the content filter policy that you choose to develop.
Step 2: In the Assign Policy to IP/MAC section search for the MAC address of the device and click Edit Policy button next to it. 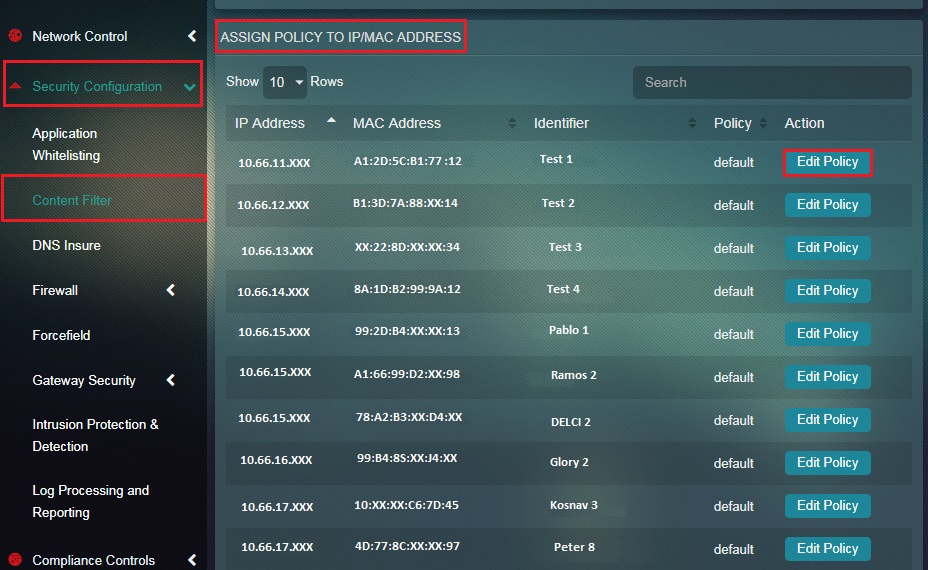
Step 3: You will now see the policy section. Select the Policy Type from the dropdown and click the Update button.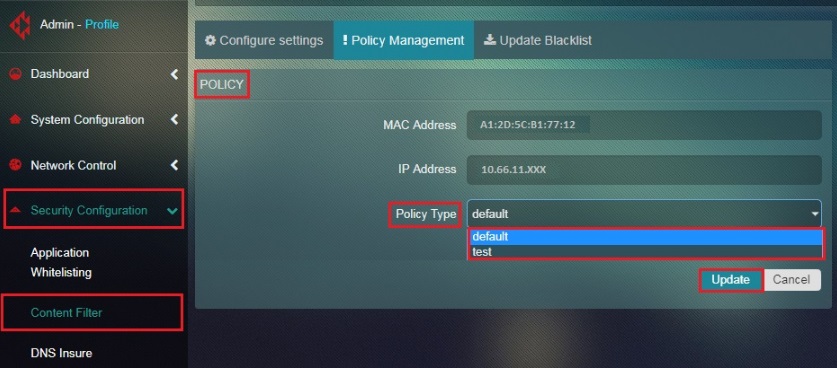
The last set of configurations involves assigning static IP addresses to the mapped devices. This is done so that the filter policy assigned to the IP/MAC doen’t change when the device IP lease expires.
Follow these steps to map all devices to CE and assign static IP addresses to all devices in the CE network:
Step 1: Go to Network Control > Device Management > Network Map and click the Map button next to the device MAC address.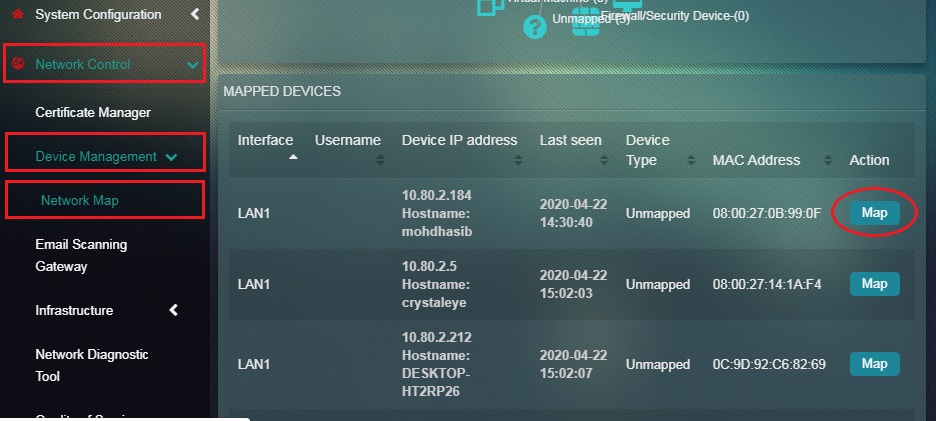
Step 2: You will now see the Mapping page. Click the Add button.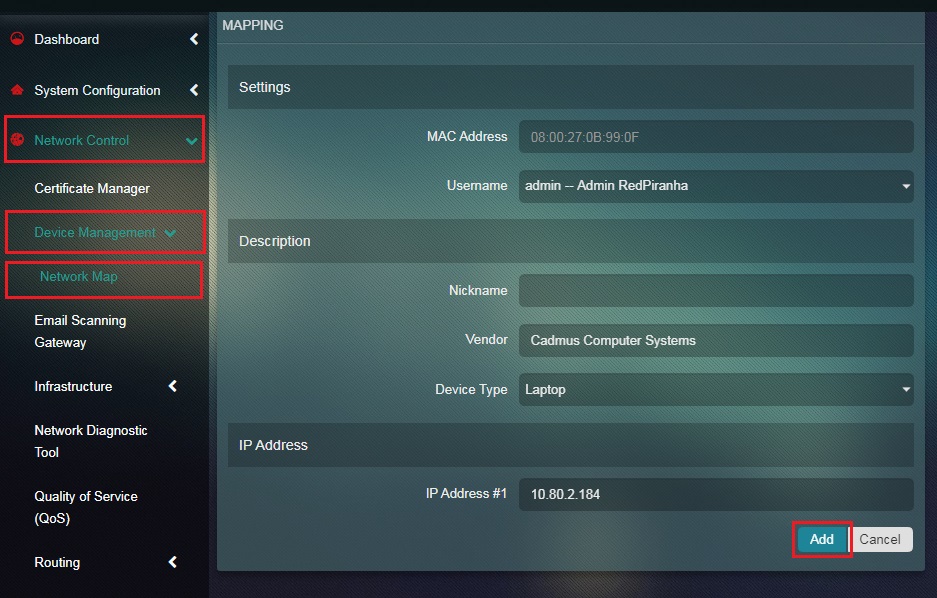
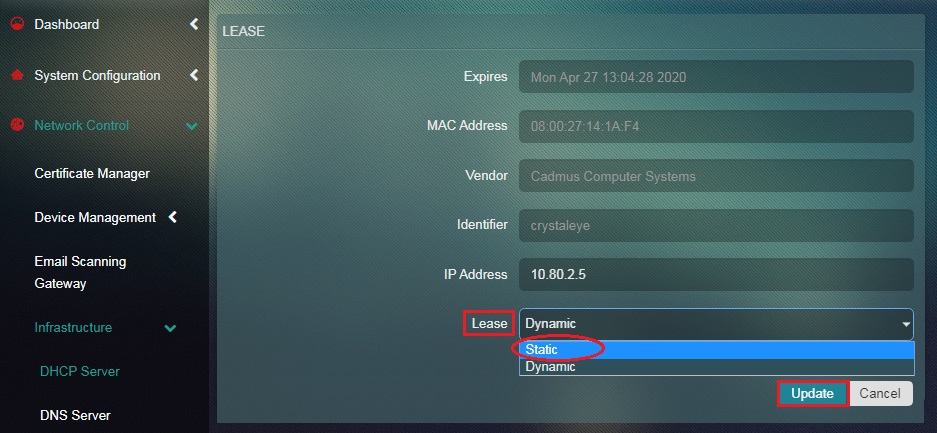
Step 3: Now go to Network Control > Infrastructure > DHCP Server and click the Edit button next to the MAC address in the Leases section.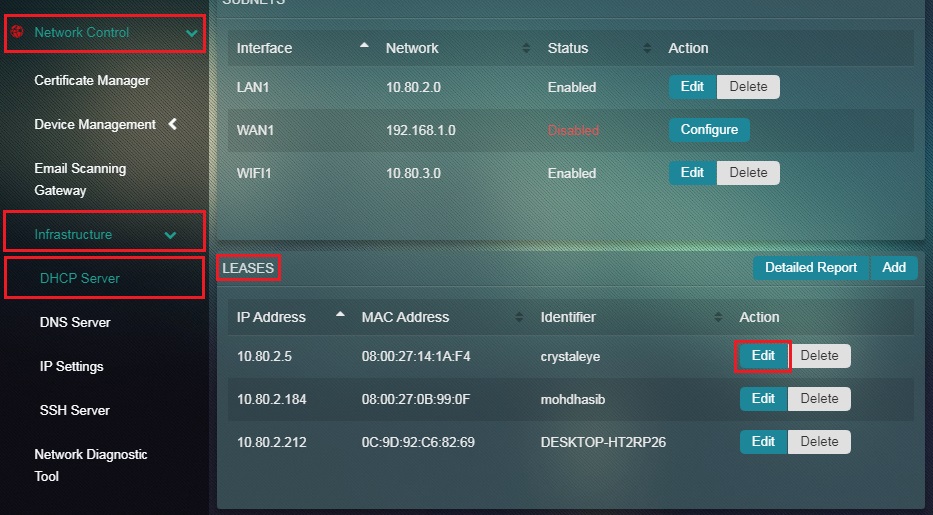
Step 4: Select Static in the Lease dropdown and click Update.